1992-02 DODGE VIPER |
||||||||||||||||||||||
|
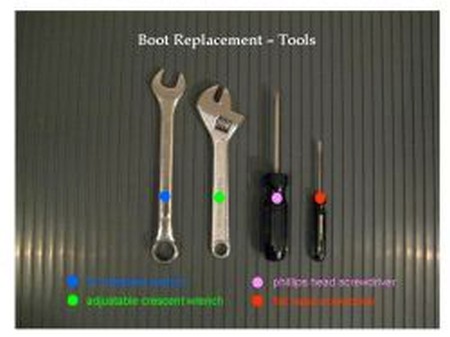
1. Tools:
3/4" crescent wrench |
 |
|
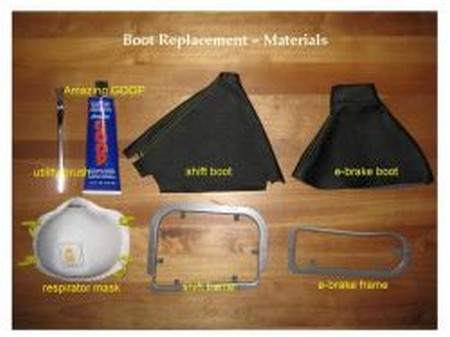
2. Materials:
utility brush |
 |
|
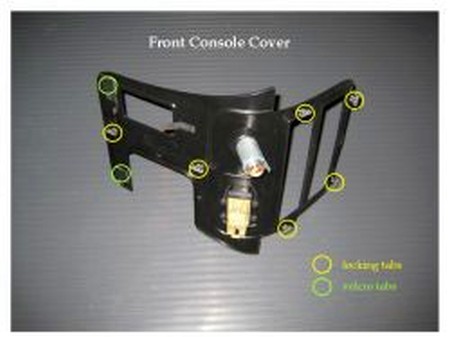
3. This is the general idea: red - screws, yellow - locking tabs, green - velcro tabs |
 |
|
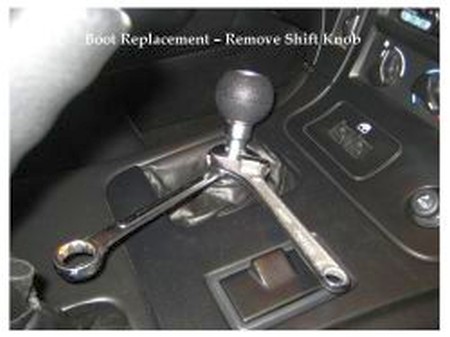
4. Remove the shift knob - push the shift boot down over the shift knob locking nut - use the 3/4" crescent wrench on the locking nut and the adjustable crescent wrench on the shift knob to break them apart - unscrew the shift knob.
Remove the ash tray, turn the A/C controls horizontally and raise the emergency brake handle to the most vertical position. |
 |
|
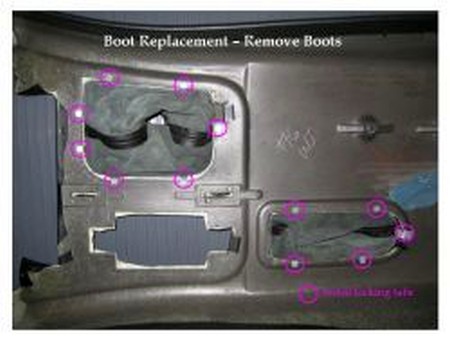
5. Yellow - locking tabs, Green - velcro tabs, White - pry with screwdriver wrapped in a cloth to avoid scratching. |
 |
|
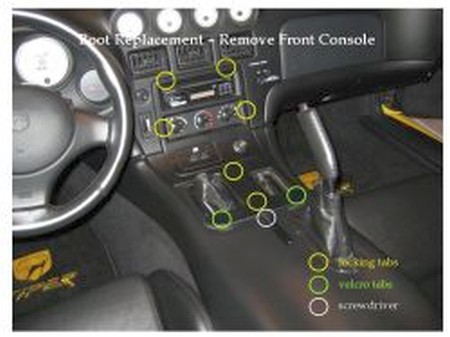
6. Remove the front console cover by popping the 6 locking tabs from
the slots in the dash and the 2 velcro tabs
Remove the two screws (phillips head) that attach the forward end of the
center console and the two9 that attach the rear end of the center console - slide both seats to their full back position in order to gain easy access
to the rear console screws Carefully lift out the center console making sure to thread the emergency brake handle through it's boot |
 |
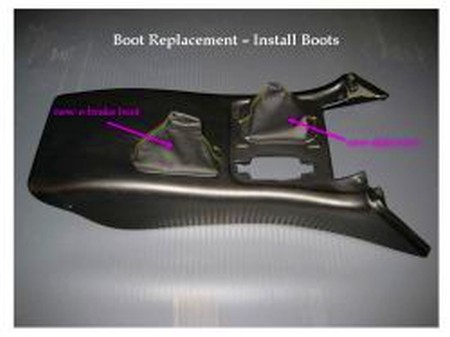
7. Remove the boots by bending straight the metal locking tabs. Remove the boots from the boot frames with a flat head screwdriver. Clean any excess epoxy from the boot frames. Install the new boots onto the boot frames by applying Amazing Goop with a utility brush - use a respirator mask for protection against inhalants - allow them to set completely. |
 |
8. Reinstall boots onto the center console. |
 |
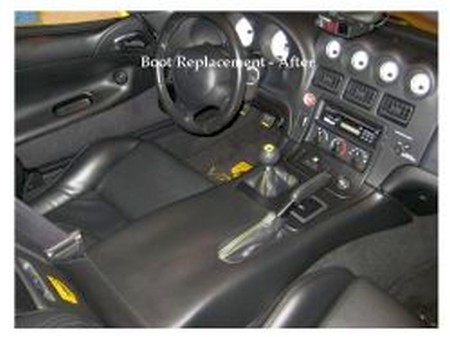
9. Reinstall center console, front console cover, ash tray and shift knob |
 |
|
ENJOY YOUR NEW LEATHER BOOTS! |
|
|
Useful tip You have installed a product made out of genuine leather. As you know, to maintain a leather product in good condition, you should take care of it. We suggest occasionally (every 4-6 week for example) applying some leather conditioner/UV protector to keep your leather from drying up in the sun and cracking. |
|
Please subscribe to our newsletter.
Get an instant 20% discount and enter our montly $100 CASH sweepstakes!