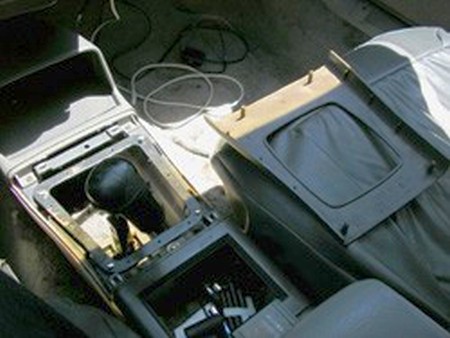
1. First, remove the center console plasic cover over the stock shift
boot by pulling upwards. It is held in by friction.
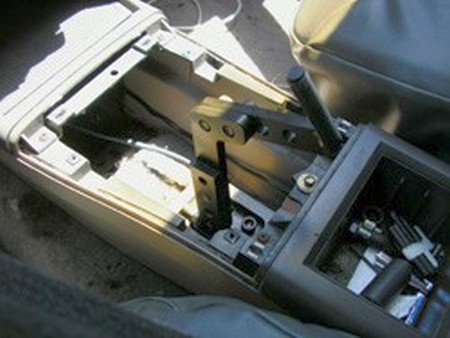
2. Next, unscrew the shift knob from the lever by twisting it
counter-clockwise. Now, remove the screws (standard screws are shown, but the
OEM screws are phillips head) from the shift
boot metal bracket where it meets the center console. The shift boot should now
be able to slide off of the shift lever.
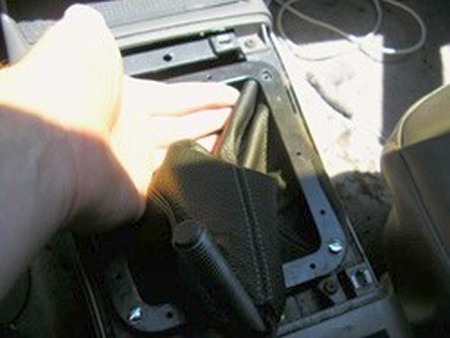
3. Carefully remove the metal bracket from the stock shift boot with a
blade or similar tool. You may wish to clean any excess glue from the bottom of
the bracket with a blade or sandpaper.
Test fit the new boot to the metal bracket to make sure the holes in the boot
line up with the ones in the bracket. You may wish to use some automotive
interior glue to adhere the boot to the metal bracket. This is not mandatory
though. I just used a couple pins through the smaller holes in the bracket to
hold the boot up to the bracket in the forwardmost edge.
Next, you'll want to fasten the boot to the shifter. You can flip the boot
inside-out and zip-tie it to the
shifter. Alternately (which is shown) you can wrap the leather through a large
washer so the shift knob will sandwich the shift boot between the washer and the
shift knob. It just helps create a tighter friction fit.
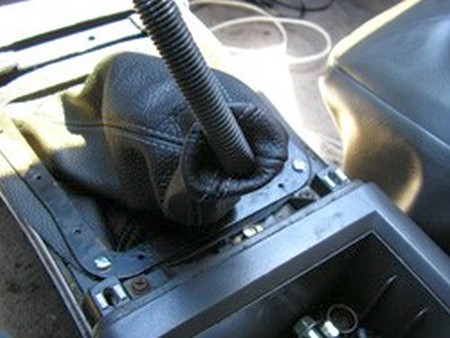
4. Reinstall your shift knob by threading it on clockwise.
If you glued your new boot to the metal bracket, simply line up the holes on
the bracket with the center console and install the screws. If not, set the
bracket over where it will be mounted. Now slip the shift boot under the bracket,
but over the mounting location and loosely install one of the mounting screws
(just a couple turns). Work around the shift boot until all four are loosely
fastened, then go around tightening them with a screwdriver.
Finally, reinstall the plastic center console cover.
CONGRATULATIONS - YOU HAVE SUCCESSFULLY INSTALLED YOUR NEW LEATHER BOOTS!
Useful tip
You have installed a product made out of genuine leather. As you know, to maintain a leather product in good condition, you should take care of it. We suggest occasionally (every 4-6 week for example) applying some leather conditioner/UV protector to keep your leather from drying up in the sun and cracking.
Redline Automotive Accessories Corp. will not be held liable for any labor, incidental or consequential damages of any kind. Proceed at your own risk.