2011-14 HYUNDAI SONATA |
||||||||||||||||||||||||||||||||||||||||||||||||||||||||
|
AUTOMATIC SHIFT BOOT INSTALLATION CAN BE FOUND HERE
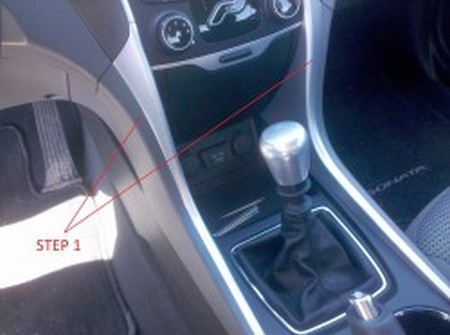
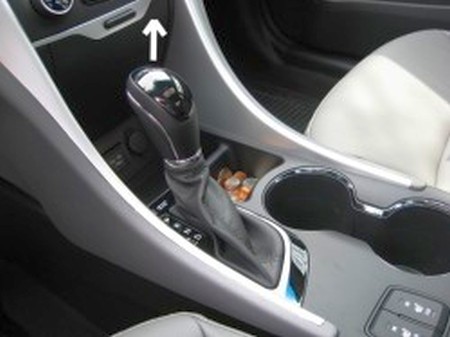
1. Remove the boomerang-shaped trim pieces on either side of the center console by lifting up vertically on the horizontal leg and then pulling the vertical leg out towards the center console arm rest. |
 |
|
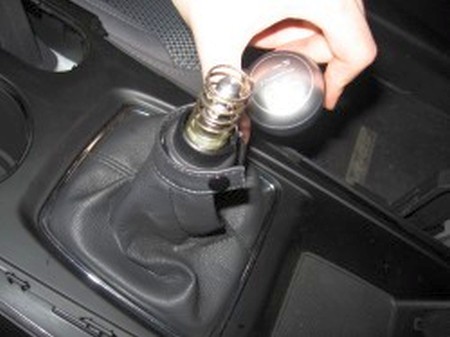
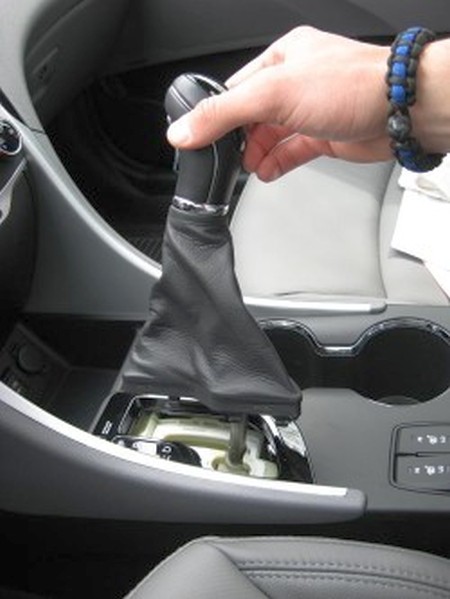
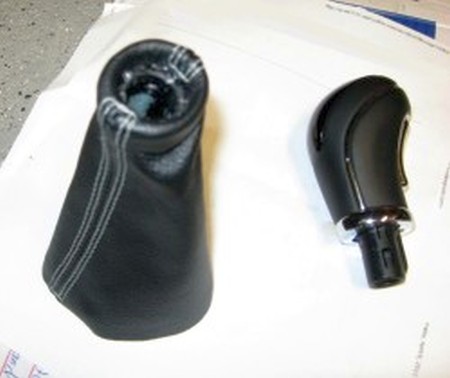
2. Unscrew the shift knob and unzip the shift boot. |
 |
|
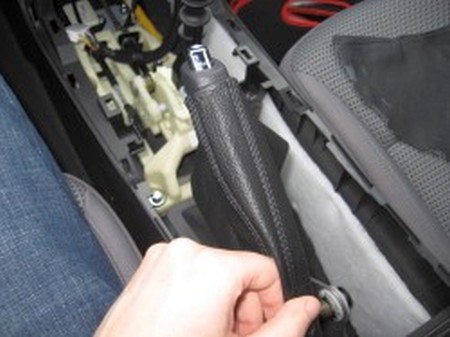
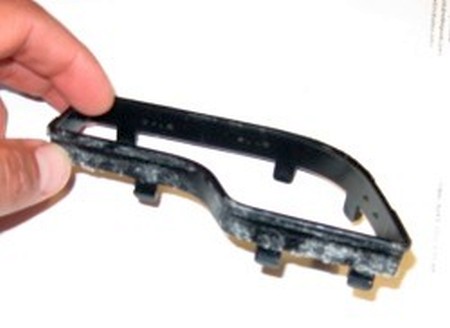
3. Remove the semi-circular plastic clip that sits in front of the hand brake by lifting it vertically. |
 |
|
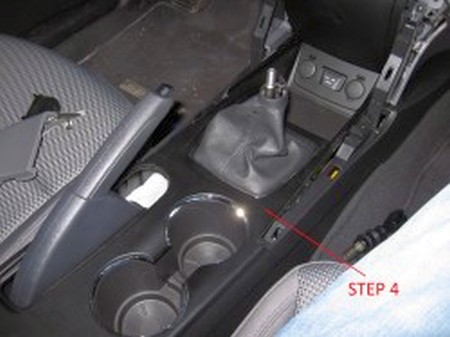
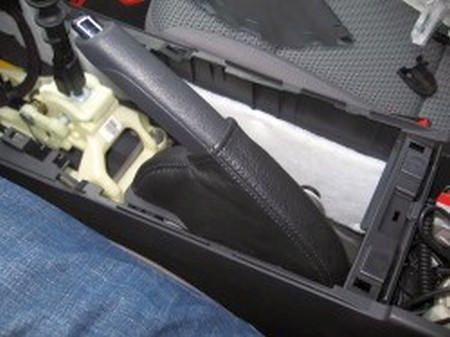
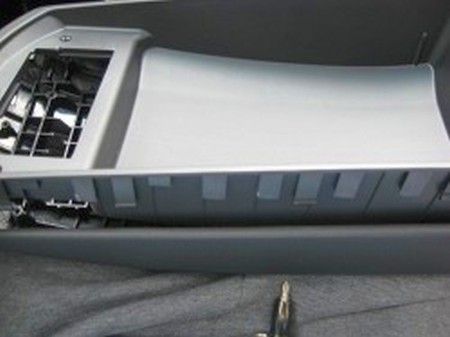
4. Lift up verically on the center console trim piece to remove it. There are several plastic fastening clips along the perimeter of the trim piece that need to be disengaged to lift up the trim piece. |
 |
|
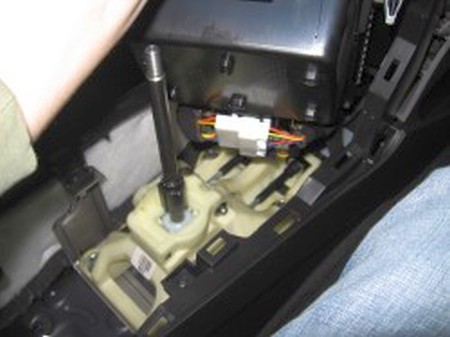
5. Unplug the wiring harness beneath the cubby hole in the front of the center console piece, and remove the center console piece entirely by lifting it over the shifter while not snagging the piece on the hand brake. |
 |
|
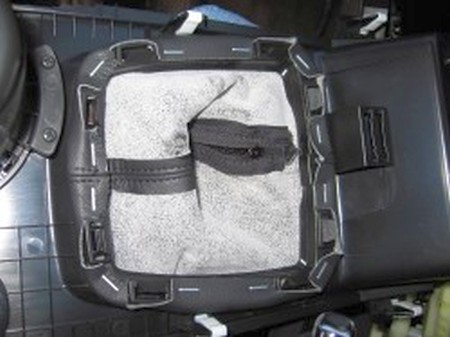
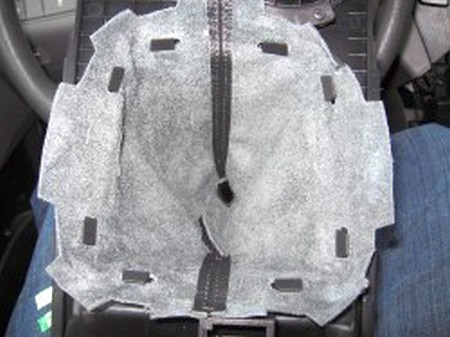
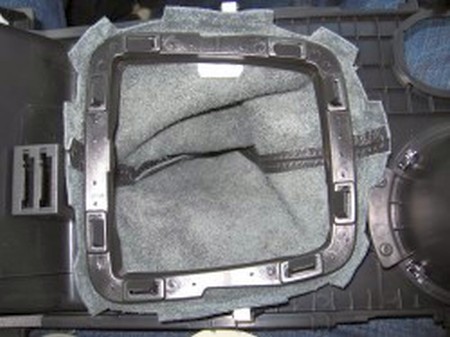
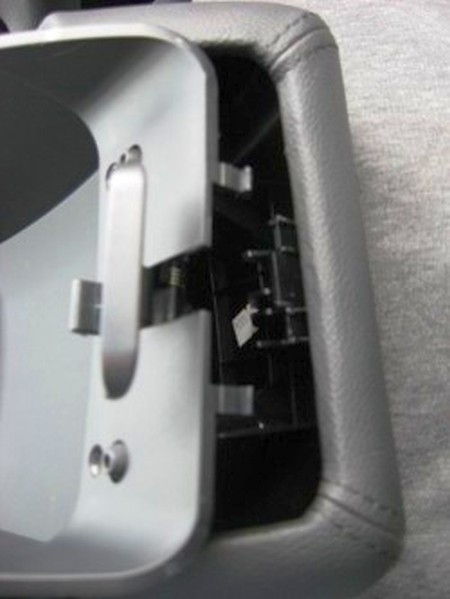
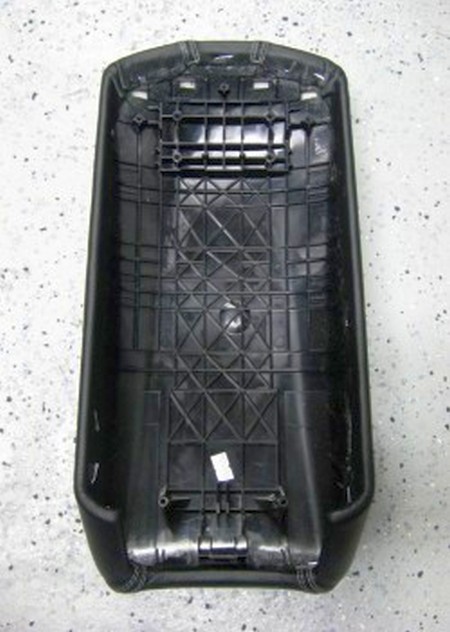
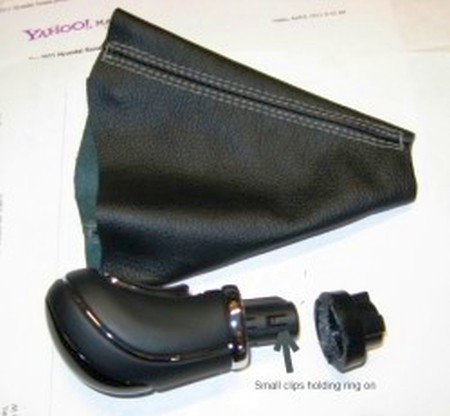
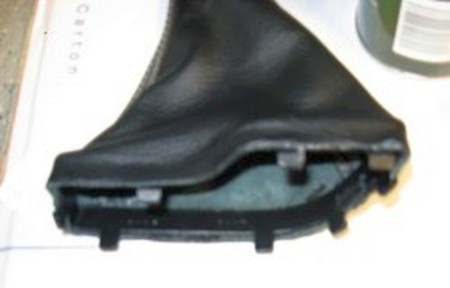
6. Remove the shift boot and the clip to which it is attached by flipping the center console piece over and adjusting the 8 plastic pronges. The may take a considerable amount of force to do. Remove the staples holding the stock shift boot to the plastic clip ring and remove the stock shift boot. |
 |
|
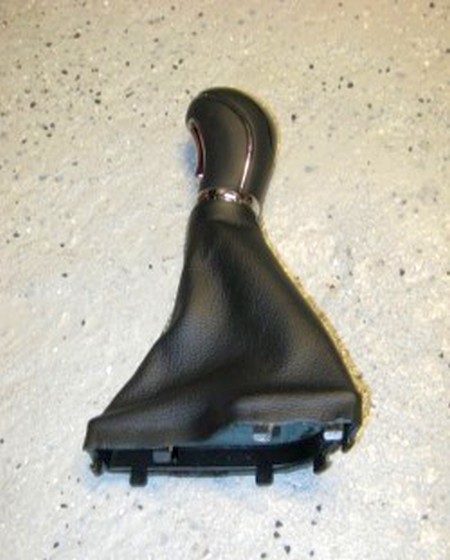
7. Apply the new shift boot from RedLine Goods onto the bottom of the center consoloe piece as shown in the picture, ensuring that the plastic pronges have fully cleared the holes in the new shift boot. Also make sure that the finished side of the boot is facing the proper direction and that the velcro seam will be facing the dash when the installation is complete. |
 |
|
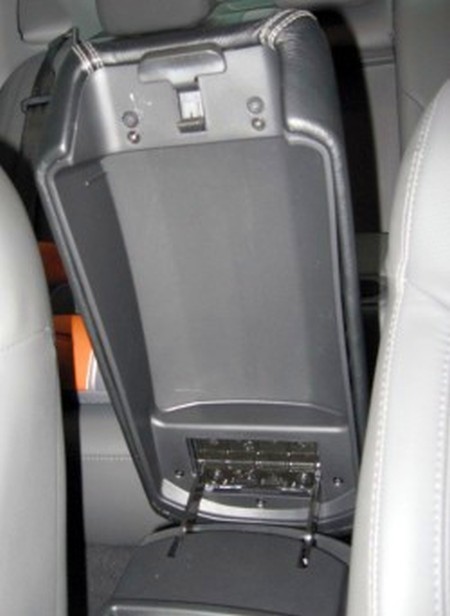
8. Place the plastic clip ring onto the center of the console, sandwiching the new shift boot between the center console piece and engaging the plastic pronges. Be sure that the seams in the leather are centered before completely attaching the plastic ring clip and that the plastic clip ring is being placed with the correct side facing the leather (the latter should be obvious upon inspection). |
 |
|
9. At this point, the leather protruding around the outside of the plastic clip ring can be attached to the clip ring with appropriate glue if desired. If the leather is not glued to the plastic clip ring, take care to ensure that no leather is snagged by the plastic fastening clips when reassembling the trim pieces. |
 |
|
10. Apply the new hand brake boot by sliding the hand brake into the hole in the bottom of the shift boot and out the smaller opening at the top. Pull the new hand brake boot snug over the hand brake. |
 |
|
11. Secure the bottom of the new hand brake boot to the hand brake using the appropriate glue. Take care to ensure that the new hand brake boot is snug and drawn fully down on the hand brake before applying the glue and reassembling the trim pieces or the bottom of the new hand brake boot may be visible when the hand brake is disengaged! |
 |
|
12. Reassemble the trim pieces and shift knob in the reverse order through which they were dismantled. Place the new shift boot in the proper spot on the shift lever and fasten the velcro, enclosing the new shift boot around the shift lever. |
|
|
ARMREST COVER INSTALLATION |
 |
|
14. Use phillips screw driver to remove 4 screws holding armrest lid to center console. |
 |
|
15. Remove 5 screws (phillips) holding bottom lid cover from leather wrapped lid. |
 |
|
16. Remove bottom lid cover by prying away side tabs with flathead screwdriver and pulling lid away starting from the back to the front. |
 |
|
17. Test fit Redline cover. Stretch cover over lid (overtop of factory lid cover) and staple in place. High strength spray adhesive is also recommended. |
 |
|
18. Replace bottom lid cover fitting in from front to back. |
 |
|
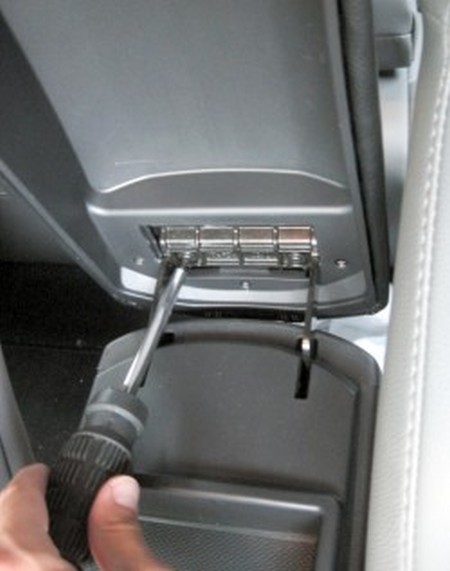
19. Reinstall armrest lid using 4 screws and reinstall plastic trim cover.
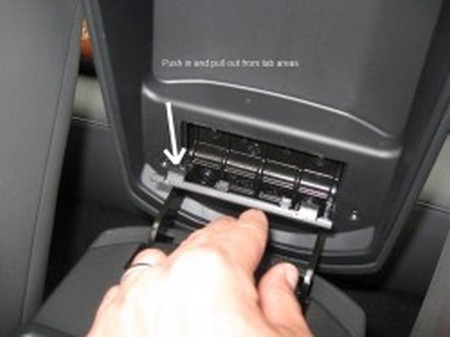
Tips: Trim covers are tight, remove by pushing from tab areas to avoid damage. Be careful not to pop out armrest latch when handling the bottom lid cover. Using heat and spray adhesive is highly recommended. |
 |
|
INSTALLATION OF THE AUTOMATIC SHIFT BOOT
1. Apply parking brake and move gear selector to neutral (turn vehicle to ACC and place foot on brake) |
 |
|
2. Grasp shift knob and pull straight up forcefully. A force of 50lbs or more may be required to remove the knob. Boot will come off with the knob. (NOTE: be careful not to punch yourself in the face). |
 |
|
3. Remove bottom trim ring from boot by removing staples and applying heat to loosen glue. Set aside. |
 |
|
4. Remove top plastic ring (closest to shift knob, covered by leather boot) by either carefully prying between ring and shifter, or use small pick tool to un-do 2 small clips inside the ring. Then remove the old boot from the top ring using heat. |
 |
|
5. Place top plastic ring inside Redline boot. Push to top leaving enough material to curve around ring and set inside top. (NOTE: ensure ring is centered with stitching.) Use high strength spray adhesive to secure top of Redline boot inside the top plastic ring. Push shift knob back over top ring. |
 |
|
6. Use high strength spray adhesive to secure Redline boot to bottom trim ring. Ensure leather is flush with bottom of ring and stitching is centered. |
 |
|
7. Ready for install. Reinstall shift knob and boot. Ensure knob is pushed all the way down and bottom ring clips are secure. |
 |
|
ENJOY YOUR NEW LEATHER BOOTS! |
|
|
Useful tip You have installed a product made out of genuine leather. As you know, to maintain a leather product in good condition, you should take care of it. We suggest occasionally (every 4-6 week for example) applying some leather conditioner/UV protector to keep your leather from drying up in the sun and cracking. |
|
Please subscribe to our newsletter.
Get an instant 20% discount and enter our montly $100 CASH sweepstakes!