1994-98 FORD MUSTANG door inserts installation guide
Tools Needed:
Flathead Screwdriver
Philips Head Screwdriver
Needle-nose pliers or panel plug removal tool
Utility knife or sharp knife
Contact cement
Clamps
Epoxy type adhesive
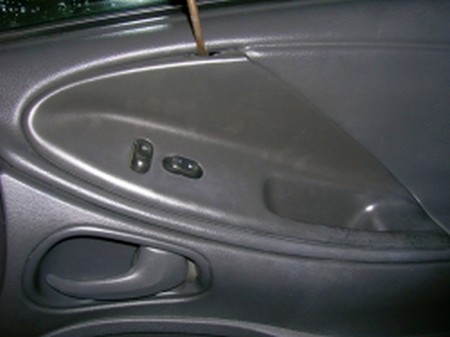
1. Start by removing the switch panel on the door (has the window and
door lock switches on it) with a flathead screwdriver. There is a little indent
you can use to help pry it off. Pull the panel out, slowly, without too much
force as there are wires still attached.
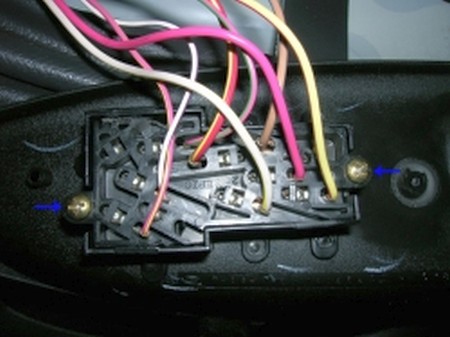
2. Now that the panel is loose, flip it over. You will see the wires
running into a little harness. That is help in place by two golden Philips head
screws. Unscrew them and the wire harness will slide out.
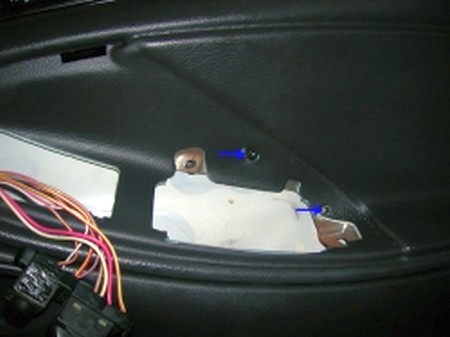
3. Now use the Philips head to remove the two screws that were behind
the panel. See the picture for screw locations.
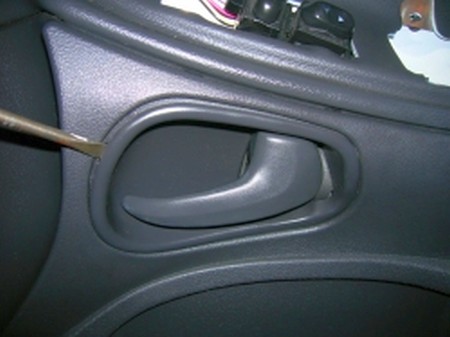
4. Next you want to remove the panel surrounding the door handle.
Again, use your flathead screwdriver to help pop this panel off.
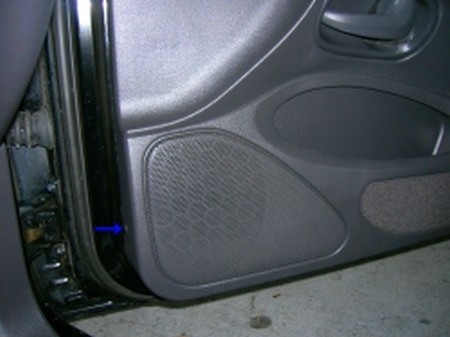
5. The final piece holding your door down is near the speaker cover.
See the picture for an exact location. It is on the side of the door, closest to
the front of the car, and very close to the bottom of the door. Again, the
picture shows this. Use the pliers or panel plug tool to remove this plastic
piece. Now the entire door panel will slide up and out, and off. Be careful and
do not pull too hard in one way. Try to avoid getting the switches or anything
else around caught while pulling this off. You are going to want to push up and
pull out slightly at the same time, with two hands.
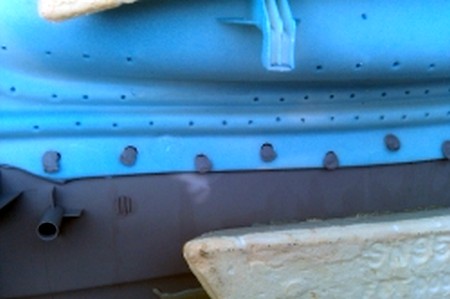
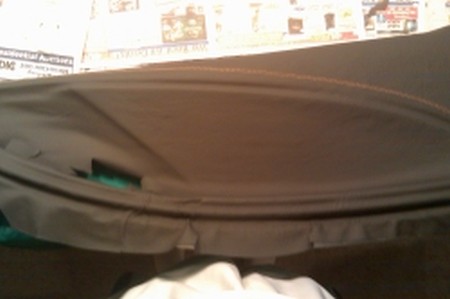
6. Now that the door panel is off you can focus on separating the two
main pieces of the panel. If you flip it over, look at the sides, and inspect
the door panel, you will see how it is two separate pieces attached by plastic
welds. The picture shows these.
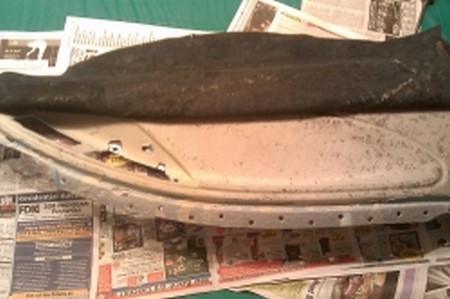
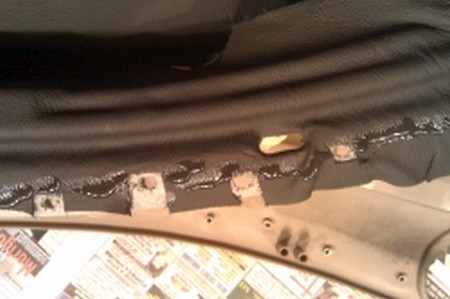
7. BE EXTREMELY CAREFUL IN THE REMAINING STEPS!!!!! You are going to
have to cut all of the plastic welds holding the top piece to the bottom. They
are very close together and stretch the entire door panel. See picture for
clarification. Use the utility knife for this and try to get it under the welds
so you can cut them off. The pictures show what they look like before and after
to help guide you through this process. Be patient, take your time, and use
caution.
Now that you have all the welds cut, use some pressure to separate the two
pieces from each other.
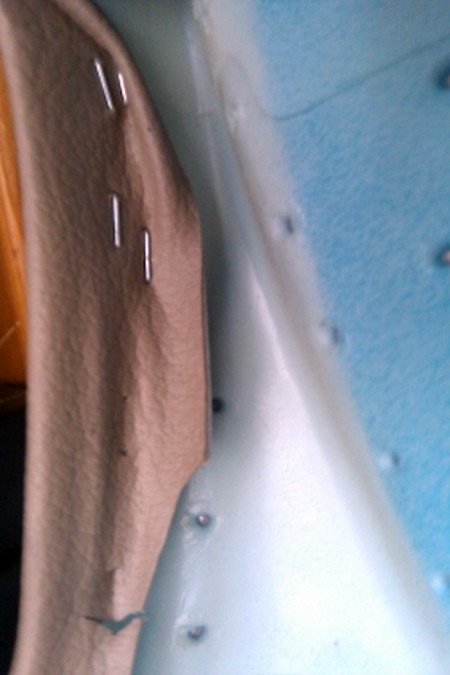
8. Once the two pieces are separate you can work on removing the
fabric. You will notice a lot of staples near the edges holding the fabric down.
Use your utility knife or flathead to pop these staples out. Make sure you get
all of them.
9. Once all of the staples are removed you can start pulling the
fabric off. (NOTE: Make sure you push the door lock plastic grommet up slightly
so the fabric will come out from around it. You do not need to take it off, just
push up slightly from the back of the panel to free some room on the top, where
the fabric is.) As you start pulling the fabric, it is best to pull in a gradual
manner. It will take some time, but go slow, and start on one end and work your
way to the other.
10. Now hold the old fabric next to the new fabric and make sure it
is close enough to the same size to fit – also, test fit it over the door panel
at this point. Once test fitting has been done, it will help to make a slit in
the fabric where the holes in the original fabric are. (Do not cut out the
complete section. Just make a cut so that you have more working room with the
leather.
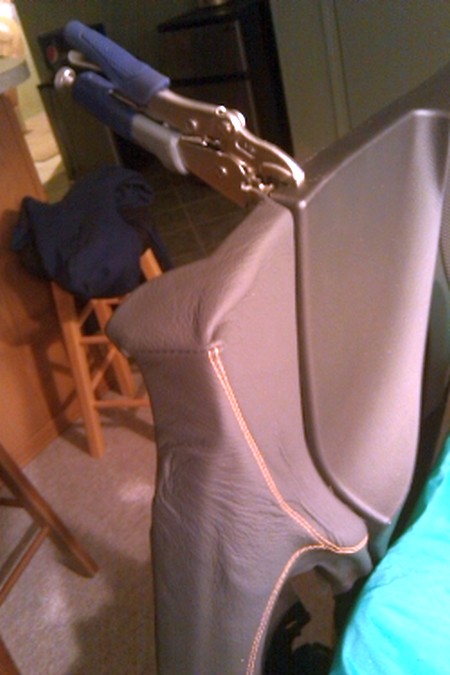
11. Now it is time to install the leather cover. I found it was
easiest to start at the top, putting contact cement on a section about 2 inches
wide, all the way across the top and a matching section on the back of the
leather. From there, work in small sections all the way across the door, working
down. Glue and then smooth out the door and move on to the next section. Take
your time; make sure you get enough cement in the crevices and on the door and
fabric. Be careful but work quickly. Continue going until you are out of fabric
to glue! (It may not go all the way to the bottom, but the bottom section does
not show once door panel is reinstalled.
After the glue dries, you need to cut out, or poke the holes, that are now
covered by the leather. There are a couple where the door/window switches go for
the plastic cover, and the screws that go into the door. There are also the many
at the bottom of the piece that allow the lower section of the door panel to
align with the top section.
12. After all these holes are free, you can attach the two sections. I
used an epoxy and put a trail of it all the way across the bottom of the top
panel – following the alignment holes. I then combined the two pieces of the
door panels and clamped the ends to hold it in place. Although it time to cure
based on the adhesive and weather.
Once the glue has dried, you can reinstall the newly leathered door panel
onto the car! Just use reverse instructions from removal to reinstall. Enjoy
your new door panels!!!
ENJOY YOUR NEW LEATHER BOOTS!
Useful tip
You have installed a product made out of genuine leather. As you know, to maintain a leather product in good condition, you should take care of it. We suggest occasionally (every 4-6 week for example) applying some leather conditioner/UV protector to keep your leather from drying up in the sun and cracking.
Redline Automotive Accessories Corp. will not be held liable for any labor, incidental or consequential damages of any kind. Proceed at your own risk.