2022-26 MAZDA CX-50 |
||||||||||||||||||||||||||||||||
|
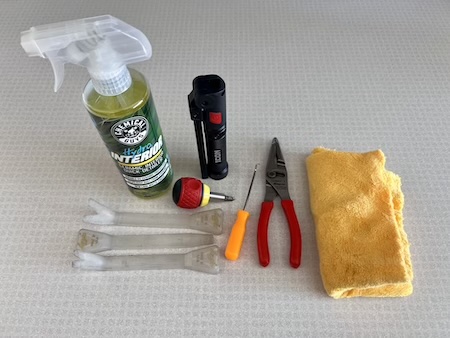
1. TOOLS NEEDED:
|
 |
|
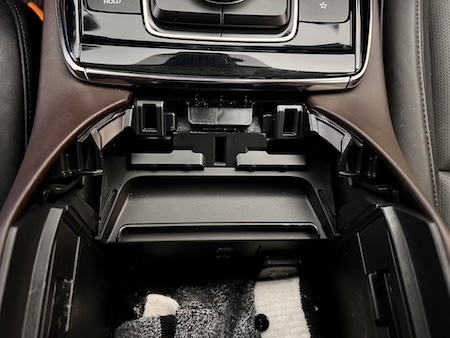
2. Remove center trim piece in front of glovebox by prying upwards. |
 |
|
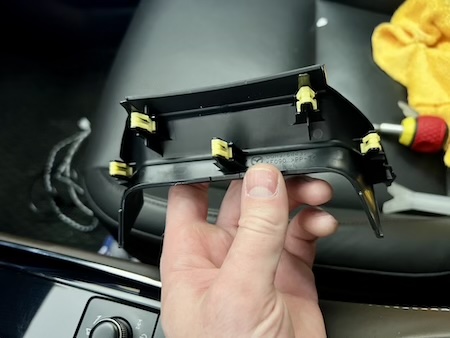
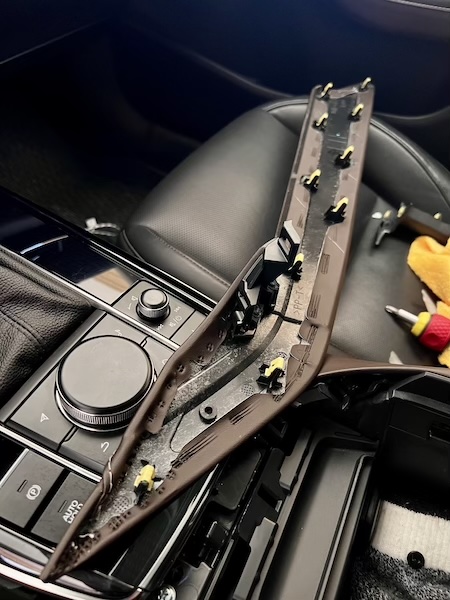
3. It's held by 5 clips but should be easy to dislodge and remove. |
 |
|
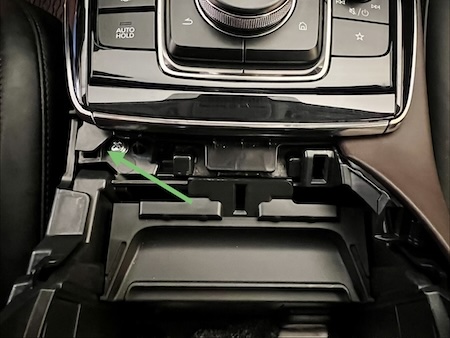
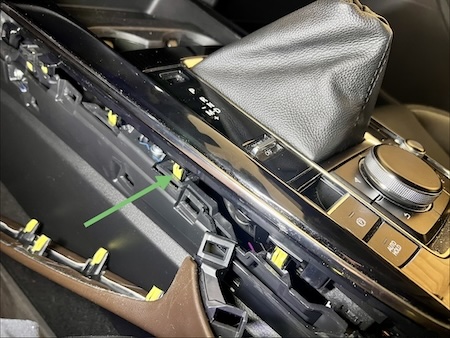
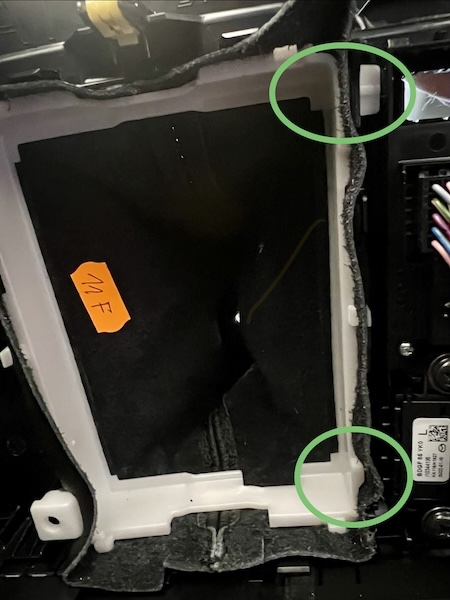
4. Side trim skirts must be removed to access retention clips for shift console. |
 |
|
5. They simply unclip to the side. |
 |
|
6. Clip positions for side skirts are presented here. |
 |
|
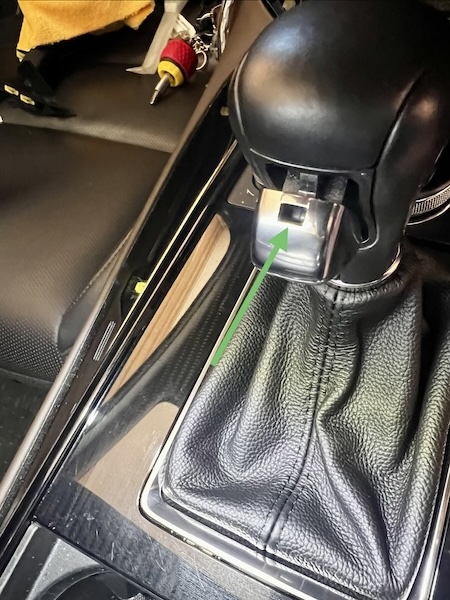
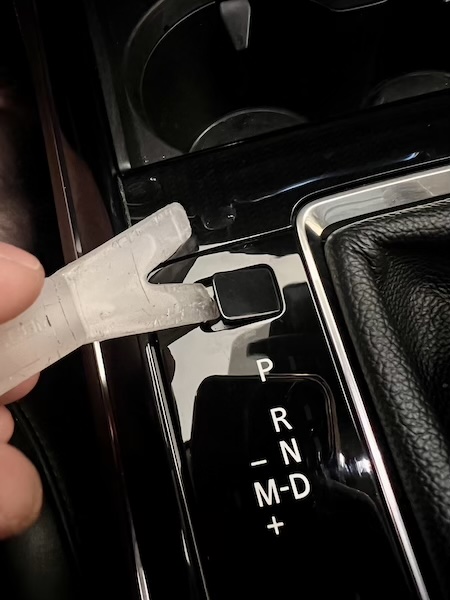
7. Remove shift knob button by gently pulling button to the front of the vehicle so that the access point is visible. Use a small pry tool to press the locking tab, allowing the button cover to slide forward, exposing the metal retention clip. |
 |
|
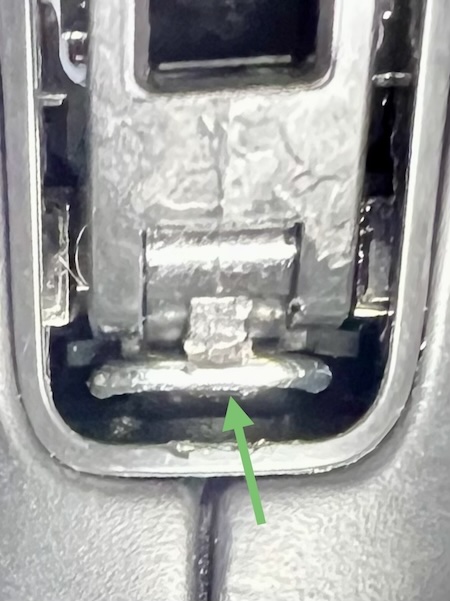
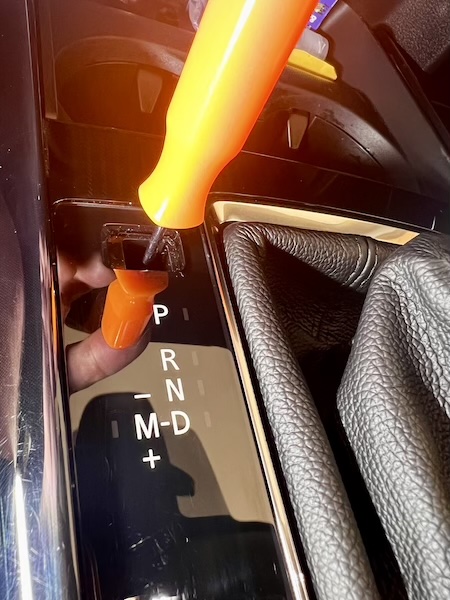
8. Use a small pick to pull the metal retention clip toward the front of the vehicle. Be careful not to damage the plastic tab above it or the outer plastic surround. |
 |
|
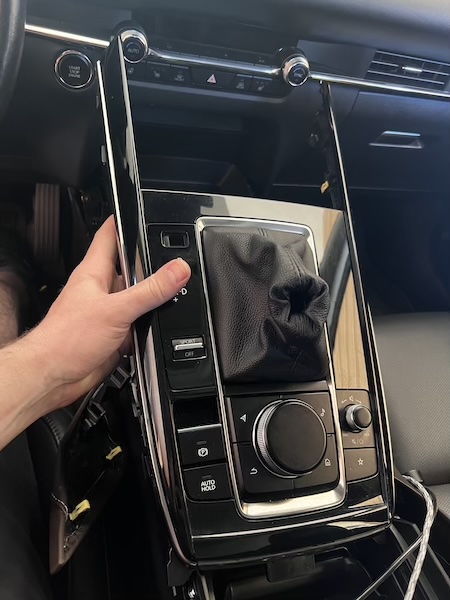
9. Remove shift console by prying upwards at each corner. Shift console can be gently pulled to the rear of the vehicle for access. It is not necessary to disconnect any wiring harnesses. |
 |
|
10. and pressing the bypass button while shifting. |
 |
|
11. Remove the console/shift boot assembly from the vehicle and onto a working table. |
 |
|
12. Shift boot can be removed by removing the 2 quantity #2 Philips screws and sliding the shift boot... |
 |
|
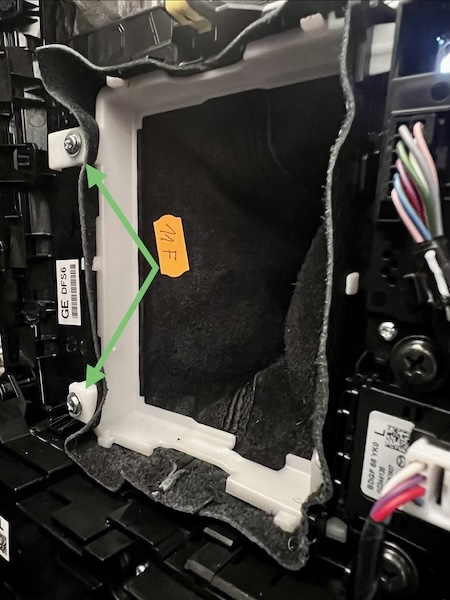
13. ... toward the screw side to disengage the retention tabs shown below. |
 |
|
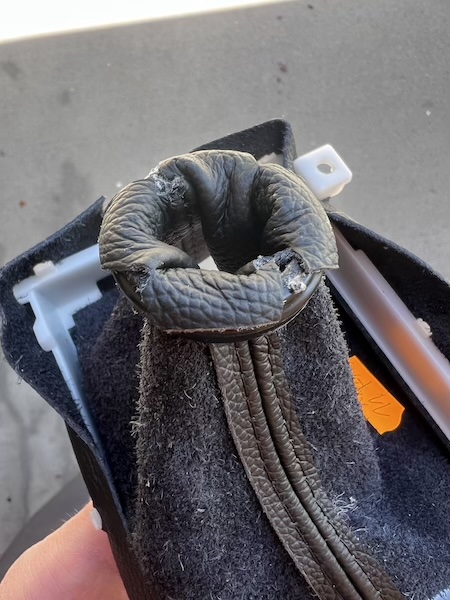
14. Gently remove the shift boot and plastic retention ring assembly. Remove the plastic ring at the top of the shift boot, paying attention to the position. This ring will need to be installed in the new shift boot in the same orientation with super glue. |
 |
|
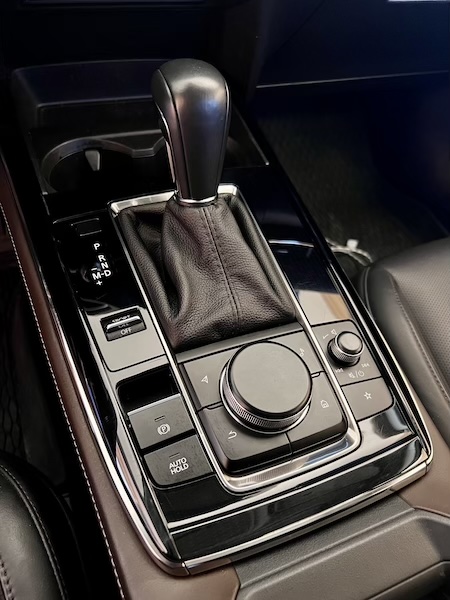
14. Re-install everything in reverse order of removal.
|
 |
|
Useful tip You have installed a product made out of genuine leather. As you know, to maintain a leather product in good condition, you should take care of it. We suggest occasionally (every 4-6 week for example) applying some leather conditioner/UV protector to keep your leather from drying up in the sun and cracking. |
|
Please subscribe to our newsletter.
Get an instant 20% discount and enter our montly $100 CASH sweepstakes!