1998-01 NISSAN ALTIMA |
||||||||||||||
|
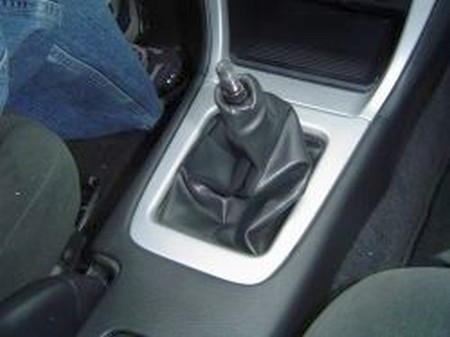
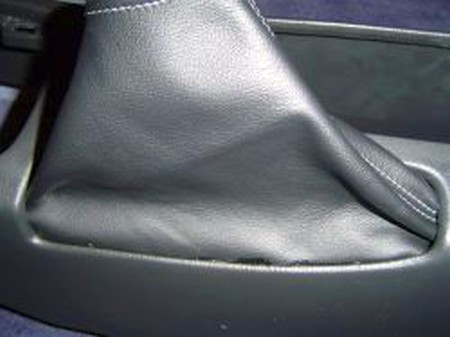
1. Remove the shift knob. Because its glued on, it will take some force to do it so I recommend having Vise Grips around to help with the job. If you want to save it, use a towel to protect it from the vise grips.
2. Pop off the trim piece the surrounds the shift knob. Its held in by clips so pull up on it from the back and it should pop out. |
 |
|
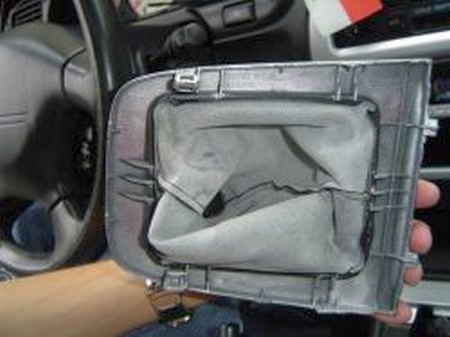
3. Unclip the old shift boot from the trim piece. Remove the wire frame from the old boot. Cut off the welded part of the wire frame and slide it into the folded bottom edge of your new boot - the folded edge has cuts in the corners to make this easy. Make sure the new boot is flush and even around the wire frame. |
 |
|
4. Attach the wire frame with the new boot back to the trim piece. Take out the top trim from the old boot and put it on the new one in the same manner in which it was affixed to the old boot.
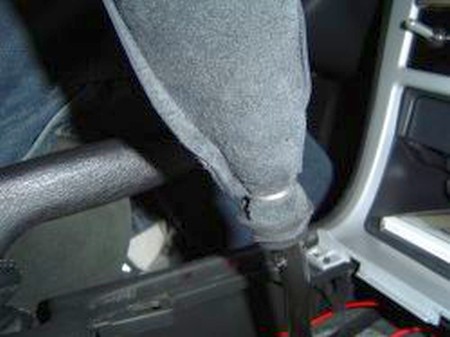
5. Slide the top of the new boot onto your shifter. You will need to turn the new boot inside-out to accomplish this.
6. Put the trim piece back in and screw the shift knob back down. |
 |
|
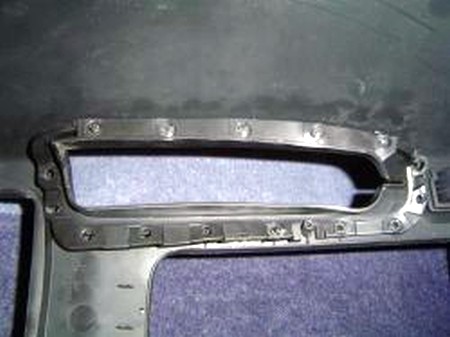
7. Remove the center console from the car, there are 5 screws holding it in. 2 under the shift boot trim piece, 1 in the front cup holder, and 2 on each side in the back (slide both seats forward for easy access.
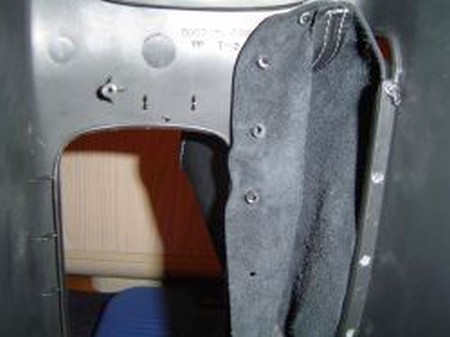
8. With the center console taken out, pop out the rubber gasket surrounding the e-brake. Little button-like posts hold it on.
|
 |
|
9. Use the little round holes in the boot to mount it on the buttons to the center console. To hold down the other side, I just used glue to hold it on. (In the groove where the rubber piece "clipped" into on the left side). |
 |
|
10. Reinstall the center console and you're done! |
 |
|
Useful tip You have installed a product made out of genuine leather. As you know, to maintain a leather product in good condition, you should take care of it. We suggest occasionally (every 4-6 week for example) applying some leather conditioner/UV protector to keep your leather from drying up in the sun and cracking. |
|
Please subscribe to our newsletter.
Get an instant 20% discount and enter our montly $100 CASH sweepstakes!