2006-12 FORD FUSION |
||||||||||||||||||||
|
|
|
|
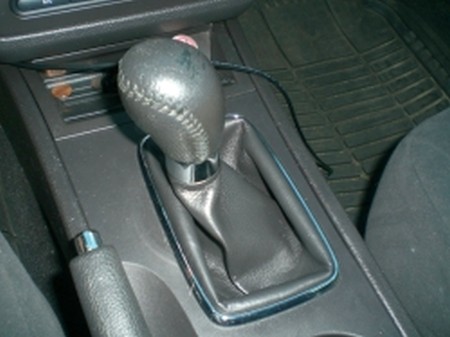
1. Remove the shifter knob by rotating it counter clockwise. |
 |
|
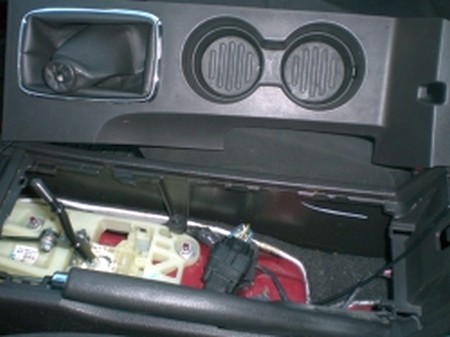
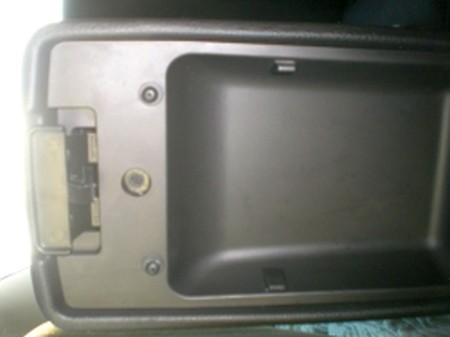
2. Open both sections of the armrest and then pull up the edge of the center console. The entire center console is held on by 7 clips that have to be pulled out, it will take some significant force to remove the clips but be careful not to bend or break the plastic. |
 |
|
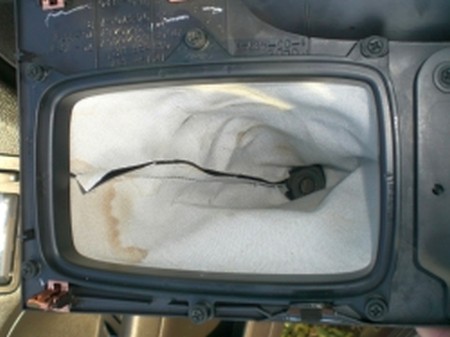
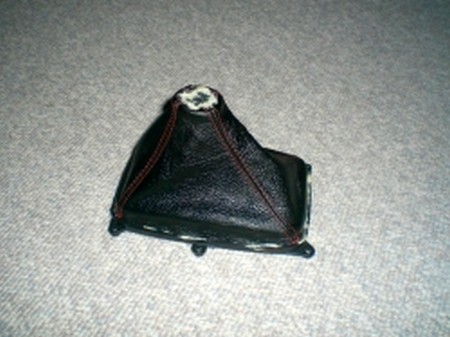
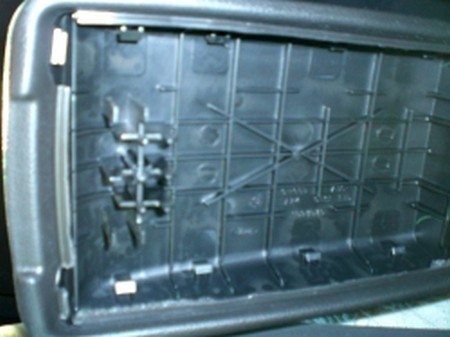
3. Remove the 6 Phillips head screws on the underside of the center console lid piece to remove the shift boot retainer. The shift boot and retainer will come out as one piece. The shift boot is glued to the retainer so to remove it simply pull it off. |
 |
|
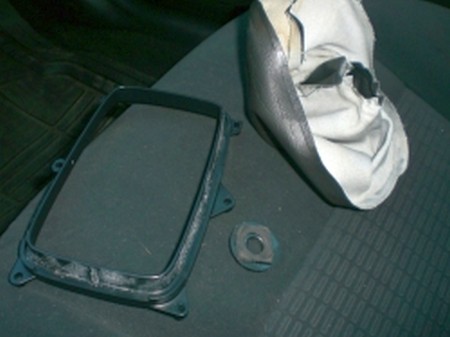
4. You will also need to remove the plastic ring at the top of the shift boot, it is again glued on so simply pull it off. Keep the retainer and the plastic ring as you will use it to attach the new shift boot. |
 |
|
5. Using a glue (I prefer gorilla glue) re-attach the plastic ring to the top of the boot, you will need to set the ring inside the boot then trim off parts of the top forming triangles you can fold down and glue to the top of the plastic ring.
Alternatively, you can flip the boot inside-out, slide the plastic ring into the collar and grab it with a zip-tie. |
 |
|
6. Then attach the new boot to the old boot retainer being careful to put it on so that the boot will face the correct direction. The retainer will screw in only one way so test fit the boot before you glue it in.
7. If you are installing the ebrake boot, simply slide it on the e-brake.
8. Re-attach the center console trim.
9. Install the shift knob and tighten it all the way to its final position.
|
 |
|
10. To remove the armrest cover open the top armrest compartment and remove the Phillips head screw. Then remove the plastic trim that the screw holds up. |
 |
|
11. Slide on your new leather armrest cover over the old armrest cover
pulling it tight. Then simply replace the plastic trim and put the screw back in. |
 |
Useful tip
|
|
Please subscribe to our newsletter.
Get an instant 20% discount and enter our montly $100 CASH sweepstakes!