2001-05 HYUNDAI ELANTRA |
||||||||||||||||||||||||||||||
|
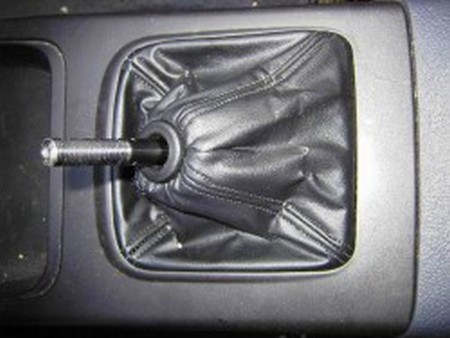
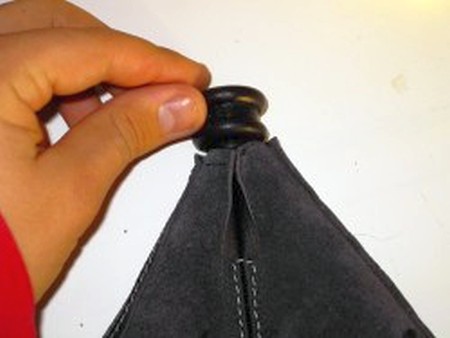
1. Remove stock knob from shifter |
|
|
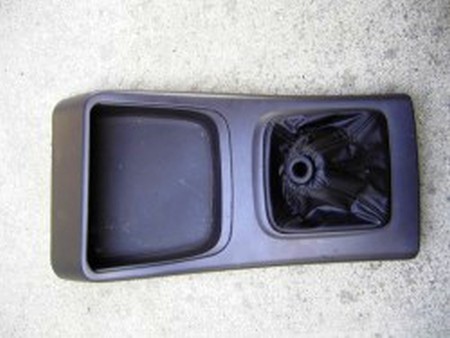
2. Pull out center section. you can use a screwdriver around the edge OR put the car in 1,3, or 5th gear, reach into the shift frame and lift up from the center. it will pop out. |
 |
|
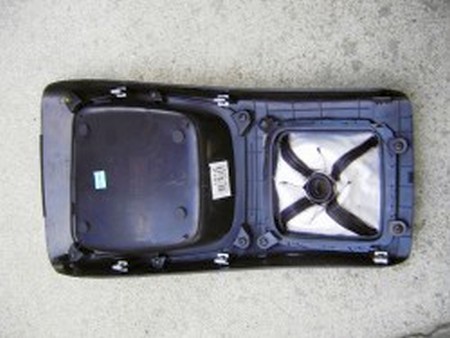
3. This is what you will see when you turn the center piece over. there are 4 screws holding the shifter boot frame to the center section. remove this and the boot and frame will come out. |
 |
|
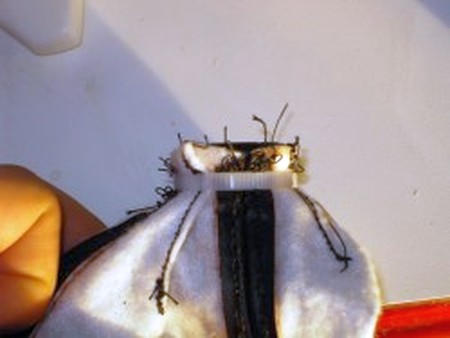
4. Your stock boot will have metal staples holding it to th frame. pry these out and remove all staples. there will also be a metal band holding the boot to the ring in the top of the boot. you can try to take it of carefully and reuse it, or use a zip-tie to attach the new boot |
 |
|
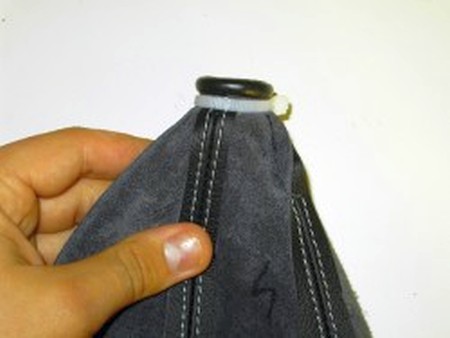
5. Put the new ring in the boot while it is inside out. the larger side of the ring goes up in accordance to the shift boot |
 |
|
6. Zip tie ring into boot around center of ring. this will hold it in place |
 |
|
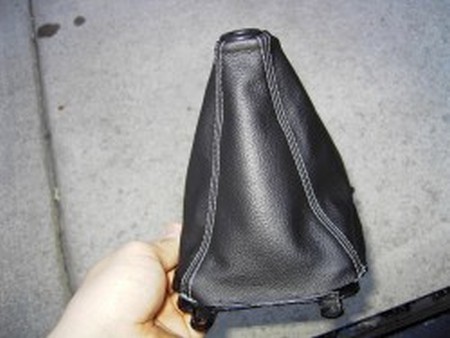
7. Turn shift boot inside out and attach back onto frame. 2 options here. you can staple shift boot back onto frame (best option) or, if you do not have access to a staple gun use leather thread and a needle, and basically sew the boot back onto the frame using the holes that were left from the old staples. Put frame back in center section, relpace 4 screws, put center section back into place and press it in until it clips into the main section. |
 |
|
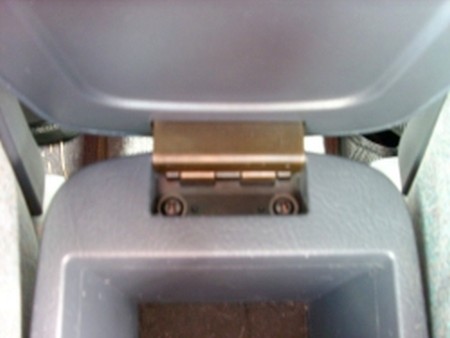
8. To remove center arm rest lid: a. Raise top of console arm rest b. Unscrew the two hinge screws in the back hinge and lift off lid
9. To install newly covered console arm rest lid, center the hinge and align over existing holes and screw tight. (Due to the hinge design, the bottom hinge plate is not perfectly flat. Therefore, it may help with re-install to align hinge and close lid then re-open. This may help position holes for the hinge and make it easier to screw into place.) |
 |
|
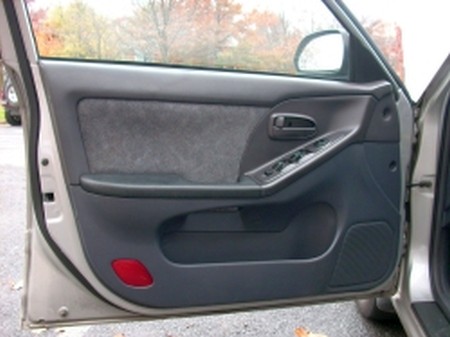
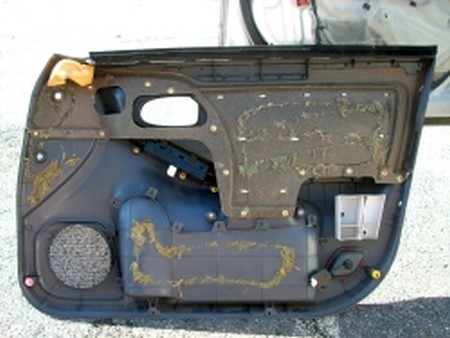
FRONT DOOR INSERTS
10. Start by removing the side mirror mounting screw cover (the black triangular piece of plastic that is above the door panel on the right side.) This is a snap-on piece and can be removed by prying off with a small pry tool. Next, remove four screws – two on the left, and two on the right, of the interior panel. |
 |
|
11. Next, remove four screws – two on the left, and two on the right, of the interior panel.
On the outside edge of the door panel, the two screws will have plastic caps covering the heads. To remove the caps, get a sharp pointed knife and pry the inner circle out (DO NOT PRY OUTER CIRCLE – IT IS RETAINED BY THE SCREW.) |
 |
|
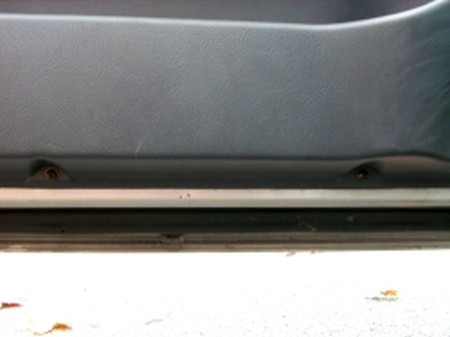
12. Remove the two bottom screws on the interior door panel. |
 |
|
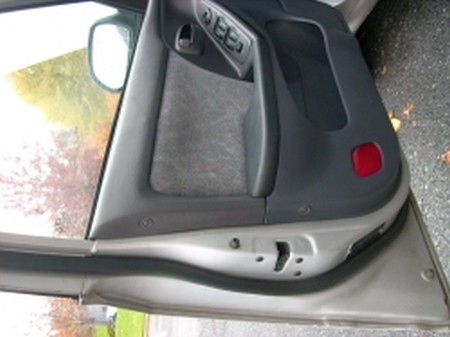
13. Remove one screw located at the door handle, in front of the lock, on the interior panel.
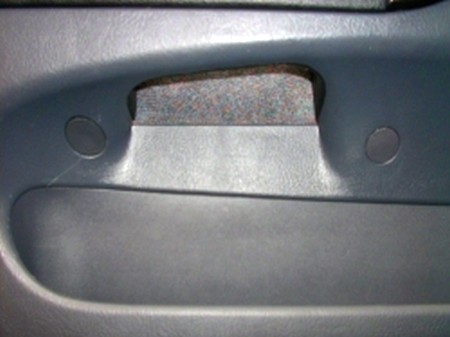
14. Remove two screws located behind the plastic circle, under the arm rest on the door panel. (In order to remove the plastic circle, use a sharp pry tool.)
15. Firmly but gently, pull the panel away from the door. (It may help to hold the side arm rest of the door panel and use that to pull the panel away from the door.)
16. Pry all plastic snap-in anchors from holes. Once removed, lift up on the panel and slide out.
17. Disconnect the window switch wire attachments.
18. Remove sound dampening insulation from back of panel.
19. Remove 14 screws that attach the two pieces of panel together. |
 |
|
20. Metal prongs are inserted through the top part of the two door panels. Straighten the prongs out from the back side, so that you can pop the door panel out.
21. Using spray adhesive glue the leather cover to the insert, wait until the glue settles and reverse steps 10-20 to reinstall. Repeat for other door. :) |
 |
|
REAR DOOR INSERTS
22. In order to disassemble, you will have a total of 5 screws to remove. Remove two screws – one on the left, and one on the right, of the interior panel.
23. On the outside edge of the door panel, the one screw will have a plastic cap covering the head.
24. To remove the cap, get a sharp pointed knife and pry the inner circle out (DO NOT PRY OUTER CIRCLE – IT IS RETAINED BY THE SCREW.)
25. Remove one screw located at the door handle, in front of the lock, on the interior panel.
26. Remove two screws located behind the plastic circle, under the arm rest on the door panel. (In order to remove the plastic circle, use a sharp pry tool.)
27. Firmly but gently, pull the panel away from the door. (It may help to hold the side arm rest of the door panel and use that to pull the panel away from the door.)
28. Pry all plastic snap-in anchors from holes. Once removed, lift up on the panel and slide out.
29. Disconnect the window switch wire attachments.
30. Remove sound dampening insulation from back of panel. Remove nine screws that attach the two pieces of panel together.
31. Metal prongs are inserted through the top part of the two door panels. Straighten the prongs out from the back side, so that you can pop the door panel out.
32. Using spray adhesive glue the leather cover to the insert, wait until the glue settles and reverse steps 22-31 to reinstall. Repeat for other door. :) |
|
|
CONGRATULATIONS - YOU HAVE SUCCESSFULLY INSTALLED YOUR NEW LEATHER BOOTS!
Useful tip You have installed a product made out of genuine leather. As you know, to maintain a leather product in good condition, you should take care of it. We suggest occasionally (every 4-6 week for example) applying some leather conditioner/UV protector to keep your leather from drying up in the sun and cracking. |
|
Please subscribe to our newsletter.
Get an instant 20% discount and enter our montly $100 CASH sweepstakes!