2003-10 BMW 5-SERIES |
|||||||||||||||||||||||||||||||||||||||||||||||
|
Materials needed: - Razor knife (hobby or X-Acto knife works great) - Flat Blade Screwdriver - Pliers - Zip-ties - Glue for bonding leather to plastic (we used SuperGlue) |
|
|
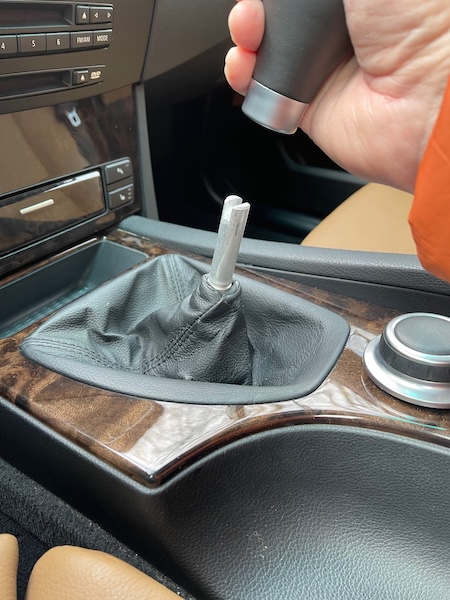
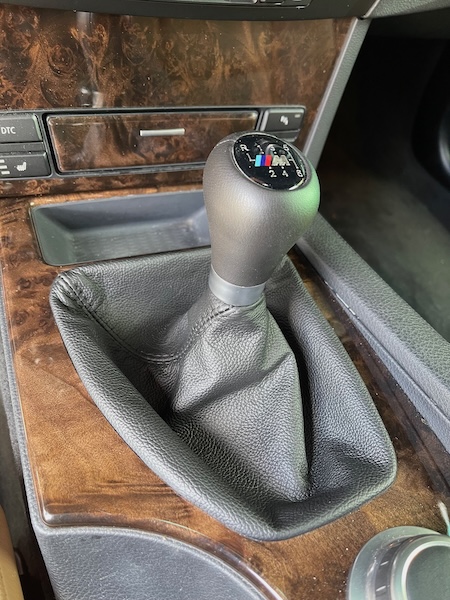
SHIFT BOOT |
 |
|
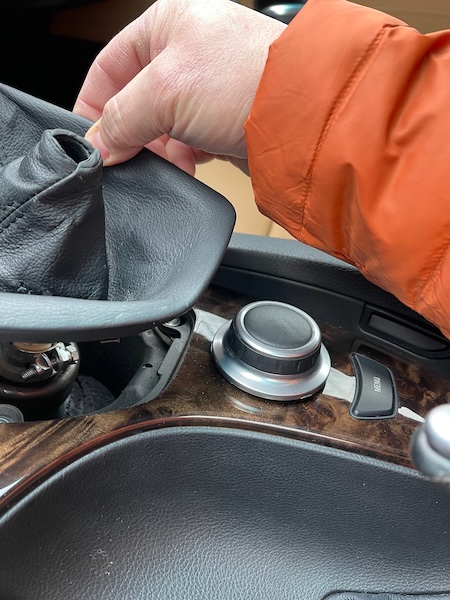
2. Gently pull sides of the old shift boot toward the shifter and up to release the two clips/tabs on each side. Lift the boot free of the shifter. |
 |
|
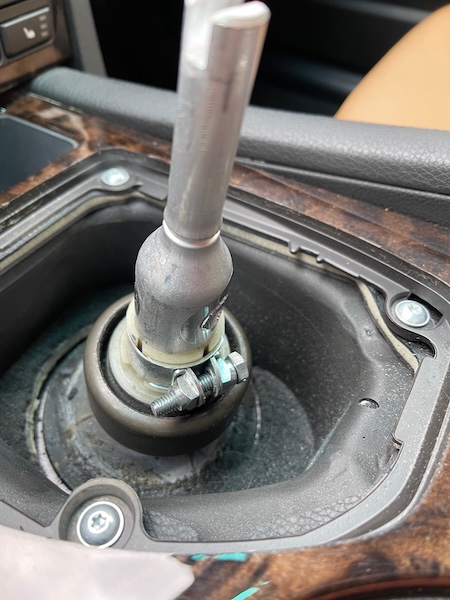
3. (Optional) The bolt holding the shift lever weight is known to wear a hole in the shift boot over time. Cutting the exposed threaded end off of this bolt will prevent damage to the new boot. |
 |
|
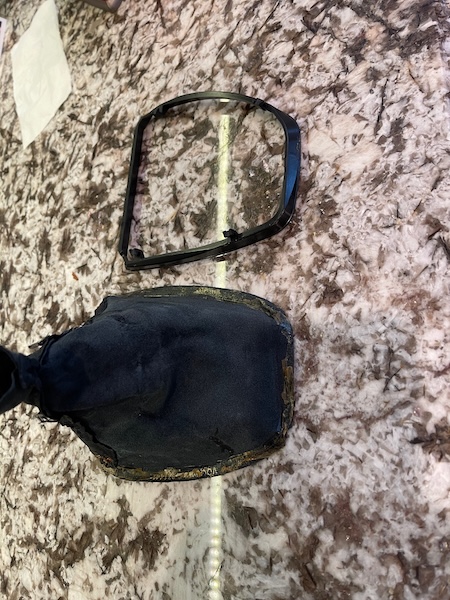
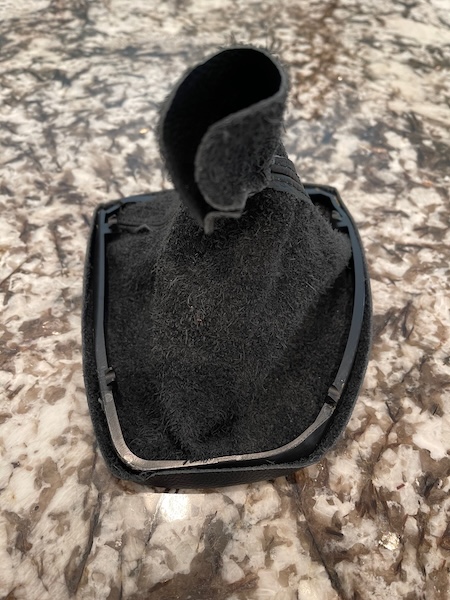
4. With the shift boot removed from the car, carefully remove the old boot from the frame. This can be done with fingers, pealing the leather and adhesive from the frame. You might need small pliers or a hobby knife to separate them. Clean any remaining glue from the frame. |
 |
|
5. To install the new boot, turn it in-side-out and place the frame over the boot with the clips/tabs up. The seams should be aligned with the corners in the front of the frame (wider end). |
 |
|
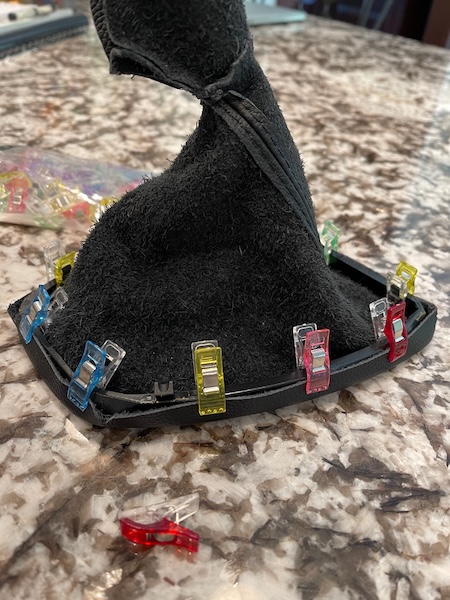
6. Wrap the edges of the boot around the frame from below, as shown and temporarily secure them to the frame with clothes pins or clamps. The edge of the leather should be aligned with the edge of the frame as in the picture. |
 |
|
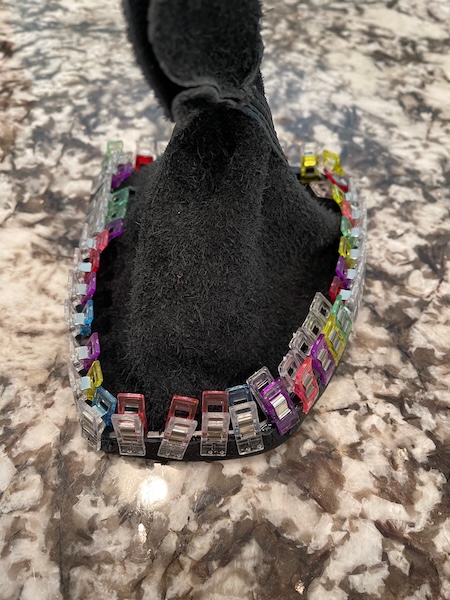
7. Working one side at a time, release the clamps and apply adhesive per instructions and clamp in position. (Contact adhesive in a tube works well for this.) Repeat this on all four sides of the frame. Finally, apply adhesive to the corners and clamp them. Allow adhesive to set per manufacturers instructions. |
 |
|
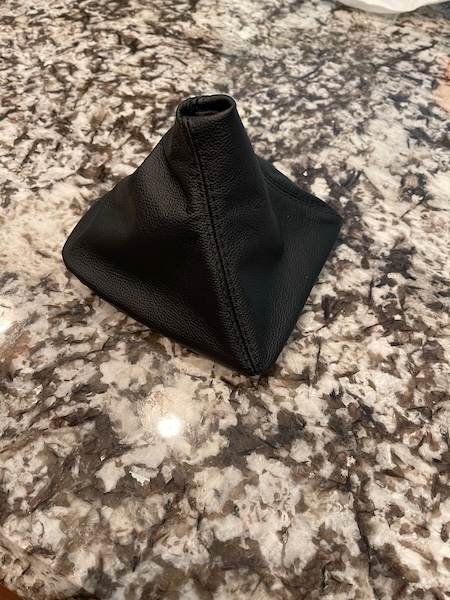
8. When the adhesive has cured remove the clamps and turn the boot right-side-out. |
 |
|
9. In the car, place the boot over the shifter and slide it down. Press the boot frame into place engaging the clips/tabs. |
 |
|
10. Reinstall the shift knob by aligning it with the slot in the shifter and pushing down firmly until it snaps into place. |
 |
|
EBRAKE BOOT |
 |
|
2. We found it easiest to open the center console door and start at the top by pressing down and pulling out. |
 |
|
3. Once unsnapped the zip tie holding the boot to the brake handle will need to be removed using wire cutters, the boot can then be carefully removed by sliding over the brake handle and off. |
 |
|
4. Separate the boot from the mounting frame. Clean the frame from glue residue to prepare for installation of the new boot. |
 |
|
5. Glue the frame into the new boot. Carefully glue a section at a time until all is done. You might find it necessary to cut small angle shaped pieces of leather out at the corners to allow the leather to wrap around the base. |
 |
|
6. The boot should be slid over the handle and positioned so that the
top seams line up with the threaded seams on the handle. The boot is zip tied to
the handle, you will notice a channel that the zip tie should be placed in
before tightening. The boot is then snapped back into place, it is tight so be
patient. |
|
|
EBRAKE HANDLE COVER installation. 7. Pull off the ebrake handle - it needs a gull forwards pull to dislodge. |
 |
|
8. Squeeze the sides of the upper part of the connector to make the shift knob part release from the part of the wiring harness that goes back into the center console. |
 |
|
9. Insert the handle into the leather handle cover. Use some glue on the ebrake handle to prevent the cover from moving. |
 |
|
10. Lace (sew) the bottom thread of the cover using the provided thread and needle. |
 |
|
11. A simple cross-stitchit will yield the best result. Do not worry if you don't make it perfect - since it is on the underside of the ebrake handle, any imperfections will not be visible anyway. |
 |
|
12. Reinstall boot and handle, and install back into the vehicle as per step 6 above. |
 |
|
Useful tip You have installed a product made out of genuine leather. As you know, to maintain a leather product in good condition, you should take care of it. We suggest occasionally (every 4-6 week for example) applying some leather conditioner/UV protector to keep your leather from drying up in the sun and cracking. |
|
Please subscribe to our newsletter.
Get an instant 20% discount and enter our montly $100 CASH sweepstakes!