1997-04 CHEVROLET CORVETTE C5 armrest cover installation guide
97-04 CORVETTE (C5) INSTALLATION INSTRUCTIONS
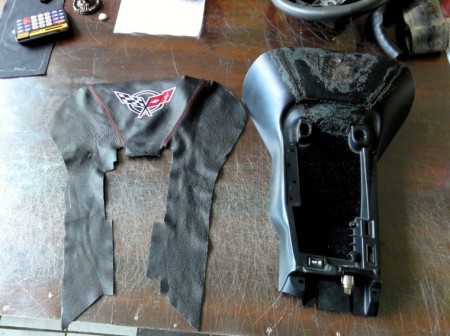
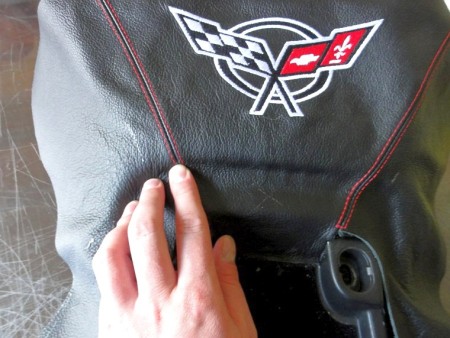
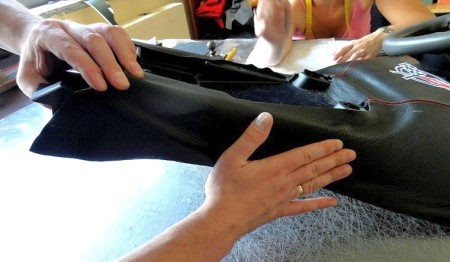
Pre-align and test-fit the cover in order to align and center the seams properly before you start gluing. This is especially important if you already have our armrest lid cover installed. The seams on the center tunnel cover are designed to follow the seams on our armrest lid cover so aligning them together is a vital part of the process. If you install both covers at the same time it will be easier because armrest lid cover is installed with an elastic. If you installed armrest lid cover earlier and glued it to the lid it may be a bit more difficult to align perfectly but still doable and will look good. If you have embroidery on your tunnel cover, pay attention to aligning it to the rear edge before you apply glue.
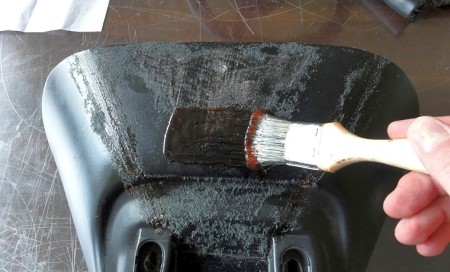
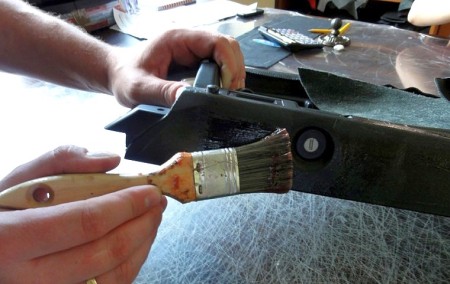
Apply glue, first to the rear part, let it cure a bit and place leather on the tunnel starting from the bottom edge, align the leather to the area between screw holes and proceed with pressing the leather against the tunnel towards the back. Pay special attention to the recess and do not stretch the leather here to much as it may delaminate later. When you have the leather glued here proceed towards the rear edge of the tunnel applying a little stretch and paying attention to the seams making them straight.
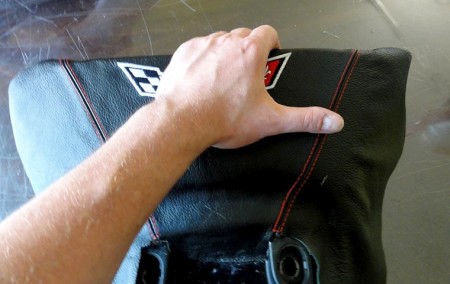
When you have the rear part glued properly, let it cure a bit before you proceed with the sides in order not to distort the seams.
After some time (10-15 minutes is enough), apply the glue to one side of the tunnel, let it cure a bit and press the leather against glued plastic starting from the rear and proceeding towards the back.
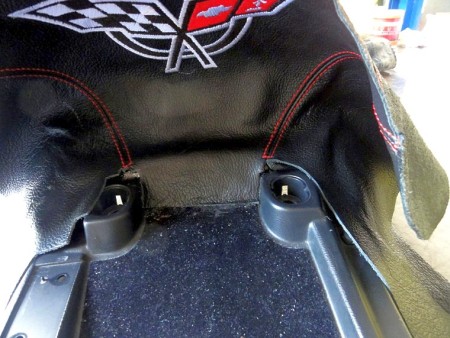
Repeat the same with the other side, pay attention not to apply the glue to the key hole - apply it up to the edges only.
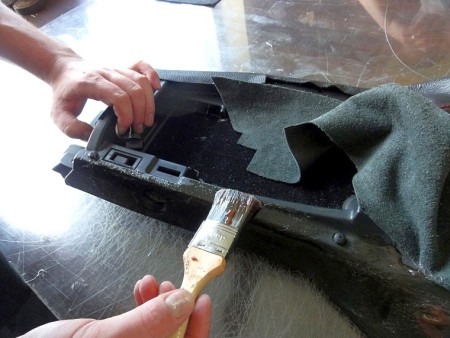
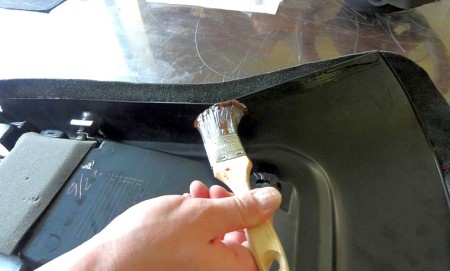
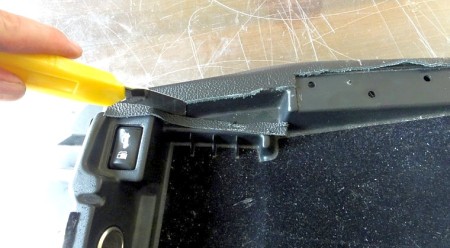
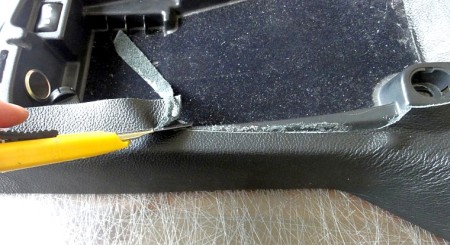
Again, let the glues on the sides settle and proceed with edges of the tunnel - apply glue to the back side of the tunnel along the edges and stretch the leather over the edges pressing it firmly against the back of the tunnel. You will have to make a few V-shaped cuts along curved edges and next to the seams for the leather to lie smoothly.
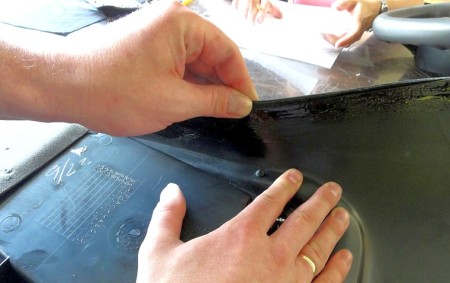
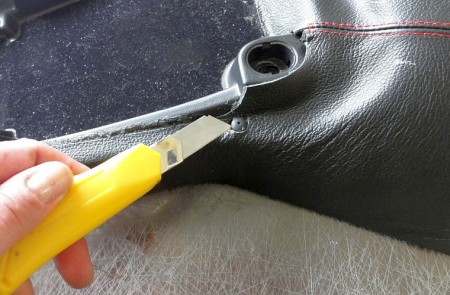
When the glue settles everywhere, trim the leather with an x-acto knife where hinges are as well as around rubber cushions and everywhere where it can interfere with closing lid.
And, last but not least, important remark about the lock hole - make one cut just to slide the key through this cut to lock/unlock the cover. The leather in the lock recess is flexible enough to allow you to open and relock the lid. Or if you never use the lock, just consider our cover a lock delete. :)
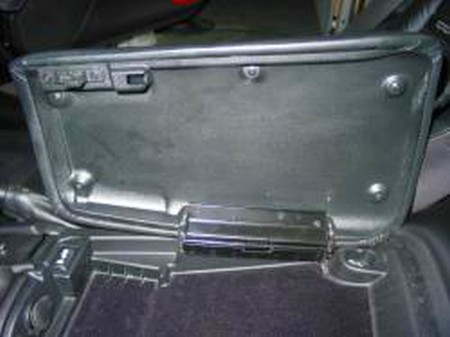
1.Open armrest lid. Remove the 4 screws holding the lid to the hinge.
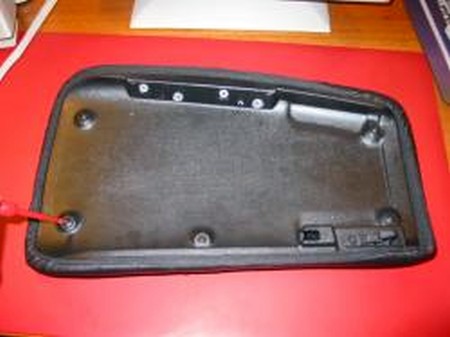
2. Remove the 7 screws holding the top part of the lid to the bottom one (5 big ones around the perimeter of the lid and 2 next to the latch).
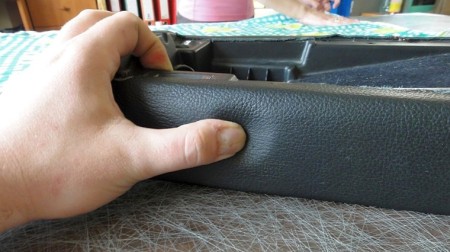
3. The top of the lid will fall free. Stretch the leather cover on it, making sure it's even and straight in all places.
4. Reinstall in reverse order of removing.
Useful tip
You have installed a product made out of genuine leather. As you know, to maintain a leather product in good condition, you should take care of it. We suggest occasionally (every 4-6 week for example) applying some leather conditioner/UV protector to keep your leather from drying up in the sun and cracking.
Redline Automotive Accessories Corp. will not be held liable for any labor, incidental or consequential damages of any kind. Proceed at your own risk.