1996-04 PORSCHE BOXSTER |
||||||||||||||
|
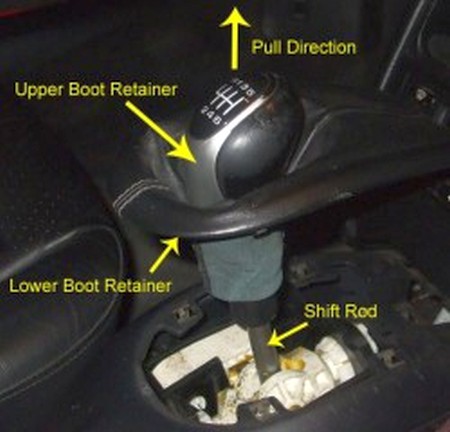
1. Use a flat bladed screwdriver or you hands to lift the bottom of the boot away from the console. It has small clips that hold it down on the console. They just pop out. Once the boot is free all around and if you have the standard shifter, you can then pull the shifter off. The amount of force may vary depending on your car. Some have found it very easy to remove, other have found it more difficult.
If it is difficult to remove, sit in the passengers seat, put the shifter in reverse and using the floor for leverage, pull on the shifter while pressing into the floor with your feet. I should come off. If not, try applying some heat to the neck of the shifter just below the knob, being careful not to damage the leather, and try again.
If you have a shifter other than the base shifter, you will need to use a T30 Torx screwdriver to loosen a screw under the boot in the front of the shaft of the shifter just below the knob. |
 |
|
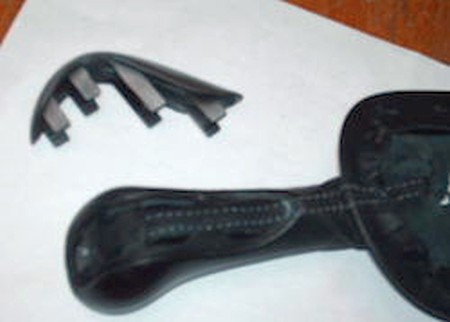
2. Pry off the gear indicator off the shift knob. Get a flat blade screw driver, and pry up around the edge of the part with the shift numbers, and it comes out. It is a tight fit, because it sort of pinches where the material is squashed in between. The clips have flat bars with a bit of a hook on the end to keep it from working itself out. |
 |
|
3. Now that the shift boot and its trim are out, carefully remove the vinyl boot from the frame (an x-acto knife will work great for that purpose), as well as off the shift knob (pull it off). Clean the frame and the knob carefully with sandpaper of any glue/vinyl residue.
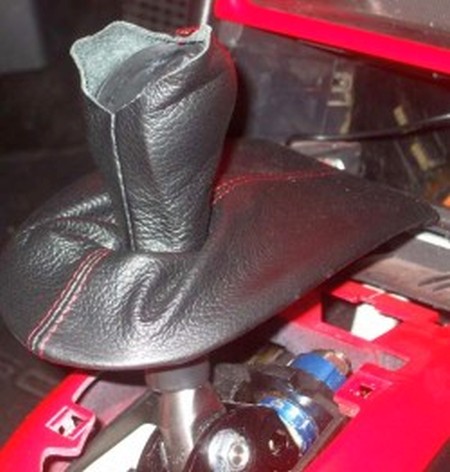
To install the shift boot you must glue the boot in the plastic frame, as well as over the shift knob. Any epoxy-based glue (3M makes some great glues for that purpose) will work perfectly. Just glue the boot in, obverving the alignment of the seams.
Then reinstall the boot and frame assembly (it will latch into place once you squeeze it in). |
 |
|
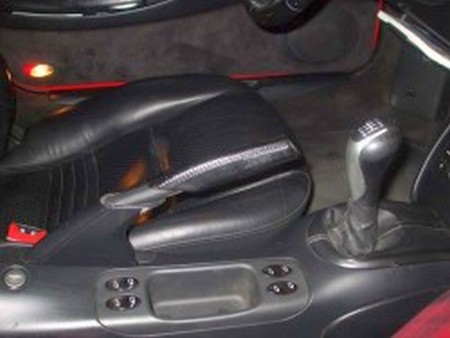
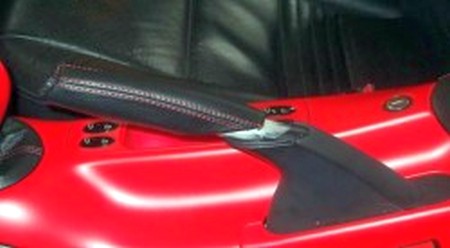
4. Slide cover assembly off of brake by pulling toward shifter Separate old cover from plastic sleeve and retainer Insert sleeve and retainer into new cover (apply adhesive on ends of sleeve if desired). |
 |
|
5. Slide new cover assembly back onto parking brake. |
 |
|
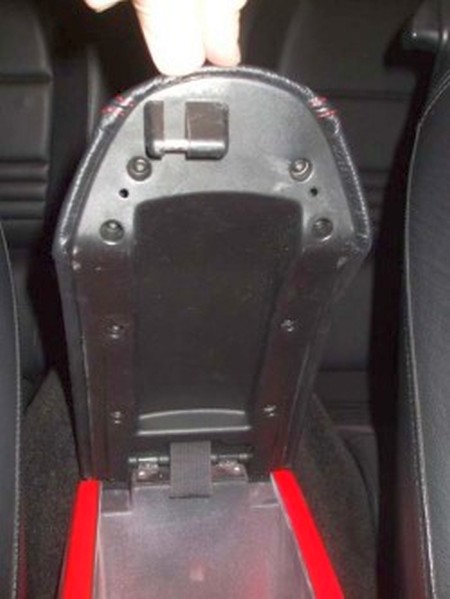
6. The center consold compartment lid consists of an upper and lower section held together by 8 Torx fasteners. The upper section can be easily separated from the lower section and recovered by following these instructions.
Remove 8 Torx fasteners to remove center console compartment top cover lid. Remove old skin from lid top cover (or if prefered, old skin can be covered over)
Apply adhesive to lid top cover. Contact cement, Automotive GOOP or any other epoxy-based glue will work.
Place new leather skin on lid top cover taking care to overlap the edges evenly so the stitching of the cover are straight Reassemble upper and lower lid sections by tightening 8 Torx fasteners. |
 |
|
Useful tip You have installed a product made out of genuine leather. As you know, to maintain a leather product in good condition, you should take care of it. We suggest occasionally (every 4-6 week for example) applying some leather conditioner/UV protector to keep your leather from drying up in the sun and cracking. |
|
Please subscribe to our newsletter.
Get an instant 20% discount and enter our montly $100 CASH sweepstakes!