2022-26 NISSAN 400Z |
||||||||||||||||||||||||||||||||||
|
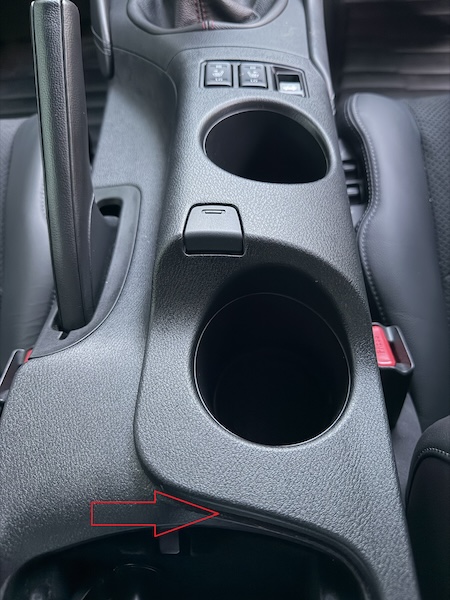
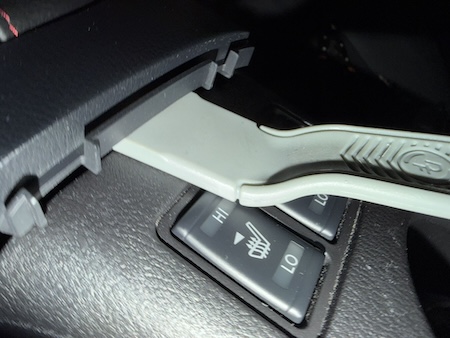
1. Slide the center armrest cover back and open it so you can get to the back edge of the molding by the cupholders. Use a pry tool under the back end of the molding around the cupholder section to gently pry it up. |
 |
|
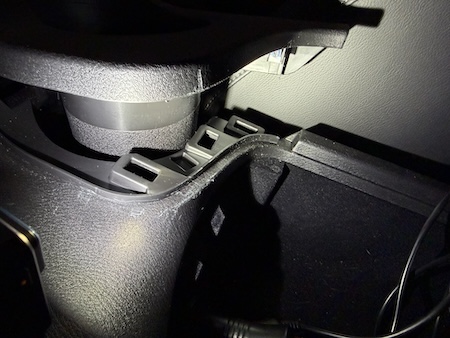
2. Once you can slip your fingers underneath, use them to finish gently pulling up the molding. You will feel the metal clips give way as you pull upwards. |
 |
|
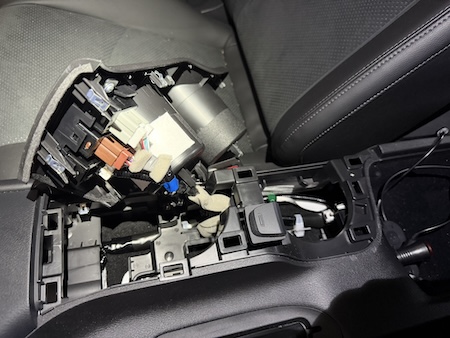
3. You do not need to disconnect the wires if you are careful not to jerk anything. You can set this section gently to the side in the passenger seat. |
 |
|
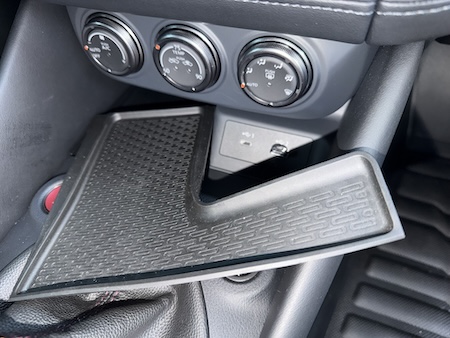
4. Remove and set aside the rubber phone cubby pad. |
 |
|
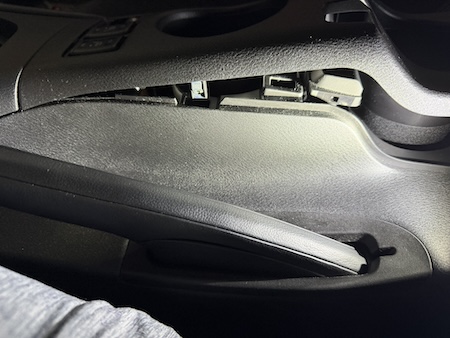
5. Gently pry up the molding around the shifter, starting from the back edge by the cupholders. |
 |
|
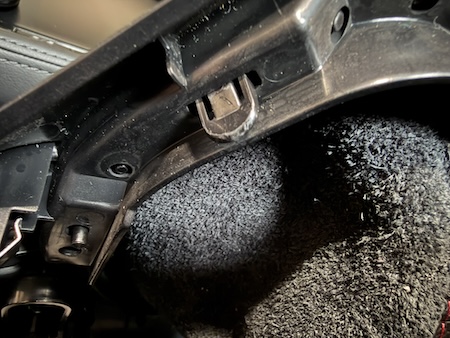
6. Once you can fit your fingertips under the molding you can gently lift it up, releasing the clips around the edges as you go. Do not lift it very far because underneath are the wires connected to the Start and S-Mode buttons. You don't need to disconnect these wires if you are careful not to jerk them as do the next steps. |
 |
|
7. Remove the factory shift knob. By far the hardest part. There are several youtube videos and tips for doing this. What worked for me that kept the factory knob in mint condition is using a Rigid 31350 2" strap wrench, a hair dryer, large vice grips, a small piece of leather belt, and brute strength + patience. |
 |
|
8. With the knob removed, you can now slide the plastic ring off the top and set it safely aside. The boot is held to the molding with several silver screws around the perimeter. |
 |
|
9. Reverse steps to install your new custom boot to the plastic ring, by wrapping the tabs around and slipping them over the plastic spikes. Push the boot-wrapped ring back into the molding, using your fingers or a pry tool to carefully ensure the boot doesn't bunch up as you slide the ring back into place. It's a snug fit but you can gently pull the boot from underneath as you slide the ring into place, so it doesn't bunch around the edges. Once the ring is seated in place, squeeze the pieces together until the four plastic tabs catch. Inspect the boot to make sure the leather is smooth and snug as you want it. Secure the ring back into place in the molding with the silver screws. Use a new ziptie to secure the tabs of your new boot to the stalk by pulling the leather tabs through and then cinching them tightly to the ring. |
 |
|
10. Clean the threads on your stalk with a wire brush to remove any corrosion or dried threadlocker. Screw on your shift knob before you put the molding back in place. Although you won't need to twist it quite so hard this time, it's best to again prevent your shift stalk from twisting as you get the knob screwed snugly back in place. |
 |
|
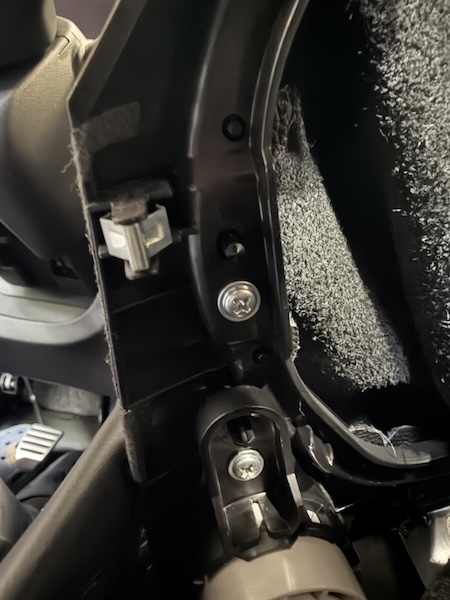
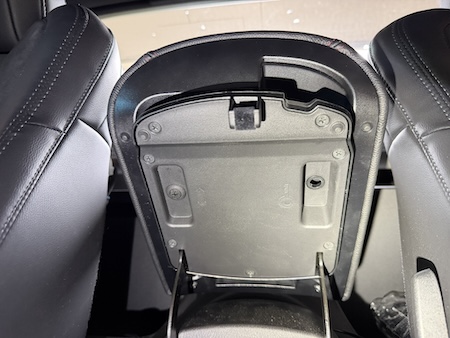
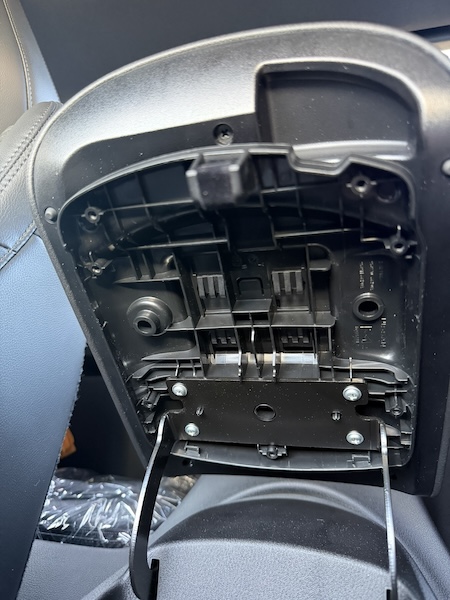
11. Open the console and remove the seven black metal screws and the one black plastic screw. |
 |
|
12. Using a pry tool at the top edge, gently pry loose the cover and set it aside. |
 |
|
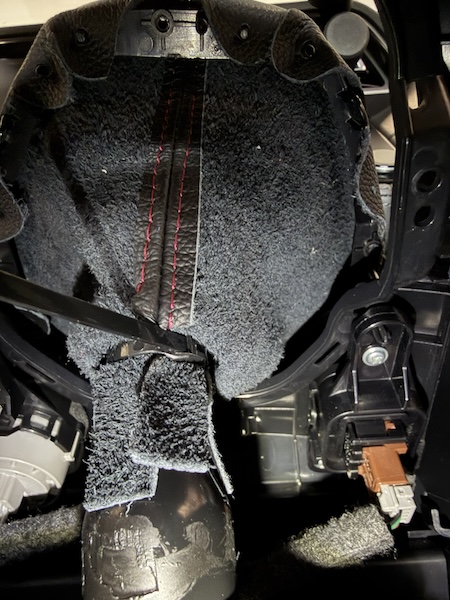
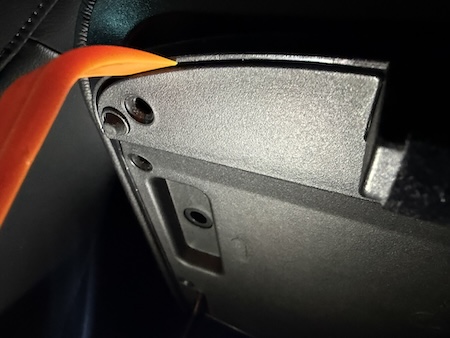
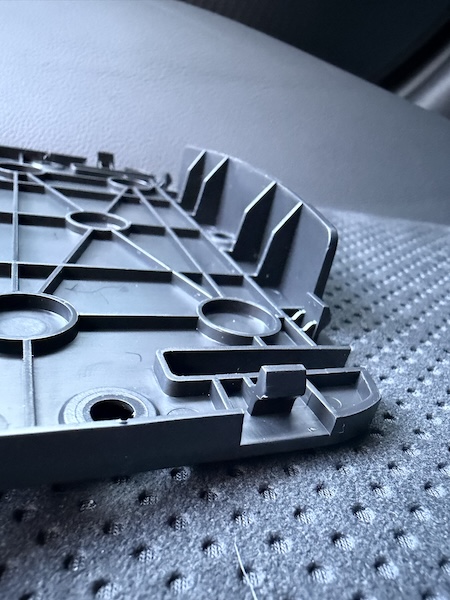
13. There are four plastic clips at the bottom inside of the cover so be careful not to snap them off. As you gently pull away the cover you will be able to slip your tool into each of the slots at the bottom corners where these clips are to release them without breaking them off. |
 |
|
14. Now remove the four silver screws holding the armrest cover. Support the armrest as once these are out the armrest becomes unattached and can be removed to install your new cover. |
 |
|
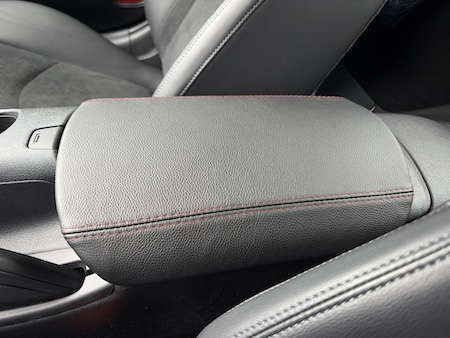
14. Install the cover on the armrest. Use contact cement or similar glue, align the cover nicely on the armrest and fold the leather around the edges. Contact us if you need assistance with this step, w'll be happy to provide you more detailed pictures from other vehicles - but the 400Z armrest has a shape that makes the cover pretty easy to install. |
 |
|
14. Reverse the process to reinstall the armrest with your new cover. When installing the black plastic cover, insert it flush along the bottom edge first (where the plastic clips are) and then gently close it up while using the bottom edge as the pivot point. You will feel the cover snap into place as you push it flush closed, and then screw it back on securely with the black screws. |
 |
|
Useful tip You have installed a product made out of genuine leather. As you know, to maintain a leather product in good condition, you should take care of it. We suggest occasionally (every 4-6 week for example) applying some leather conditioner/UV protector to keep your leather from drying up in the sun and cracking. |
|
Please subscribe to our newsletter.
Get an instant 20% discount and enter our montly $100 CASH sweepstakes!