Updated by Mike on 2024-02-20. Reading time 9 minutes.
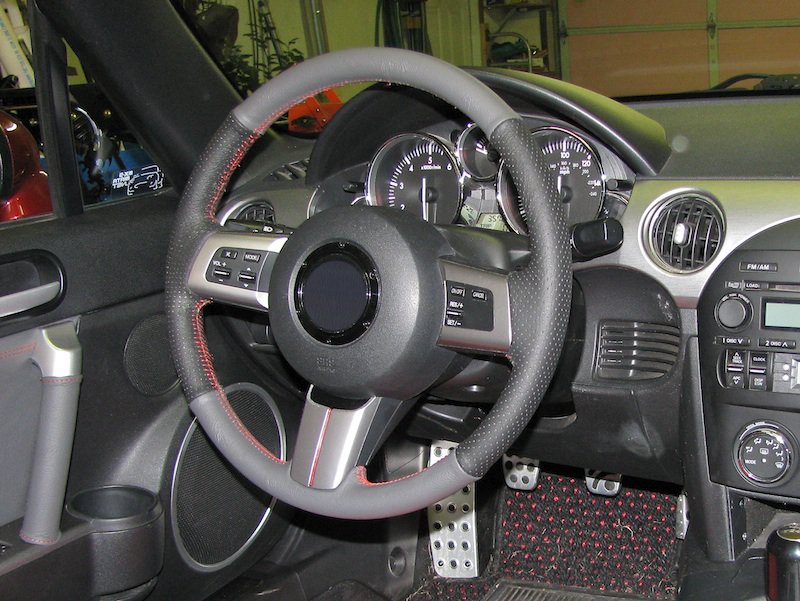
Installing a steering wheel cover can appear to be much harder than it actually is. In reality it's not very challenging. However, the easiest way to put on a steering wheel cover requires a lot of due care and patience. This guide shows it on a Mazda Miata car, however the same principles apply with minor differences to all vehicles.
Warning!
To install in-vehicle, you will have to remove your airbag (if your wheel is so equipped) and you will be working with glue inside your vehicle. Make sure to protect all surfaces from glue stains! On the other hand, completing the installation outside the vehicle, requires you to remove the steering wheel completely, which is best done with specialized tools (wheel puller or similar). Please consider having the removal part done by a qualified automotive technician.
We recommend considering our steering wheel cover installation service if you are unsure of your ability to follow the procedure explained in this article on your own.
A steering wheel cover will come with needles and spare thread. It will also have two parallel threads running down the edges, which you will lace together using the spare thread. With our steering wheel covers you will receive enough thread to do it three times over, so there is room for trial and error. Keep reading to learn the easy way to put on a steering wheel cover.
Redline Automotive Accessories Corp. will not be held liable for any labor, incidental or consequential damages of any kind. Proceed at your own risk.
How to put on a steering wheel cover: Inside or outside the vehicle
This is a big decision when putting on a steering wheel cover that has both pros and cons. Ultimately, we would settle for inside of the vehicle, the pros outweigh the cons, but you do have to be careful to prevent glue stains in your car.
Inside of the vehicle, apart from this one downside, has only pros: less work, less risk, no need to create or obtain a vice-type apparatus that will hold the wheel down while you put the steering wheel cover on it.
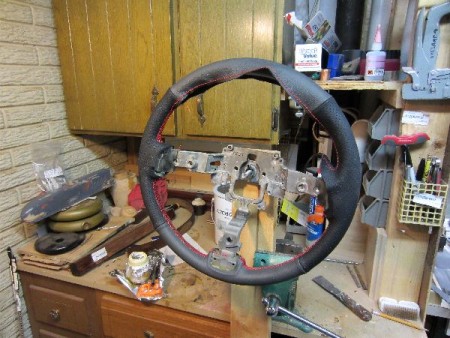
Doing it outside the car means you'll have to come up with a rig like this one. Created by drilling a hole through a wood board to run a bolt through, using a big wing nut to secure the wheel to the bard, and vice-grips to hold the contraption on your working table:
Do you really need one? Well, yes and no. You could do it on your lap, but it will be backbreaking (expect a cramp in your neck as well). So unless you have the tools and equipment needed to create a rig like this, inside of the vehicle might be a better option. However, the smaller the vehicle, the less comfort you’ll have when moving around, so take that into consideration as well when deciding your course of action.
How to Take Off the Steering Wheel Cover
Outside of the vehicle - steering wheel removal
Airbag removal warning! If your car is equipped with the driver's airbag you will have to remove it. While the procedure is quite straightforward (see next step) it does require due care to prevent airbag damage. DO NOT PROCEED with airbag removal unless you feel confident that you
know what you are doing!
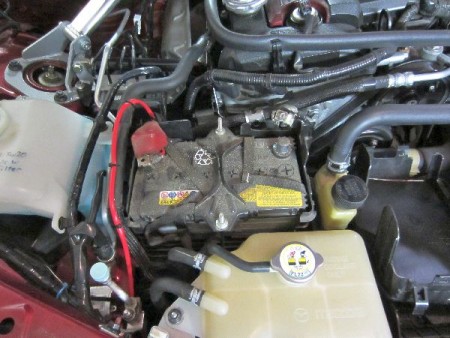
Disconnect the battery, turn your headlights on and let the car sit for a minute or two so that any residue charge dissipates. This cannot be emphasized enough.
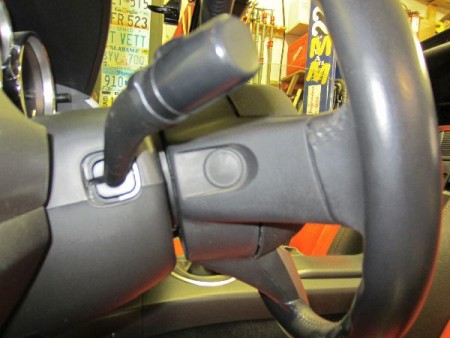
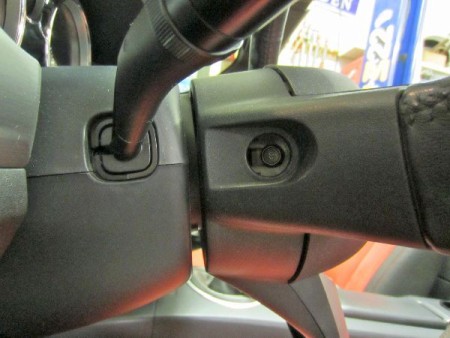
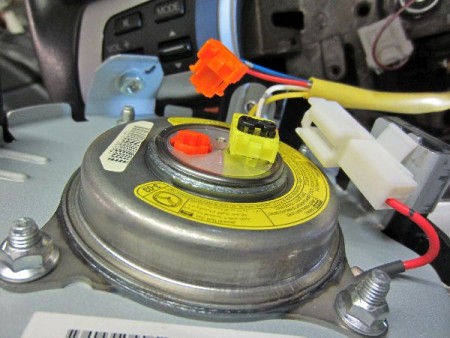
Usually, there are plugs on the side of the steering wheel columns which need to be removed to access bolts or prongs that attach the airbag, which is the first thing you need to remove. On some, even very new vehicles, the holes are very small and have no plugs. Make sure you research this online for your specific vehicle type!
Remove the horn, button panels and airbag connectors while keeping the airbag facing away from you.
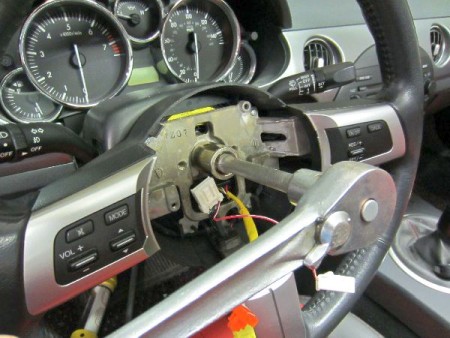
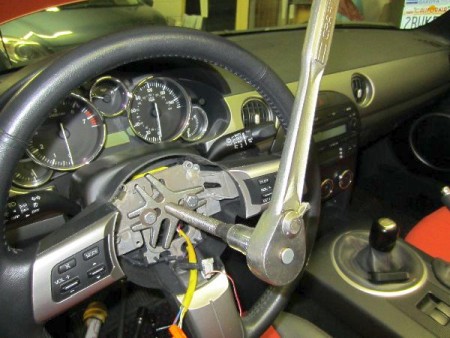
Remove the center nut on the steering wheel. This is a lock nut so expect it to be snug. Use a wheel puller to remove the steering wheel (this might be the place where you might want to consider using your local mechanic instead of tackling it yourself.) DO NOT push, pull, or beat on the wheel to remove it.
Inside of the vehicle - surface protection
If you decided to do it inside of the vehicle, make sure you have room next to the car to keep the glue. You don't want a can of glue to tip over on your seats, console, or carpet. With low cars - just keep the glue on the floor next to you and reach it through the door. If it's a truck - you might need a table accessible through the door wide open (you don't want to ding your door on your own table!). Make sure the surface is aired (glue fumes), and make sure to protect everything in your interior that could get stained with glue.
How to take off steering wheel cover (the old one)
First, make sure that this is necessary. Some covers are designed to go OVER the factory leather. We always indicate this in the description of each steering wheel cover product that can be found on our website.
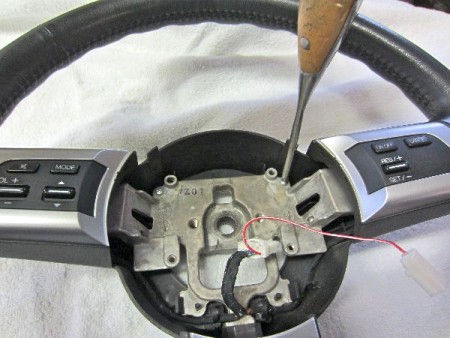
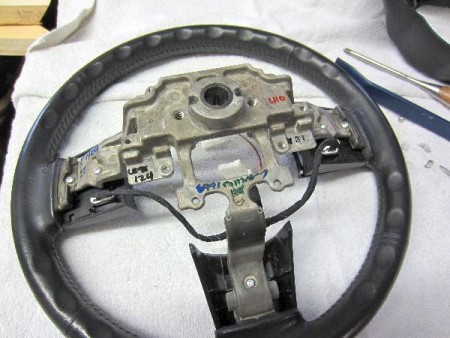
Regardless, now is the time to get rid of all the hardware and button panels on the wheel. Each wheel differs, but common sense always prevails. You want to get the point where the entire surface of the old steering wheel cover is exposed.
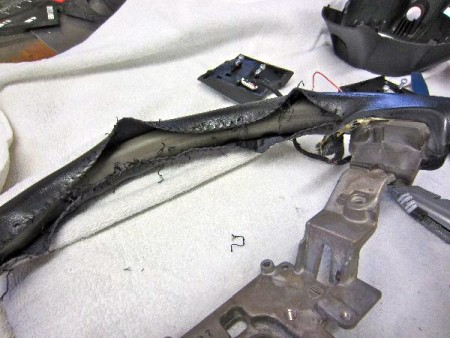
Removing the stitching from the factory cover, this is the point of no return. And again - MAKE SURE YOU NEED TO DO THIS BEFORE YOU DO IT!
Putting On the Steering Wheel Cover
Wondering how to make a steering wheel cover fit tighter and stay where it's supposed to be? Keep reading!
Test fitment and wheel preparation
Align the cover on the wheel very carefully. Check for any discrepancies. It is not that easy to pull it on, it is going to be a good 4 inches shorter than the circumference of the wheel and you will need to stretch it laterally to make it go on all the way.
Make sure to figure out which side is the front and which is the rear, start on top dead center first and move evenly towards both sides. Once you have it lined up, check and recheck everything several times. Make sure you're comfortable with what's ahead of you.
As our wheel covers often come in two-tone, the pattern of the seams on our product may not match the seams on the factory cover. In that case, you will need to carve grooves (reliefs) in the wheel surface to accommodate our seams. Use a retractable blade to do that, most wheels have a surface that renders itself to shaving off quite nicely. A 2-3mm groove (between 1/16 and 1/8 of an inch) will suffice. Be careful not to cut your fingers, however!
Gluing the outside
Glue the new cover in place, on the outside rim of the wheel ONLY. Do not glue it all the way to the inside, you must allow enough free leather for it to be pulled into place before stitching. If your wheel comes in perforated leather, use glue sparingly and if you notice any seepage, wipe it off immediately. We recommend contact cement as the glue of choice, however any epoxy-based glue for textiles and plastics will work.
Instead of glue, consider a very thin double-faced tape. Has to be thin so that you can't feel it through the leather once you're done. If that's your course of action, use a thin strip of double-faced tape approx 1/8 from each edge (front and rear). Put it on the steering wheel cover, not the wheel itself! When you're lacing the wheel later, most of the work is supposed to be done by glue or tape. Lacing is just finishing it off and preventing it from unsticking. Make sure to pull the edges of the cover close together when gluing already, ie. before the glue cures, or before the tape sticks to the actual wheel.
Making the ends meet
Once the leather is glued to the rim of the wheel, you should be able to stretch it with your fingers to close the gap between the ends pretty much down to 0, or almost. If, however, the ends won't meet, there is a trick that will help.
Dampen the leather profusely with a wet sponge, applying it from the inside of leather (the furry side) to make it more stretchy. It needs to be damp, not wet. When you apply enough wetness, you will notice it becoming softer and more pliable.
How to lace a steering wheel cover on
Now is the time to start lacing. Or stitching, if you will. Or sewing, but we really don't think you can call it than since you're not actually punching holes through the fabric (or leather).
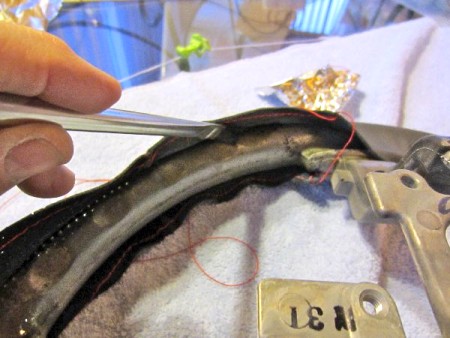
Tie the two parallel threads together with a knot (double at least, it has to be strong) one on end of each section (as in - length of wheel between two adjacent spokes) and start looping the thread through the parallel threads pre-sewn on the steering wheel cover.
Pull the thread tightly and hold it tight when you run the next bit, don't let it get loose in the part you've already done as it won't be easy to tighten it again across several loops. Tie a knot on the other end and proceed to the next section.
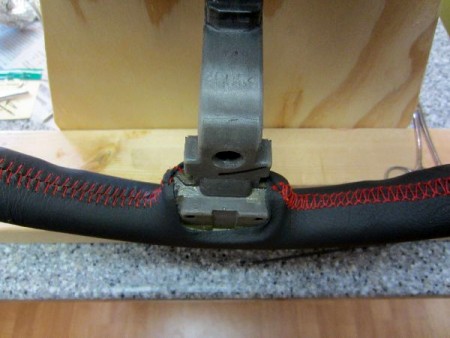
There are many patterns available, use whichever you prefer. Some require removal of the pre-sewn threads (baseball stitch or cross stitch, for example). The quickest, easiest, and most common is looping through every second step of the pre-sewn threads. In our opinion, it also looks the best.
The one on the left in the picture below is baseball stitching.
The one on the right loops through each step of the pre-sewn threads and in our eyes it's just too dense.
NOTICE! Not all patterns are applicable to Alcantara. Alcantara works differently than leather, it is less stretchy and more prone to ripping. We do not recommend stitching patterns that involve removing the pre-sewn parallel seams. Only patterns involving lacing the pre-sewn seams should be used on Alcantara steering wheel covers.
If you have some evenness (puckers) in the leather after lacing it up, heat the leather with a hairdryer and massage them out.
That's pretty much it! If you took the path of removing the wheel from the car, now's the time to put it back in, reversing the steps taken to remove it. Oh, and make sure to ENJOY!!!! It was tedious, and it took time, but the end result is really well worth it!
About the author
Mike is the owner of Redline Automotive Accessories Corp, manufacturer of steering wheel covers since 1999 under the brand name RedlineGoods. Mike has participated in installation of numerous steering wheel covers for various vehicles in the almost 25 years of running this website.
Shop our steering wheel covers
We have been manufacturing these beauties for years. We take pride in our manufacturing process, providing a product that is of the highest quality. A small, family-owned business with heart — you can trust RedlineGoods to make your steering wheel better than new with our steering wheel covers. Shop new steering wheel covers with us! Browse steering wheel covers for popular vehicles like Ford Mustang, Chevrolet Corvette, Chevrolet Camaro, Mazda Miata, and more!
We have been enjoying an average rating of 4.8 out of 5 stars from our happy customers! We invite you to become one of them!