|
||||||||||||||||||||||||||||
|
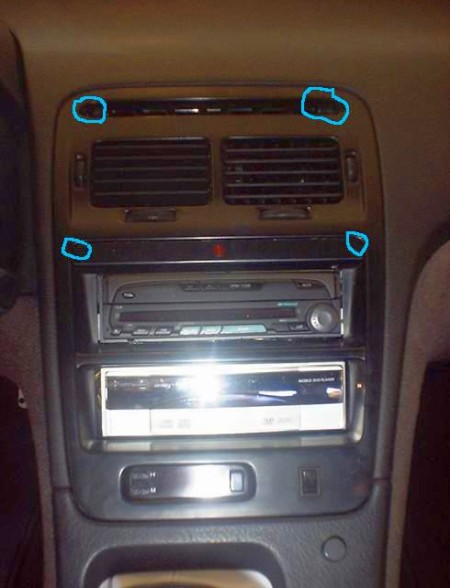
1. There are two cosmetic clips sitting on the top of each side of the upper vents. Using a small flat-blade screwdriver, remove these clips to expose the bolts beneath and then remove the bolts. 2. Underneath the two vents and above the stereo space is a long flat cosmetic cover that is held in place by two clips behind it. Again, use a small flat-blade screwdriver to pinch the clips and remove the cover. Be VERY careful not to break these clips. Unscrew the two bolts beneath this cover.
|
 |
|
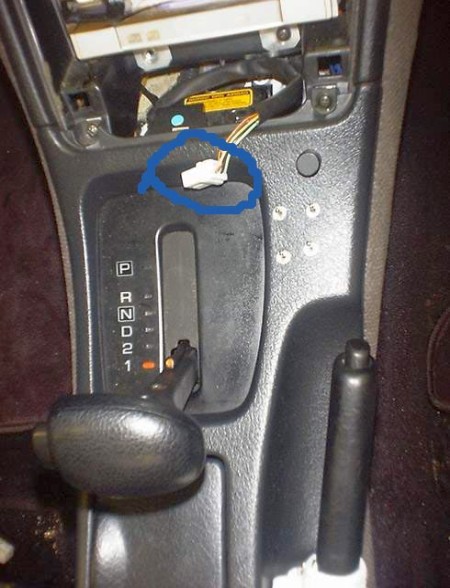
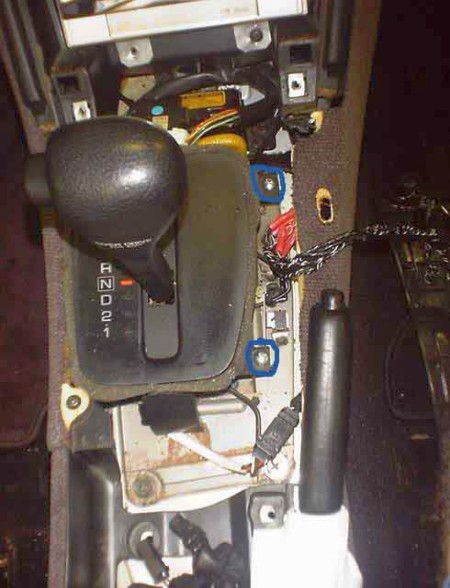
4. Remove the two screws that are exposed which fasten the top of the plastic console trim to the dash. On this picture they are to the left and the right of the clock connector (the connector is circled in blue). |
 |
|
5. Pull out the ashtray and remove the bolt underneath it. |
 |
|
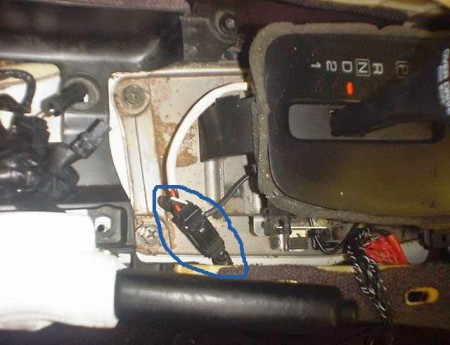
6. Put the shifter in NEUTRAL. Remove the connections to the lighter, ashtray light, and mirror/shocks/mirror defrost cluster, and place the trim piece out of the way. |
 |
|
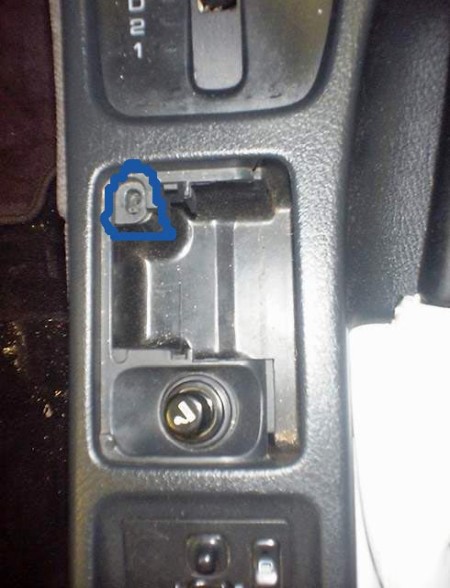
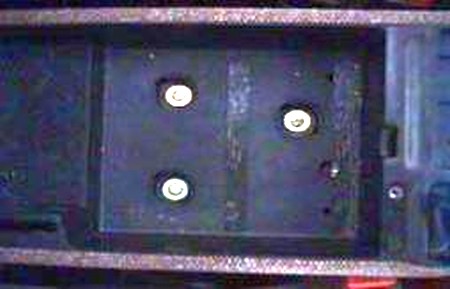
7. Remove the two screws holding the front (sides) of the utility tray (rear console) to the front console (picture above). These are pictured just below the button of the emergency brake (driver side of trim) and just in front of the base of the emergency brake (passenger side of trim). Open the utility tray, and use a flat-blade screwdriver to pull up the front (largest) felt covering to expose three bolts. Remove these bolts. |
 |
|
|
|
|
NOTE: If the emergency brake is loose, i.e. pulls all the way up easily, now is the time to tighten it up. There is a nut at the base of the brake that can easily be tightened down while it is exposed. Before you do that, you should tighten the brake shoes though. Refer to http://www.twinturbo.net/ttnetfaq/FAQpages/prknbrake.html for details on doing that. In most cases the shoes are the culprit for loose e-brake and tightening the nut isn't even needed. Installation of the new shifter boot |
|
|
1. Remove the 4 screws holding down the shifter plate. There are two on each side. |
 |
|
2. Unplug overdrive plug. It may be tucked under the shifter a little and held in place with some clips that just fold over. |
 |
|
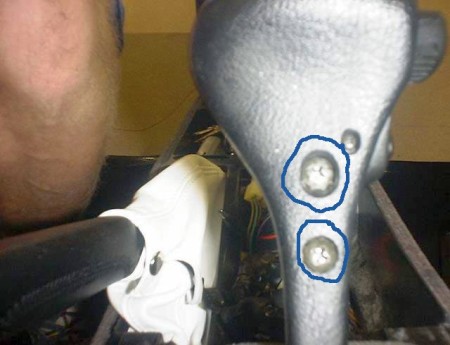
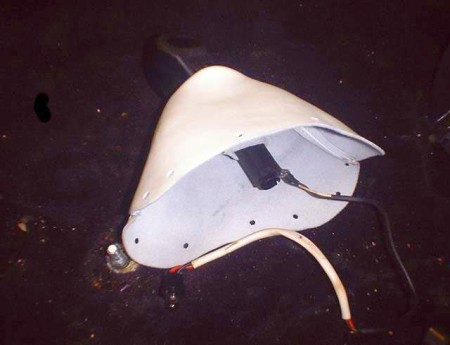
3. Remove the 2 screws on the front side of the shifter. You should now be able to remove the shifter. As you lift it up a little, the overdrive button will pop out.
|
 |
|
4. Install new shifter boot over shifter. |
 |
|
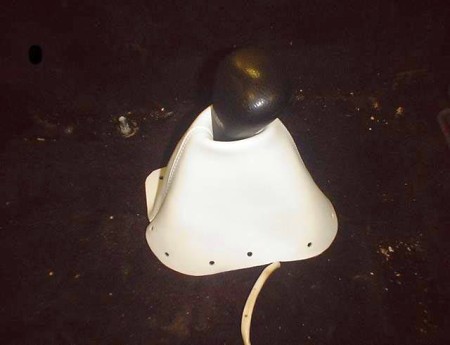
5. Pull rolled edge up until it meets the overdrive button and straighten boot front and back so stitching is straight. 6. Run the shifter with new boot back through shifter plate Screw a 1/4" screw with a washer through one of the front holes into the plastic edge of the shifter plate making sure the stitching is still straight. 7. Screw two through the rear of the shifter and then one on each side pulling the edges fairly tight. |
 |
|
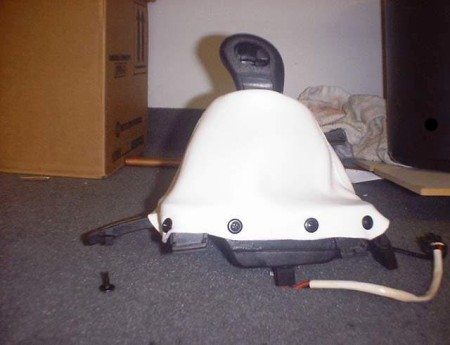
8. You can now fill in the rest of the shifter boot holes screwing it down onto the shifter plate. 9. Place the new shifter back down onto the shaft. 10. Reinstall the overdrive button. To do so, you must pull the shifter up a little bit and then back down to "lock" it in. 11. Replace the 2 screws in the front of the shifter. 12. Screw the 4 screws back in that hold the shifter plate down. |
 |
|
Installation of the new e-brake boot That's pretty obvious we hope. Flip the utility tray over, remove the bolts and the metal plate holding the old boot in place and put the new one in. Then reinstall the plate. Our boots don't come with mounting slits but they do have the mounting holes. Supposedly, although we haven't been able to verify this, there might be variations in the layout of the slits. Therefore we had to leave it up to you to make them fit your holding plate. Re-assembly This one is easy. Use reverse order and you're done! Afterwards form the boots to your liking.
You have installed a product made out of genuine leather. As you know, to maintain a leather product in good condition, you should take care of it. We suggest occasionally (every 4-6 week for example) applying some leather conditioner/UV protector to keep your leather from drying up in the sun and cracking. |
|
Subscribe to our newsletter to get an instant 20% discount!