2001-07 VOLVO XC70
shift boot installation guide

Looking for a Volvo XC70 shift boot? We offer the best ones out there!

VOLVO XC70, S70, V70 2001-07 INSTALLATION INSTRUCTIONS


EBRAKE BOOT

1.
Pry the ebrake assembly up starting from the rear.

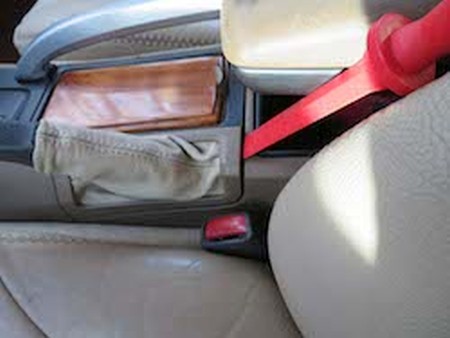
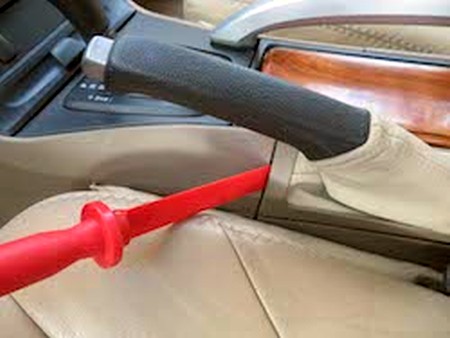
2. Use an upholstery tool, but a screwdriver or something still flatter like a butter knife might be even better.

3. The latch/catch is fairly small and easy to trip open. Pressing straight down with your tool, then angling a bit to push up will usually do the trick.

Pull the brake handle up and slip the bezel over it with the old boot turning itself inside out. It will slip over the handle with relative ease.

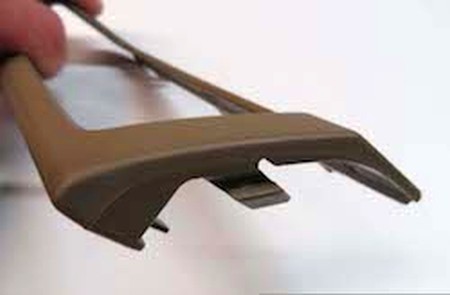
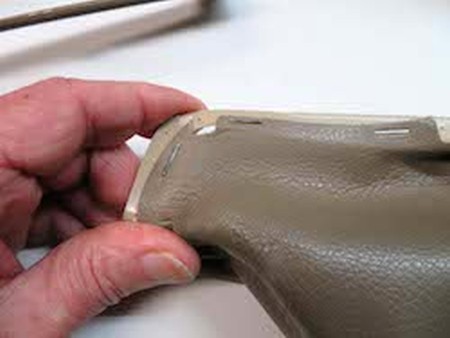
4. Once removed, you can see the indents where the two layers of the plastic bezel were clamped and adhered together. They will align with the notches of your boot. These should snap easily apart with a screw driver or a flat blade.

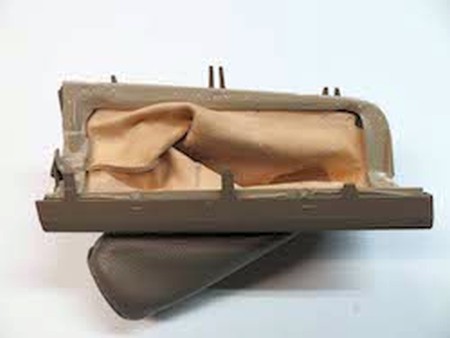
5. This picture shows the whole assembly after the layers have been separated.

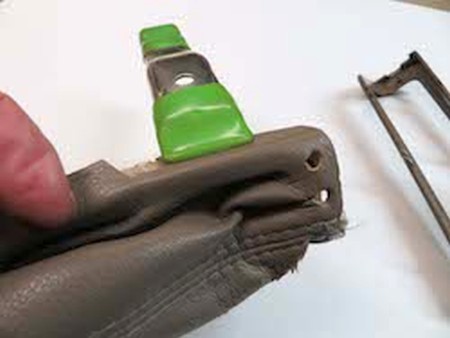
6. A close up of the staples used at the factory to assemble the boot to the lower bezel. You will be unable to get staples through the plastic without specialized tools, so you will be using either a plastic welding epoxy, or another strong durable glue of your own choosing.

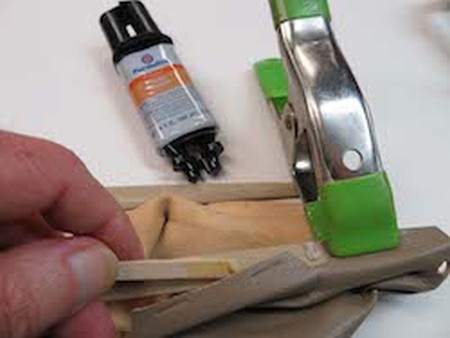
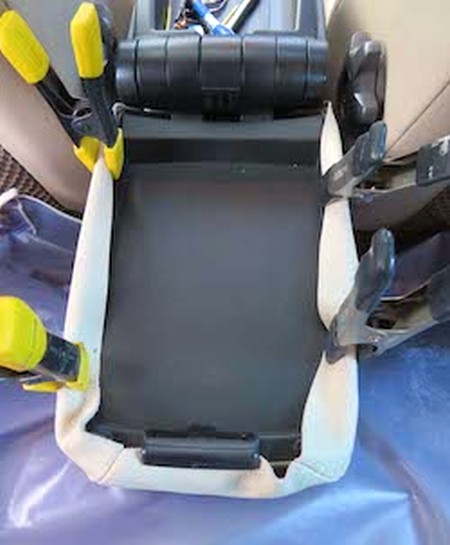
7. Align the two holes on the narrow end as the starting point, and use a powerful spring clamp to hold it in place.

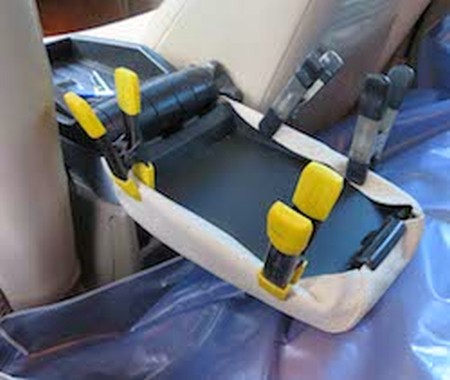
8. Start glueing. With each new section of boot (between the notches in the leather), apply the glue and clamp it into place, leaving the clamps for a least an hour or so. PW epoxy hardens in 5 minutes and cures in about 12 hours. Refer to the can of the glue you are using for detailed curing instructions, and follow them.

9. It is quite a stretch to fit your new boot on the bezel, so keeping it clamped during assembly will prove very helpful. Just make sure the notches in the leather stay aligned with the old factory glue joints, and that the small holes stay aligned to the factory holes where the pins from the upper bezel fit down into them.

With that you are home free. There is a good chance you can snap the two bezels back together without re-gluing them, but you can always apply some PW epoxy to the old glue spots, clamp them and let them cure.

The boot will be a tight fit over the handle, but no worries, you will get it on without too much trouble. A little dab of leather conditioner to act as a lubricant might come in handy as well.

ARMREST COVER

Using spare parts, I have made attempts to remove the arm rest cover from the console, even with the entire center console out of the car, and found myself at a complete loss as to how to disengage the hinge that holds the lid and (optional) cup holder from it. I would caution you not to even try, but instead to work with protective drop cloths anywhere that potential adhesive drips or overspray might occur. I used a plastic apron. While instructions for removing the whole console from the car can be found on YouTube, I simply believe that would be overkill, since you’ll still probably hit a dead end with the console lid hinge either way. Just be careful spraying that adhesive around.

10. To start, if you ordered your cover with a foam pad, you will want to apply that first. The product used was the 3M 90 Automotive, available at Lowes and other venues. I must say it does a great job and holds up very well.

If you are using this or another spray adhesive, due to the difficulty involved in removing the arm rest from the car, we recommend spraying a small amount in a small bowl or something like a clean shallow container outside of the vehicle. Then you will want some cheap hardware store bristle brushes to apply it with. It will be possible to brush that on the surface of the lid without having to worry about overspray. The foam and the new leather piece can easily be sprayed on first outside the car.

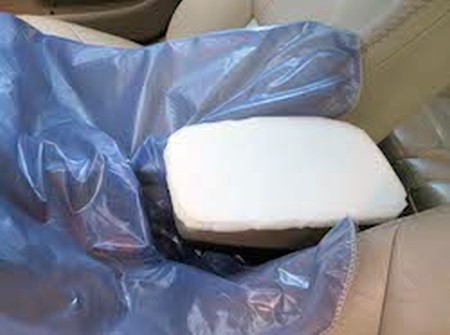
11. After the foam is attached (if your RedlineGoods armrest cover was ordered without padding, it doesn't apply to your install, obviously), spray the leather and very carefully center it and lay it over the assembly without yet applying any adhesive to the sides of the lid. That will help you avoid having the sides of the leather catching on in the wrong position. Then flip the lid open and clamp the leather tightly from the inside.

12. From this point you can release the clamps from one side after the other to be able to paint the side edges. From there you can move on to apply the adhesive to the bottom edges and the inside the vertical edges of the interior side of the lid.

We suggest not gluing the inside corners until you know for certain where you will need to cut off any excess. Same with the flat inside part of the cover. It would be wise to avoid getting any adhesive on that part as well, especially if it also functions as the bottom of a cup holder. Just do the inside vertical edges, and reuse your clamps to hold it tight and flat against the remainig ones.

Once you have come that far, you will need to trim around the latch, the inside corners and the hinge area to cut off excess leather. Final touch up with adhesive in those areas will likely be needed.

ENJOY YOUR NEW LEATHER ITEMS!


Useful tip

You have installed a product made out of genuine leather. As you know, to maintain a leather product in good condition, you should take care of it. We suggest occasionally (every 4-6 week for example) applying some leather conditioner/UV protector to keep your leather from drying up in the sun and cracking.

Redline Automotive Accessories Corp. will not be held liable for any labor, incidental or consequential damages of any kind. Proceed at your own risk. 

Copyright RedlineGoods.com. All rights reserved.

Save 20% today!

E-mail:

Subscribe to our newsletter to get an instant 20% discount!

Get discount
Skip