2008-11 SUBARU IMPREZA |
||||||||||||||||||||||||||||||||||||||||||||||||||||||||||||||||
|
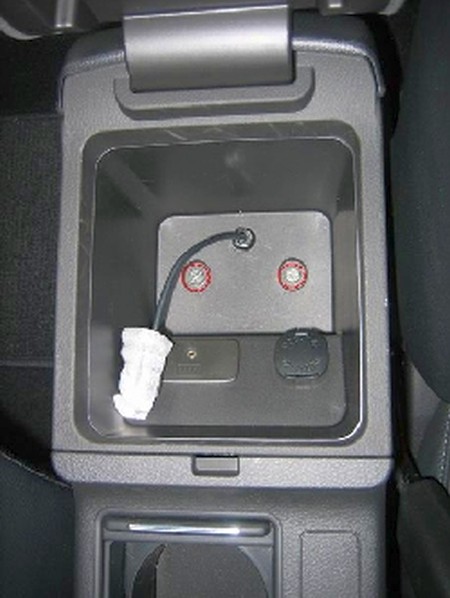
1. Remove the 2 bolts (circled in red) that are in the arm rest that are bolting down the arm rest to the chassis. |
|
|
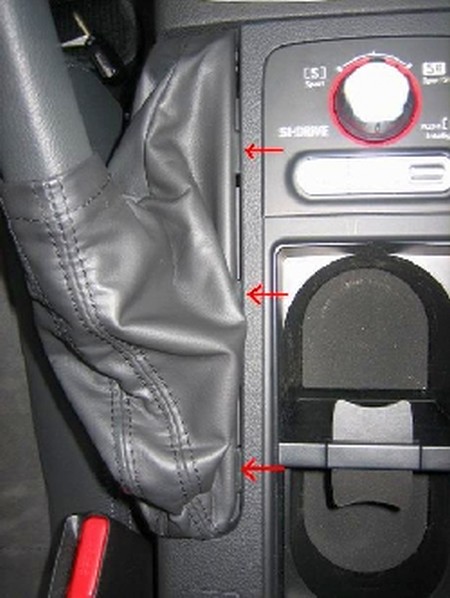
2. Push the Ebrake boot up towards the roof of the car. There are three tabs (see red arrows) that you need to release. If you push straight up they will release. You can also push the boot slightly towards the driver’s seat to help this. |
 |
|
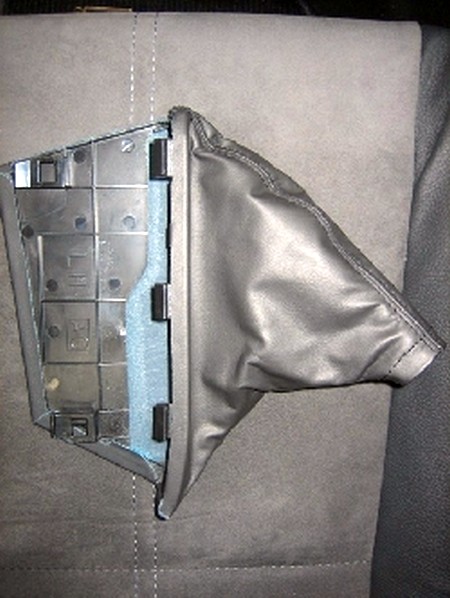
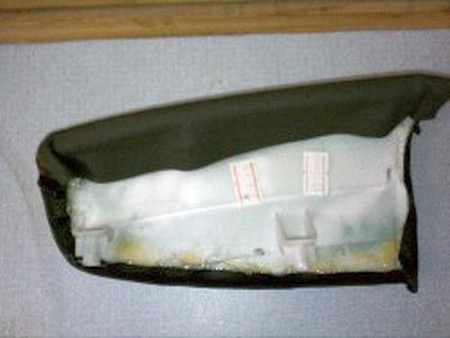
3. Once the tabs have released, just slide the entire boot over the handle. You will now need to remove the old boot from the plastic frame. The leather is bonded to the plastic frame with adhesive and you can use a hair dryer to soften the adhesive and gently peel off the old boot. Super glue works well to attach the new boot. |
 |
|
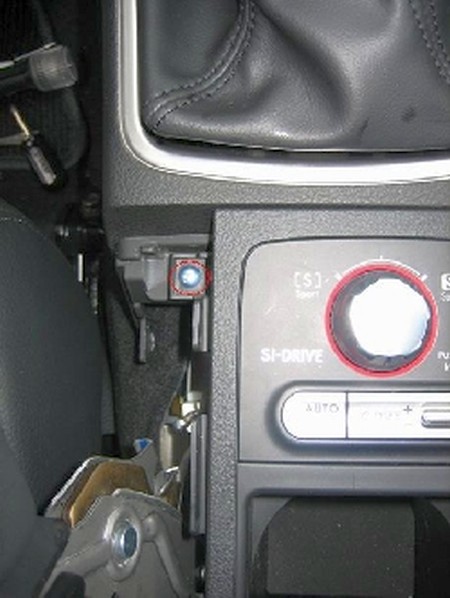
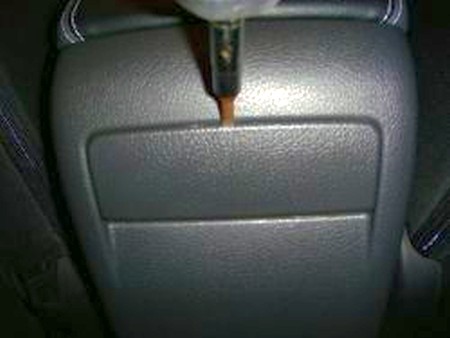
4. Under the Ebrake bolt is a bolt that needs to be removed (circled in red) |
 |
|
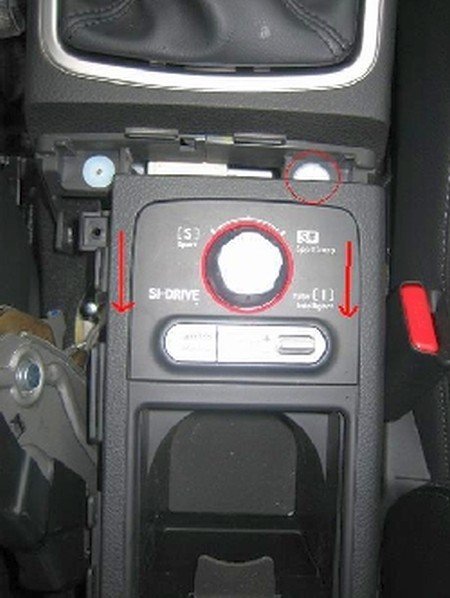
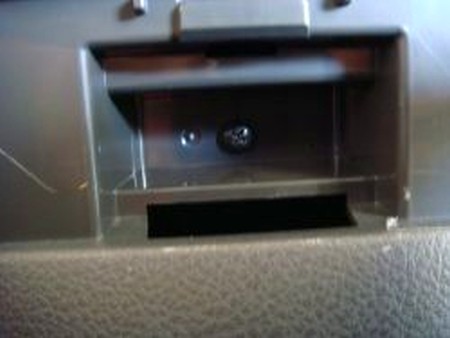
5. Slide the entire center console towards the rear of the car. DO NOT LIFT TOWARDS THE ROOF OF THE CAR AS YOU WILL BREAK THIS LITTLE WHITE CLIP (circled in red). When you reassemble the center console later, it helps to separate this clip into two pieces and place the upper part in the center console. |
 |
|
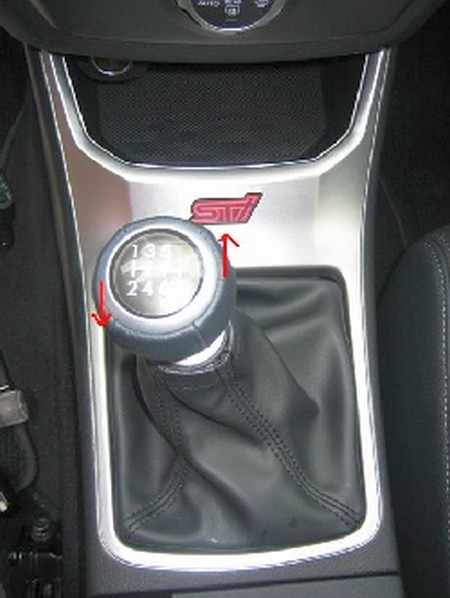
6. Remove the shift knob by turning it counter-clockwise |
|
|
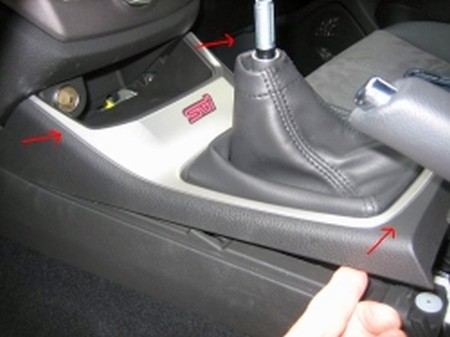
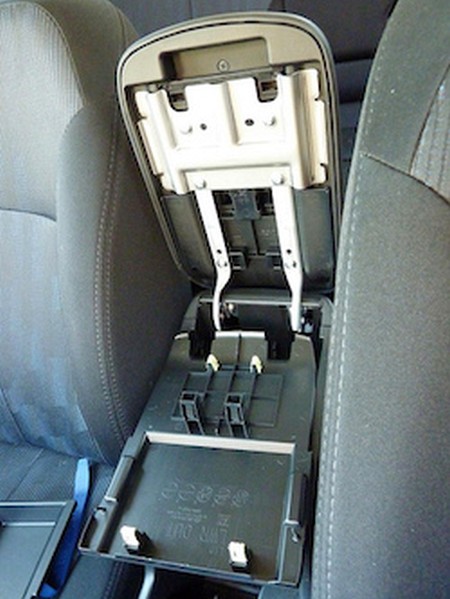
7. Then grab the tray and the shift boot portion and pull it straight back as well. However BE VERY CAREFUL, as there are small fingers that hold the whole assembly to the lower part of the dash. |
|
|
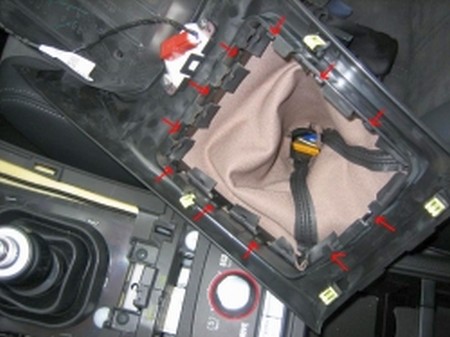
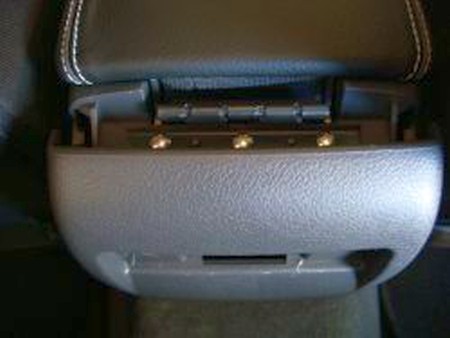
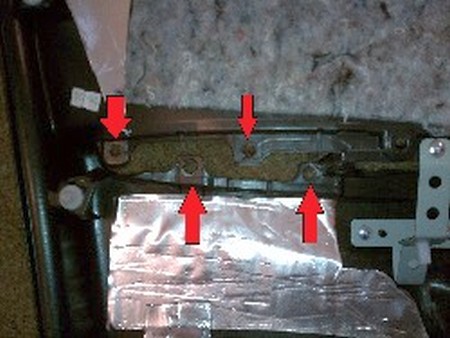
8. Flip that piece over (be careful not to disconnect the wires) and remove the shift boot and frame by pushing on the tabs (see red arrows)
9. The shift boot and frame will then lift out.
10. Once out, you will see how to remove the shift boot by simply removing the leather from the tabs on the surround frame. Obviously, you will replace the old shift boot with the new one and attach to the tabs using holes you need to create with a punch/knife.
11. Reassemble everything and enjoy your new boots! |
|
|
CENTER ARMREST COVER |
 |
|
2. Remove the screw revealed by the removal of the cover. |
 |
|
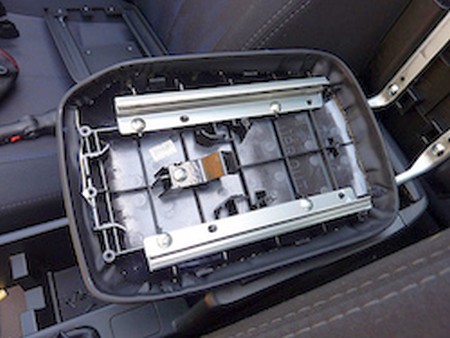
3. Pull the entire back wall of the center console off and remove the three screws mounting the armrest hinge to the console. |
 |
|
4. Remove the screws visible on the underside of the armrest to separate the top and bottom halves. Proceed to step 4 for the extended armrest below. |
|
|
SLIDING ARMREST |
 |
|
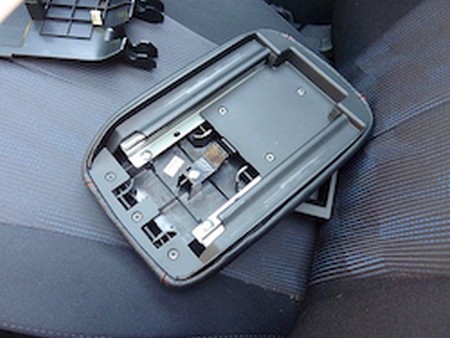
2. Remove the six black screws that hold the bottom plastic cover. |
 |
|
3. Once removed you can install the leather cover. Note the two metal bars are sharp - be careful in order not to get cut. |
 |
|
4. Install the armrest cover over the top part. The elastic (on some versions of the cover) is mainly to help you maintain it in place while you glue it. Glueing the cover is the recommended procedure and only install without glue if you must retain the condition of the original armrest. Installation without glue may require periodic re-adjustment since the cover might shift slightly when you apply the pressure of your elbow to it. If gluing, use any epoxy-based glue and follow the instructions on the glue container. |
 |
|
5. It takes a bit of finesse but the cover fits like a glove. Make sure you work out any wrinkles or loose spots at this point. |
 |
|
6. Reassemble in the reverse order of removal. |
|
|
DOOR ARMRESTS |
 |
|
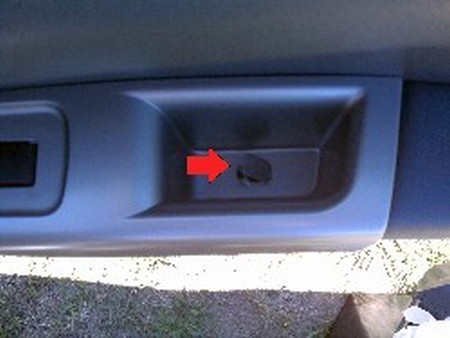
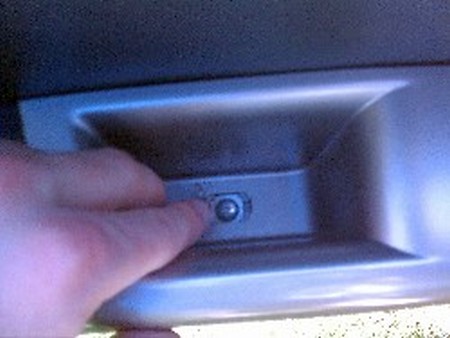
2. Push in with the flathead and pry out. |
 |
|
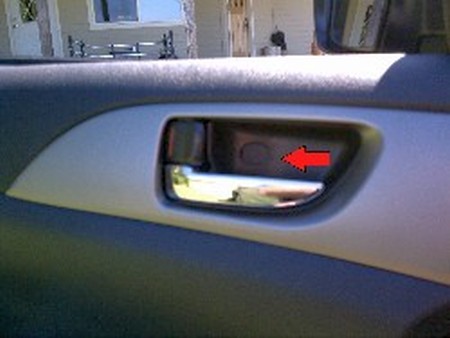
3. Remove phillips head screws from armrest and door handle. |
 |
|
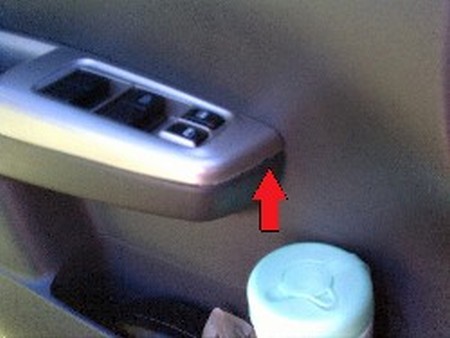
4. Using small flathead screwdriver, push in the tab at the front of the armrest. There is a small notch that you can insert the screwdriver into. Press in while pulling up |
 |
|
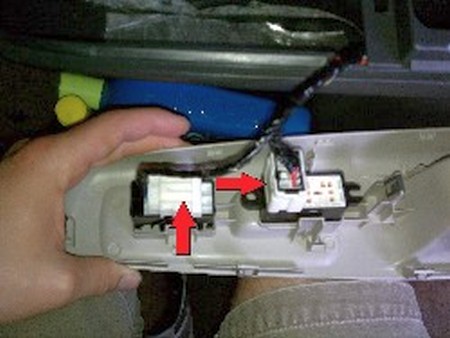
5. Turn the armrest over, and you'll see the plugs for the power windows and locks. You'll need to use the small flathead screwdriver to push in the tabs and remove the plugs |
 |
|
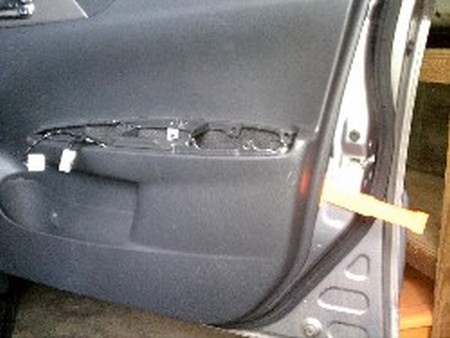
6. Remove the armrest and you'll see two more Phillips Head screws holding the door panel to the door |
 |
|
7. Using a panel popper or other long flat wedge, pry the door panel up from the side. Use your fingers to pry the panel off the door, popping the individual pins from the door. Short, quick jerks work best |
 |
|
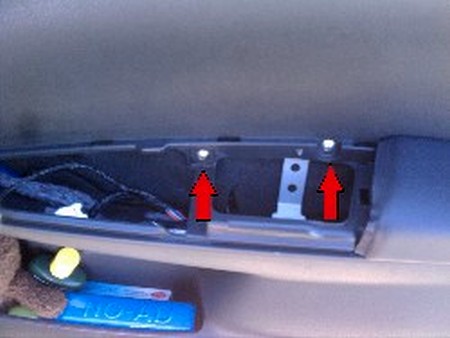
8. After prying the panel off, remove the door lock and door pull cables from the door panel. Remove the plastic door panel and lay it on a stable, soft surface, with the back side facing up. (Be careful not to scratch the other side - the plastic is soft and gouges easily!) Locate the 4 white plastic rivets which hold the stock vinyl armrest to the door panel). Using a drill and approx 1/4" bit, drill these rivets out. Only drill out the flared white part - you don't want to go all the way through! |
 |
|
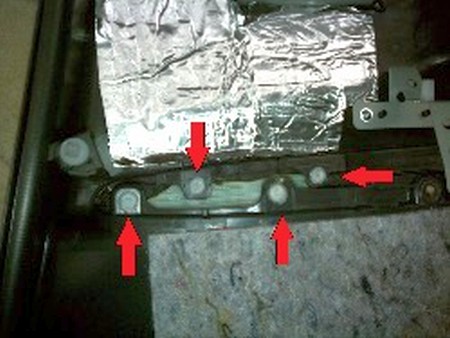
9. Remove the vinyl armrest - you'll see the white plastic nubs that we'll use to reattach the armrest later |
 |
|
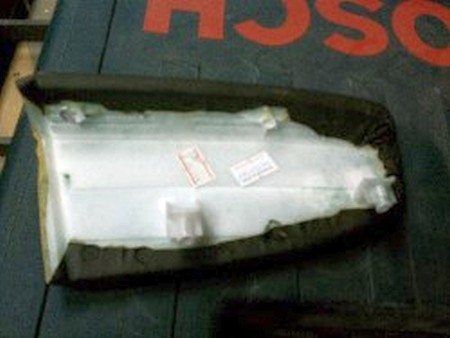
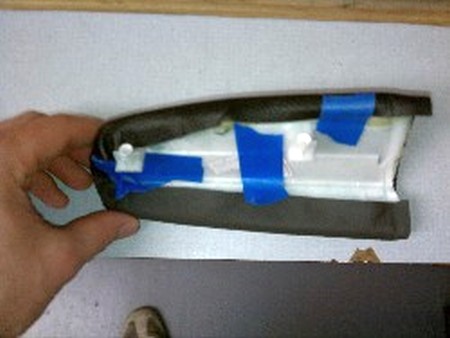
10. Using your fingers, gently pull the stock vinyl covering off of the armrest. Try to leave as much of the underlying padding and cheesecloth material intact as possible. Dry fit your new leather cover to the armrest. Use Blue tape to hold it in place and align it as best as possible. You'll have to do some folding of the leather around the curved end. It shouldn't be necessary to trim any of the leather. |
 |
|
11. Once you're satisfied with the fit, glue it down one section at a time with hot glue. ***You can also use spray adhesive you attach the top, but it is not necessary*** |
 |
|
12. Note that the leather overlaps two of the mounting points. This is not a problem, and you do not need to trim the leather (unless you really want to!) |
 |
|
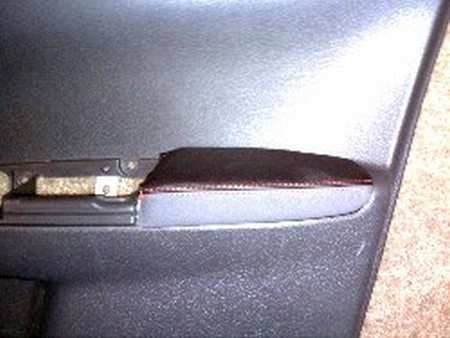
13. Install the newly wrapped armrest back into the door panel. Align the mounting nubs with the rivets you drilled out previously. Mount the armrest using the #12x1/2" screws. Depending on how much you drilled out, you may not need the washers. Hand tighten until the armrest is flush and there are no gaps . Hand tighten until the armrest is flush and there are no gaps. Proceed to other door. |
 |
|
CONGRATULATIONS - YOU HAVE SUCCESSFULLY INSTALLED YOUR NEW LEATHER BOOTS!
Useful tip You have installed a product made out of genuine leather. As you know, to maintain a leather product in good condition, you should take care of it. We suggest occasionally (every 4-6 week for example) applying some leather conditioner/UV protector to keep your leather from drying up in the sun and cracking. |
|
Please subscribe to our newsletter.
Get an instant 20% discount and enter our montly $100 CASH sweepstakes!