1995-02 SATURN S |
||||||||||||||||||||||||||||||||||||||||
|
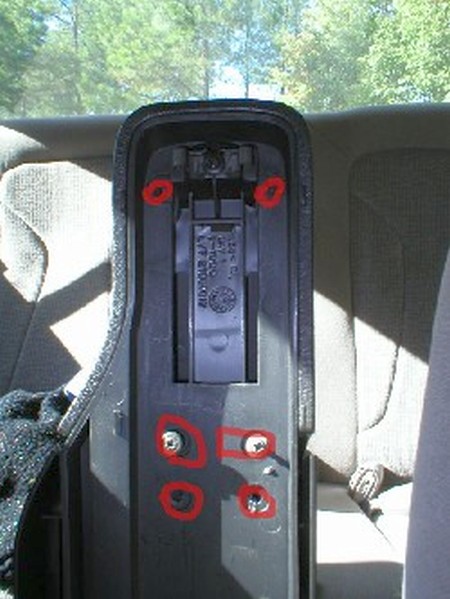
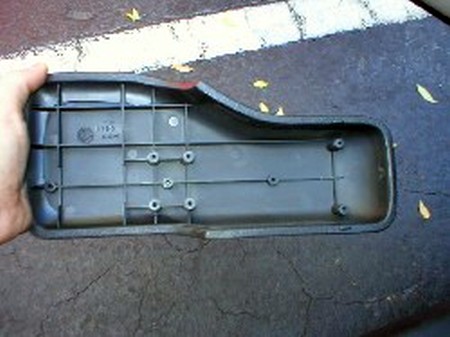
1. If you have an arm rest, remove the lid by unscrewing the six screws marked in red. |
|
|
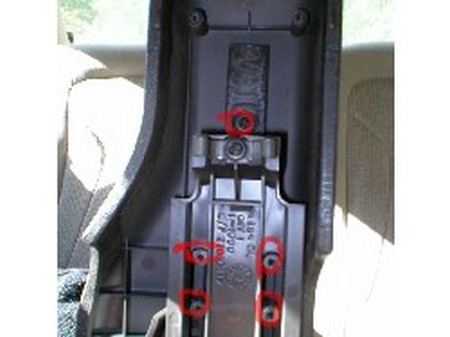
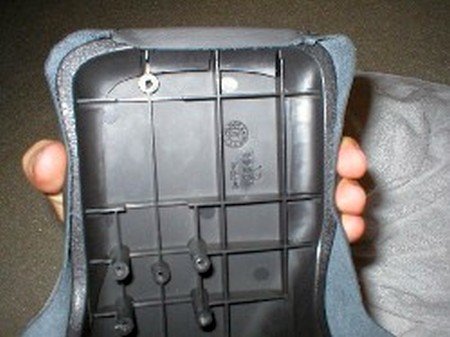
2. Slide the arm rest and remove the top screw on the slider. |
 |
|
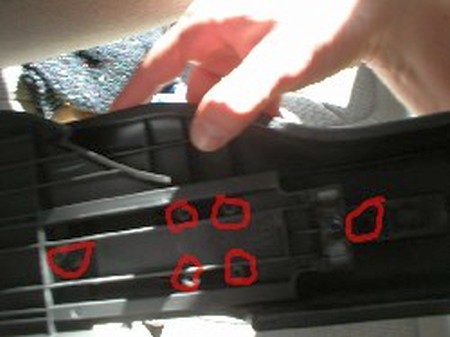
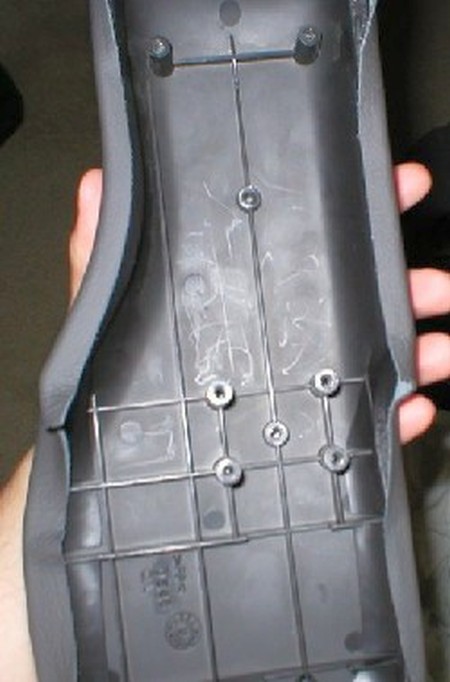
3. Slide the arm rest some more, and remove the screw on the bottom of the slider.
|
 |
|
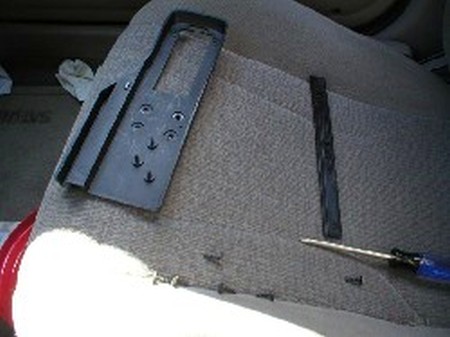
4. At this point, you should be able to pull off the bottom plate, and slider. |
 |
|
5. LEAVE THE ARM REST COVER ON THE ARM REST. YOU WILL BE GLUING THE NEW LEATHER REST ON TOP OF THE PLASTIC ONE. |
 |
|
6. Set the arm rest on the new leather cover, so you get an idea of how it's going to fit. Now is a good time to test-fit the leather, you're going to be using super-glue to attach it, so you need to understand how it's going to fit. |
|
7. Using super-glue, glue the leather to the plastic, staring at the top. Make sure you stretch out any wrinkles as you work your way down the arm rest. |
 |
|
8. Here it is, about half-way done. Just keep working your way around, being sure to keep the leather somewhat taut. Screw the arm rest back in, and voila! you're done! |
 |
|
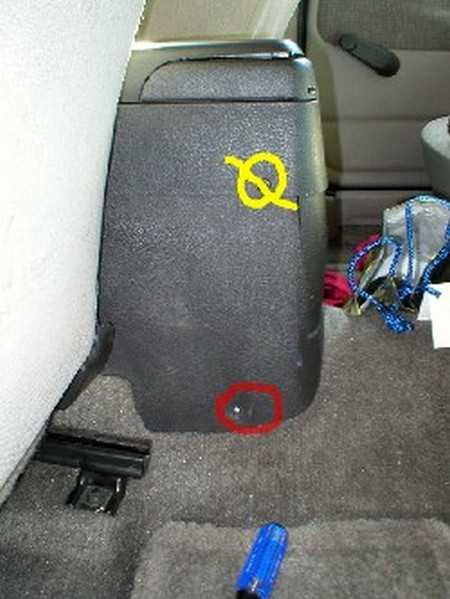
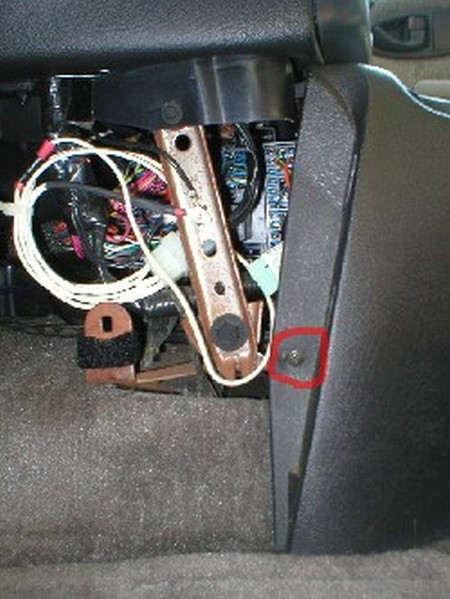
9. First, remove the center console. You do this by removing the BOTTOM screws on either side of the console (circled in red). You do not need to remove the screws in yellow! |
 |
|
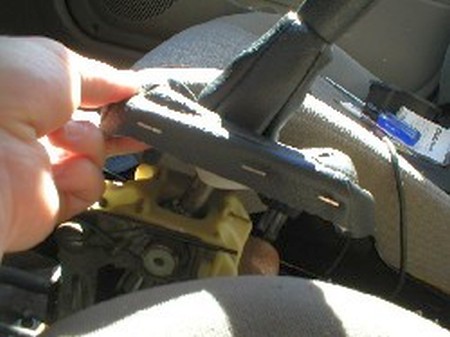
10. Next, remove the two screws in front (again, they're circled in red). Reach back behind the cigarette lighter and unplug it's connector from the console (you may want to pull the fuse first so you don't get shocked). After you've removed four screws and the cig lighter plug, the center console will lift out of place. |
 |
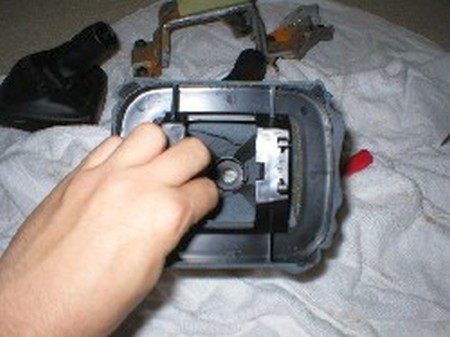
11. The bottom of the shift boot will pop right off, you may need to wiggle it a bit. In order to remove the actual shift knob, you need to put the car into 2nd gear, wrap a rag around the knob, and PULL!!! If it's not coming off, you're not pulling hard enough! The knob will pop off quickly, so don't hurt yourself when it flies off!
Screw back on the shift knob. |
 |
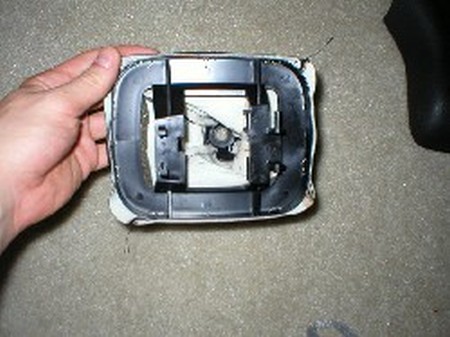
12. This is what the old shift boot looks like. Pry off the staples to get the bottom ring and peel the top ring off of the boot, you'll need those two pieces of the new boot. |
 |
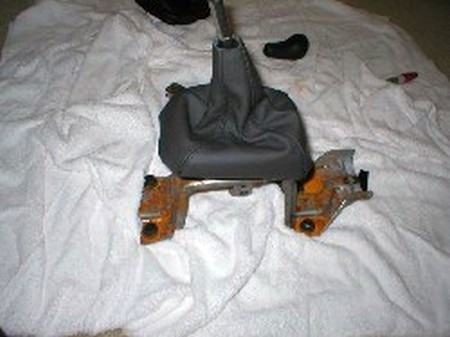
13. When I was fitting the new boot to the shifter, I happened to have a spare shift assembly. This was extremely helpful, since it let me fit the boot onto the plastic top and bottom rings without having to sit in my car. Also, I was able to test the fit based on the furthest point the shifter can go, without having the shift cables attached to it. All 92-02 S-Series have the same shift assembly, you can grab one from the junkyard for pretty cheap. If you don't want to pull a shift ass'y from a junkyard car, you can just use your own car. Be advised to leave a little more slack in it than I do, since you'll be constrained by the shift cables, not the shift assembly. |
 |
14. "Shift" the assembly as far down as it goes (like you're going into 4th), and hold the taut part of the boot to the bottom of the ring. Then, fold down the top of the boot to the top ring and glue it in place (see upper part of boot's top ring in pic, there's a little notch in the leather where I folded the leather into the top ring). Glue the boot at both points where it's taut. Note: don't go crazy here with tautness, just keep the leather pretty straight. |
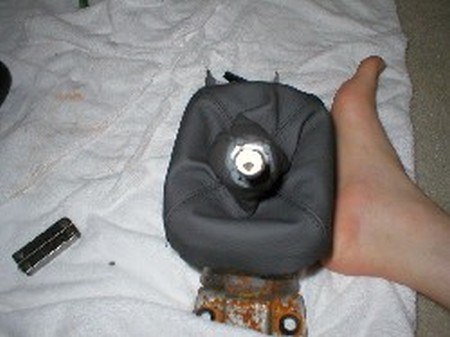 |
15. Here's a pic with the two fore and aft extremes (2nd and 4th gear) glued down. Note the wrinkles in the shifter, they go away when the car is shifted into gear. |
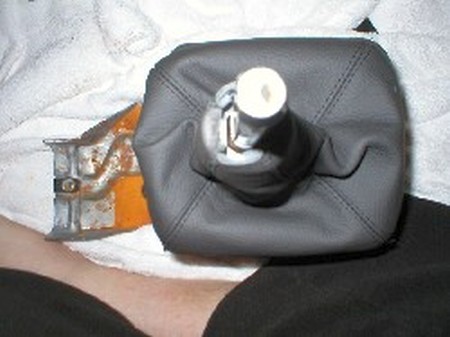 |
16. When you're done gluing, it should look something like this. |
 |
17. Add some staples to the bottom ring, so it's not just being supported by glue. |
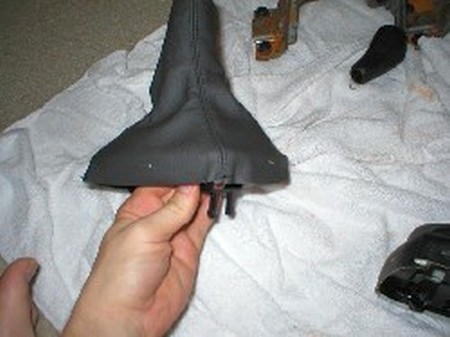 |
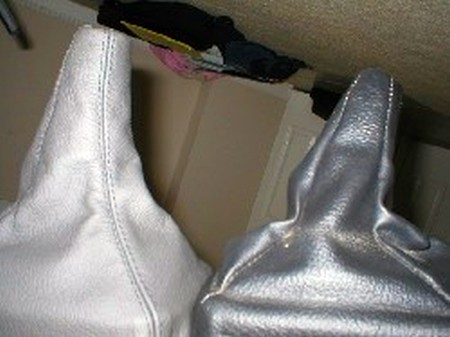
18. Here's a comparison between the new boot and old boot. |
 |
19. Snap the new boot into place, put the center console back, screw it in (4 screws) and push the shift knob on. Reinstall the shift boot |
 |
|
CONGRATULATIONS - YOU HAVE SUCCESSFULLY INSTALLED YOUR NEW LEATHER BOOTS!
Useful tip You have installed a product made out of genuine leather. As you know, to maintain a leather product in good condition, you should take care of it. We suggest occasionally (every 4-6 week for example) applying some leather conditioner/UV protector to keep your leather from drying up in the sun and cracking. |
|
Subscribe to our newsletter to get an instant 20% discount!