1991-94 SATURN S |
||||||||||||||||||||||||||||||||||||||||||||||||||||||||||||||||||||
|
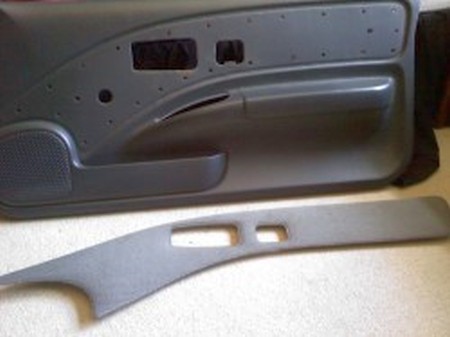
1. This is what you need to tackle. |
|
|
2. First, remove the shift knob from the shifter by pulling straight up on it. If never removed before, it will likely be quite hard to remove, so be very careful not to punch yourself in the face or bang your hand on anything once the knob breaks free. |
 |
|
3. The boot is attached to the center console by the lower retainer. Use a small flat-head screwdriver to carefully unclip it. There are two small clips at the front and two at the rear that hold it onto the center console. Do not break it as it will be needed later on. |
 |
|
4. You will need to carefully remove the plastic retainers from the boot. Before doing so, take note of the orientation of the retainers, in relation to the shape of the boot. The upper retainer will have a flat edge that needs to be towards the front of the boot. |
 |
|
5. The lower retainer will be marked "FRONT" at the front of the boot. You will need to install these retainers in the same orientation on the new boot. |
 |
|
6. A sharp knife makes it easier to remove the lower retainer. Pay attention to how the flaps in the boot are folded over the lower retainer. The upper retainer will simply pull straight out through the bottom of the boot. |
|
7. Retainers removed from boot. |
 |
|
8. Retainers removed from boot (another angle). |
 |
|
9. To adhere the retainers to the new boot, use a suitable plastic-to-leather glue (e.g contact cement) in accordance with its instructions. Glue and insert the upper retainer into the boot from below, making sure that the flat edge is towards the front of the boot. It will fit snugly into the boot, with some excess leather at the top. |
 |
|
10. If required, trim the leather leaving a small excess edge, then glue and tuck the small lip that remains into the top of the upper retainer to neatly finish the top edge. |
 |
11. The lower retainer must be installed into the boot with the words "FRONT" facing down and towards the front of the boot. It should face the same direction as the flat edge in the upper retainer. |
 |
12. Fold and glue the flaps of leather over the edges in the same way the stock boot was, making sure that everything is even. |
 |
13. Once the glue has dried, installation of the new boot is simply the reversal of removal. Make sure the word "FRONT" on the lower retainer is facing towards the front of the car. Slide the boot over the shifter and clip the lower retainer into the center console. The upper retainer will slide over the shifter. Push the shift knob back onto the shifter and installation is complete. |
 |
14. Stock armrest. |
 |
15. Open the armrest and unscrew the two screws that hold the lid onto the hinge. |
 |
16. Unscrew the locking clip and interior lid panel from the lid and carefully pry it out. |
 |
17. It is recommended to leave the original cover in place, as it will provide some extra padding and will help to maintain the shape of the armrest. The lid is quiet angular and hard without this. |
 |
18. Lay out the new cover and make a few dry-runs at fitting it to the armrest. There is a significant area that will need to be glued and you will need to make sure that the way you lay it will give the desired result to prevent creases. You may need to trim some of the original cover from inside the lid, in order for the interior trim to fit correctly. |
 |
19. Turn the cover inside-out and use contact adhesive (in accordance with its directions) over the entire interior of the boot and on the top of the armrest. |
 |
20. Once the glue is ready to adhere, start to transfer the inside-out cover to the lid, beginning at the center and working your way out to the edges, making sure it is aligned correctly. Fold the remaining leather in the underside of the lid. You will not be able to smooth any wrinkles out once it is laid down, so plan ahead and take your time, rolling the leather onto the lid. |
 |
21. You may need to trim some of the excess leather from the inside of the lid to allow the interior cover to still fit. |
 |
22. Do this carefully with either scissors or a sharp knife, taking care not to damage the rolled edges. |
 |
23. Install the interior cover and clip. You may need to press quite hard to get the panel to fit inside the lid, due to the extra material around the edges. Make sure that the screw holes in the panel line up with those in the lid and install the screws. |
 |
24. Reinstall the hinge screws to affix the refurbished lid to the armrest body. |
 |
25. Armrest cover is installed. |
 |
26. Unscrew and remove the plastic mirror triangle. |
 |
27. While pulling the door handle, undo the screw. |
 |
28. Use a flathead screwdriver to pry the power lock switch from the trim piece. Unplug the wiring harness, and remove the power lock switch and trim from the panel. |
 |
29. Unscrew the two screws in the door pull and remove. |
 |
30. Using a pin puller, work around the door panel and remove it from the door. Work slowly, Saturn pins are known to break easily. When you are done, the panel will be removed from the car. |
 |
31. Use a flathead screwdriver to pull up on the tabs on the reverse side of the door panel. The metal plate holding the fabric will slide right off. |
 |
32. Wrap the leather on the door insert: clean it off with alcohol, use Contact Cement liberally on the panel (preferably use a piece of cardboard or paper if you care for the table you're doing this on)
34. Push the leather cover against the insert, let the glue settle. Wrap the edges and glue them, or trim them off (an X-acto knife is great for that purpose). Make cutouts for the door handle and the power lock switch.
35. Reinstall everything in reverse order of removal.
36. Repeat on the other door. |
 |
NOTE FOR 95-96 CARS: UNLIKE 91-94, THE DOOR PANELS DO NOT NEED TO BE REMOVED FROM THE CAR!
The fabric is glued onto a board, which is glued onto the panel. With a flathead screwdriver, butter knife, or razor blade, gently pry up on the board.
Once you’ve gotten through the line of glue, you can begin to use your hand to pull up the material.
Some parts may be glued tighter than others, you should use your flathead screwdriver to pry those up, so you don’t risk tearing them by hand.
Once you've done that, proceed to step 32 for wrapping the insert.
|
 |
|
CONGRATULATIONS - YOU HAVE SUCCESSFULLY INSTALLED YOUR NEW LEATHER BOOTS!
Useful tip You have installed a product made out of genuine leather. As you know, to maintain a leather product in good condition, you should take care of it. We suggest occasionally (every 4-6 week for example) applying some leather conditioner/UV protector to keep your leather from drying up in the sun and cracking. |
|
Subscribe to our newsletter to get an instant 20% discount!

