2003-12 MAZDA RX8 |
||||||||
|
The RX8 Illuminated Shift Knob was a Japanese Domestic Market upgrade kit that was only sold to Japanese buyers. Very few outside of Japan received the original kit and documentation of the exact kit details (such as how original wiring was altered) is very limited. Instructions for removing an Illuminated knob are based on RX8club information where this kit is tied into the lighting circuit for the Ash Tray light. This is believed to be the method in which the upgrade kits were installed; however, individual cars may vary. This info does not include information on how to install an Illuminated Shift Knob into an RX8 that did not previously have this kit installed. For that information, turn to RX8club.com.
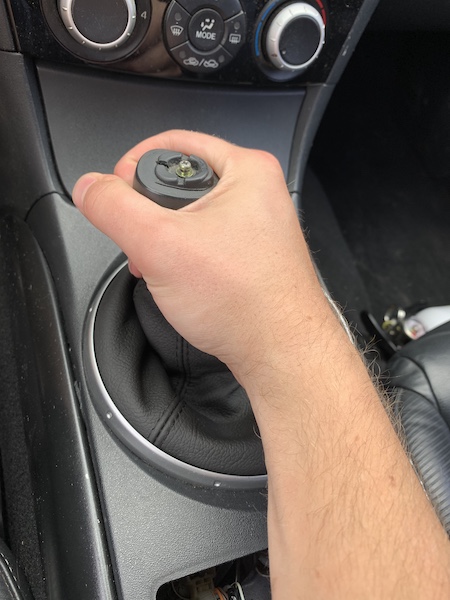
1. With a regular (not illuminated) shift knob, start out by unscrewing the shift knob. Firmly rotate it counterclockwise until it's off. Set it aside.
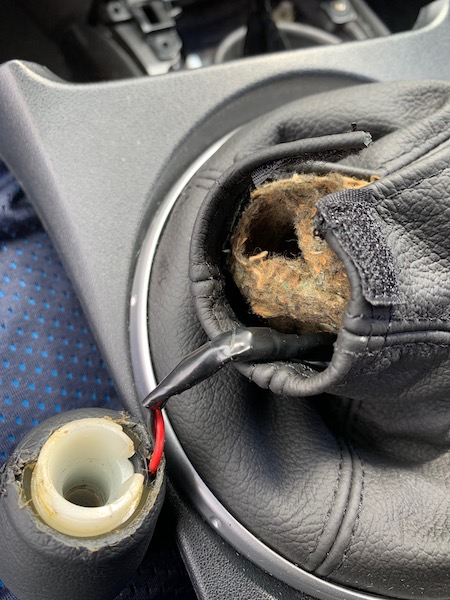
Illuminated shift knob owners. Do you unscrew the shift knob yet. You'll do it later, once you've removed the wire harness. |
|
|
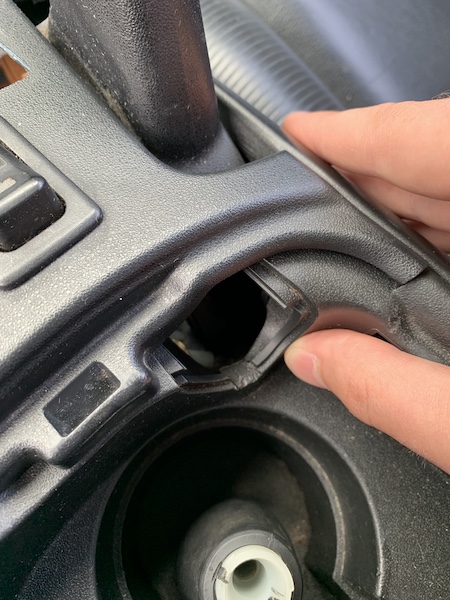
2. Slide back the front compartment of the center console and look at the inside front right corner. There is a small plastic panel there. Gently work the flat-bladed screwdriver into its edges and work around the edges, prying very softly until the piece pops out. Set it aside.
3. Open the ashtray door and pull out the ashtray container insider.
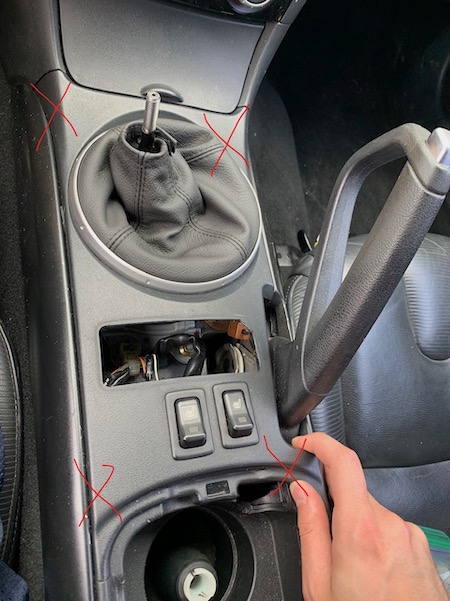
4. Grab the rear right corner of the large panel that surrounds the shifter. This panel extends from the ashtray at the front to the cupholder storage compartment at the rear. Use your fingertips and the tip of the flat-bladed screwdriver to gently pop up the right rear corner just a quarter inch or so, then work your way around the panel to remove the entire panel. Feel where the connectors are, underneath, and ensure that they all pop free of the car. (There are six of them spread evenly around the edges, and a seventh by the hand brake.)
|
|
|
5. Disconnect any wiring connectors underneath the panel you are removing. Look for the little tabs that lock them together, and gently push down on the tabs while pulling apart the connectors. (Not all RX-8s have any connectors here.)
Illuminated shift knob - your knob is still in place at this point. Once you've removed the center console panel, disconnect the shift knob wiring (location of the wiring may vary from the picture shown here) and only now unscrew the shift knob. 6. Remove the panel and place it upside down on a soft surface, like a towel.
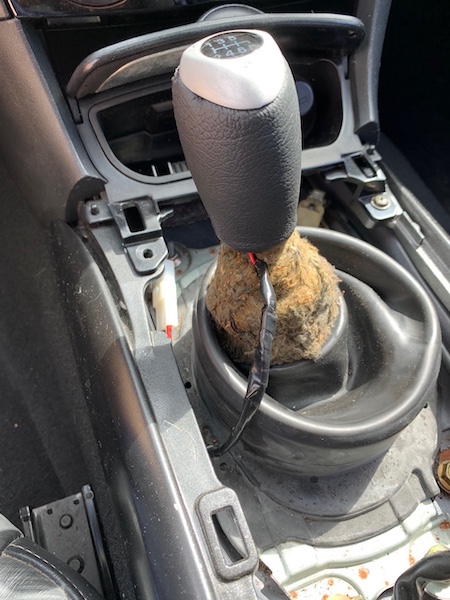
7. Reach inside the OEM (factory) shift boot and remove the padding inside it.
8. Straighten out the padding to form it into its original conical shape.
9. Looking at the underside of the panel, use a Philips screwdriver to unscrew the little black plastic frame that goes inside the OEM shift boot.
10. Lift out the OEM shift boot and note how the slits in it fit over the little black plastic frame.
11. Remove the OEM shift boot from the little black plastic frame, and place the RedlineGoods shift boot over the frame in the same way. (You may wish to orient the RedlineGoods shift boot so that the seam with double-stitching that does NOT reach all the way to its tip is facing the driver's inside knee.)
12. If the slits do not fit perfectly over the tabs in the little plastic frame, then use the knife or box cutter very carefully to extent the slit slightly to fit the frame. It is a tight fit and such cutting may not be necessary. Some of the slits are hard to see, but they are there.
13. Place the conical padding material into the RedlineGoods shift boot as it was in the OEM boot.
14. Screw the shift boot and frame back into the shifter panel.
Illuminated shift knob: reinstall the shift knob and its electrical connection at this point.
15. Place the panel back into the car, connect all the connectors, and firmly snap it back into place, while tucking the tip of the RedlineGoods shift boot down and into itself, around the shift lever.
16. Replace the small panel inside the storage compartment, and replace the ashtray container and close its door.
17. Screw the regular shift knob back into place, carefully holding the shift boot so that it does not twist, and so that tip of it stays tucked inside itself. |
|
|
CONGRATULATIONS - YOU HAVE SUCCESSFULLY INSTALLED YOUR NEW LEATHER BOOTS!
Useful tip You have installed a product made out of genuine leather. As you know, to maintain a leather product in good condition, you should take care of it. We suggest occasionally (every 4-6 week for example) applying some leather conditioner/UV protector to keep your leather from drying up in the sun and cracking. |
|
Subscribe to our newsletter to get an instant 20% discount!