2002-06 ACURA RSX |
||||||||||||||||||||
|
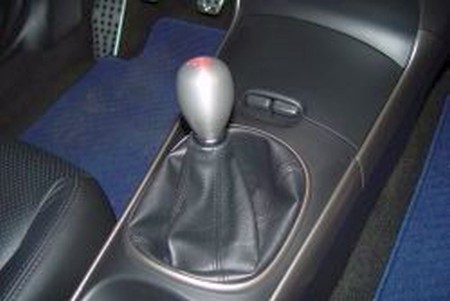
1) Remove the shift knob by unscrewing it. Then remove the middle piece of the center console by sliding the tray (front cup holder) holder back and pulling up on the lip of the middle piece. You have to pull pretty hard so don’t be afraid of breaking it. |
 |
|
2) Now that the middle piece has been removed you will need a flat screwdriver and pliers to bend the back of the staples (that are holding the boot on) and pull them out to free the leather tabs.
|
 |
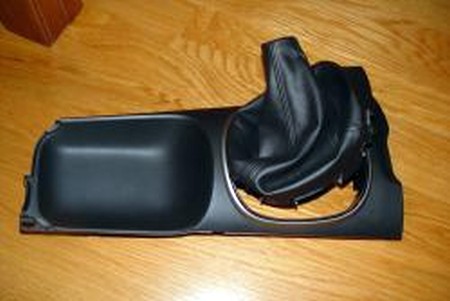
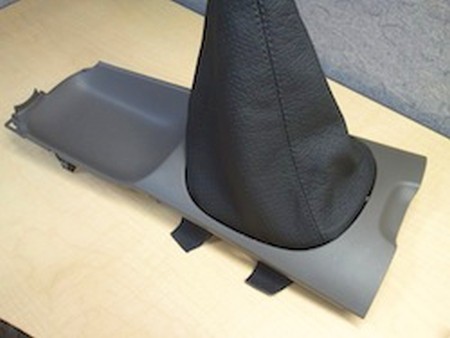
3) Remove the old boot assembly to a comfortable working location. |
 |
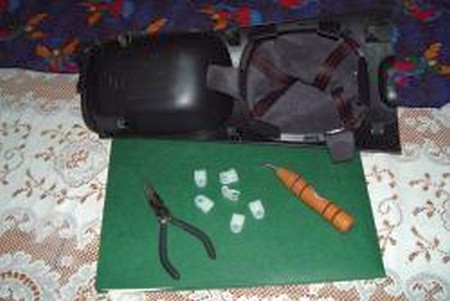
4) After you pull the old boot from the middle piece you’ll need some tools(see picture) to help you get the new thicker leather back in. This process will take some patience as you have to keep pulling the leather down until it goes in all the way. You may have to use something (like a popsicle stick) slim and smooth to pry the slit open slightly farther to accommodate the thicker leather.
5) Once you get the leather all the way in you’ll need to re-staple (if you have the right stapler) or pick up six little clips (like I used that I picked up at the hardware store for a $1.00) and slide them on over the leather tabs. |
 |
6) Turn the boot inside out and tie the shift boot adapter back on with a cable tie. Leave it loose enough for you to still turn the nut. Then flip it back the right way. |
 |
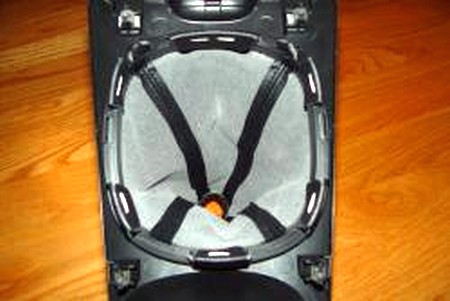
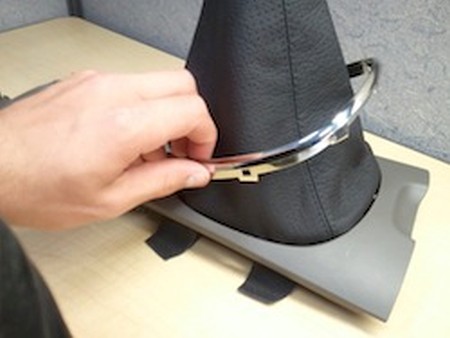
7) Remove the silver plastic ring before trying to fit the shift boot tabs into the console. There is almost no room to fit them in with the ring in place, but with it removed, it takes just a minute instead of a very very long time. It was taking forever for me, but once I figured out that I could remove that ring, my roadblock disappeared. You just need to push on the silver plastic ring tabs to allow it to be lifted out of the console assembly. |
 |
8) Once the shift boot is in place, reinstall the plastic ring, fold the shift boot tabs around the plastic tabs on the underside and use some sort of wire (I used paper clips) to wire the shift boot through two small holes that are in each plastic tab. |
 |
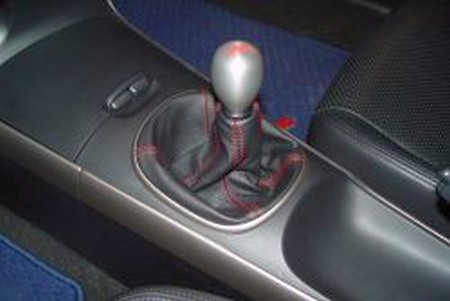
9) Now pop the middle piece back into place and twist the nut back down and twist the shift knob back on! |
 |
|
Congratulations, you're DONE! |
|
|
Useful tip You have installed a product made out of genuine leather. As you know, to maintain a leather product in good condition, you should take care of it. We suggest occasionally (every 4-6 week for example) applying some leather conditioner/UV protector to keep your leather from drying up in the sun and cracking. |
|
Please subscribe to our newsletter.
Get an instant 20% discount and enter our montly $100 CASH sweepstakes!