1997-04 VOLKSWAGEN PASSAT B5 | |
|
1. Remove shift knob, by turning counter-clockwise. It comes off pretty easily.
NOTE: some models have a different mounting for the shift knob. It's held by a cramped ring which is impossible to remove without destroying it. The knob then just pulls straight off. Then you need a new means of securing the knob on the stick, I have used galvanised wire, twisted to tension it, and trimmed to avoid damaging the boot.
Remove the plastic trim piece holding the bottom of the shift boot to the console. It comes off easily as it's held only by a few soft plastic prongs. The best way to do this is to pull it gently up starting from one side and working your way around. |
|
|
2. Remove the old boot by taking out the staples. Mount your RedlineGoods shift boot on the original trim piece. You might want to punch the same staples back in, or use small pieces of thin copper wire instead. Slide the wire through the two adjacent holes (left by the staples in the trim piece) while making appropriate holes in the shift boot if needed, and twist the ends of the wire together. 4 pieces of wire, one in each corner, will suffice.
3. Remove the shift knob assembly from the old boot (the upper plastic piece is just pushed into the lower one thus holding the boot - pull down the lower element to disassemble it) and install the top of the new boot the same way. |
|
|
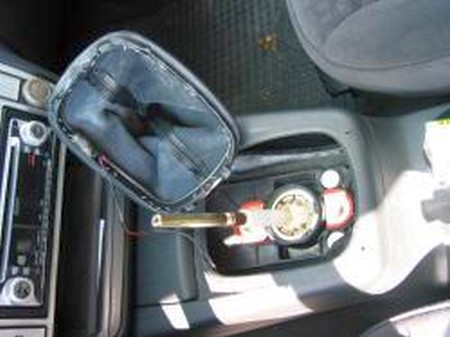
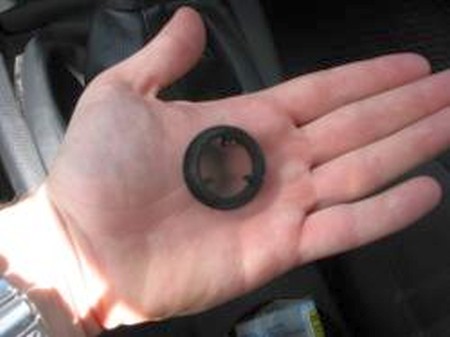
4.Remove the boot from the shifter by taking off the rubber band, and removing the small metal ring. After these are removed, just slip the boot off the shifter. This picture shows one of the elements freed from the assembly.
5. Reinstall the boot and knob assembly in the center console, unless you are installing an e-brake handle and/or armrest cover... |
|
|
6. Pry off the bottom cover of the armrest cover with a flat head it. It should come right off. 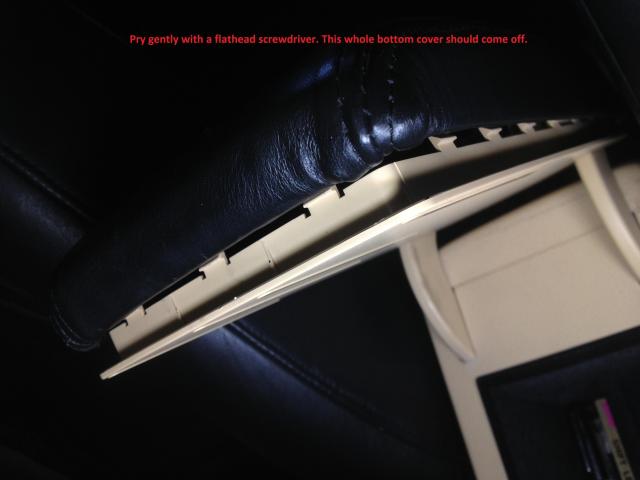 |
|
 |
|
|
7. Grab a T15 socket. Pull out the ashtray and you should see these two screws: 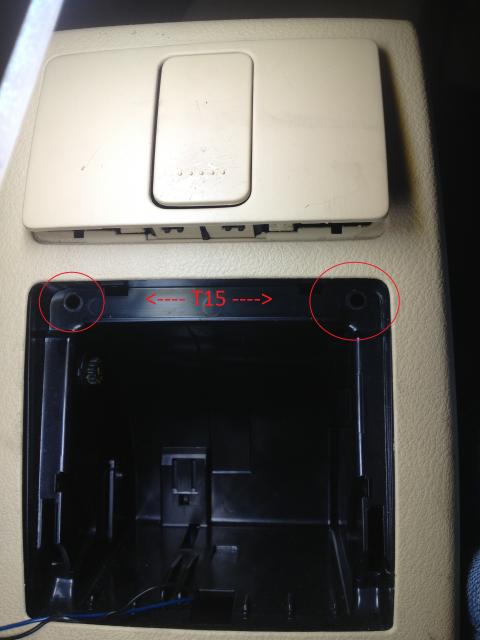 |
|
|
8. Once those screws are out, pull the back cover off. Disconnect the clip that's connected to it and set it aside. Pull the inside felt tray out. It's just held in by tabs and is easily pryed out. There is three gold bolts that are taken out by a 13mm socket. Two can be taken out from the back, but the one towards the front needs to be taken out with a 12" extension. Once those 3 bolts are out, take out the 2 8mm bolts that are holding the center console to the plastic piece holding the shifter boot. If you pull the handbrake up far enough, you should be able to slide the center console out. 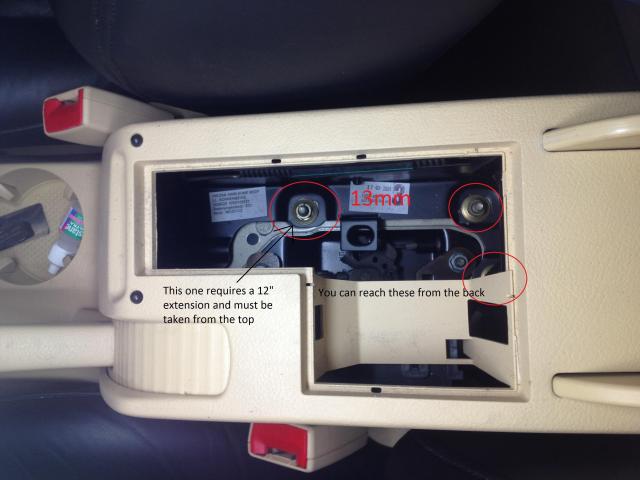 |
|
 |
|
|
7. Now the center console should come out. To remove the handbrake boot, there is 2 possibilities. Some B5.5 owners claim that you can take out the handbrake boot with a good yank. However, if you're like me, yours has a clip. This clip can be found on the bottom side of the handbrake boot. Push in on that clip with a flat head screw driver and it should slide right out. 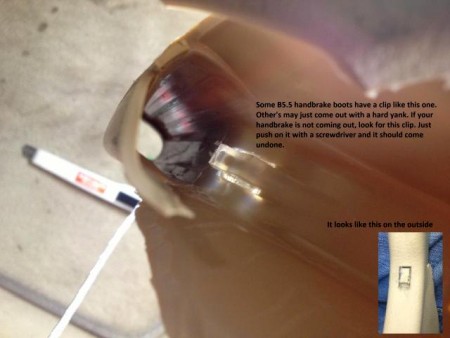 |
|
|
8. Once you got the handbrake boot off, slide the new boot on over it and reinstall it on the handle. If there is excess leather covering the silver button, tuck it in using a flathead screwdriver. When you're ready to re-install the cover, install the black tabs first. Then just push down on the back and the back clips should snap in. If you broke one of these clips while prying the cover off, don't worry it will still hold in just fine, 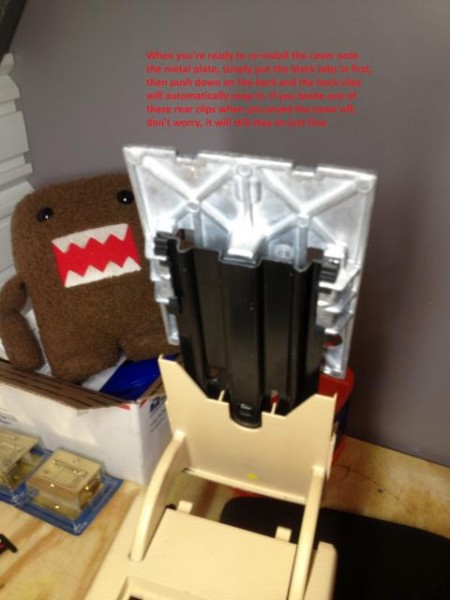 |
|
|
9. Since the armrest slides back and forth on the console, you need to secure the rear of the cover to the existing material that is on there. Sew it on, glue it on or even zip tie it on, but otherwise the cover won't cover the rear since it requires stretching. Then tuck it in nice and flat. Then reinstall everything in the reverse order of removal. 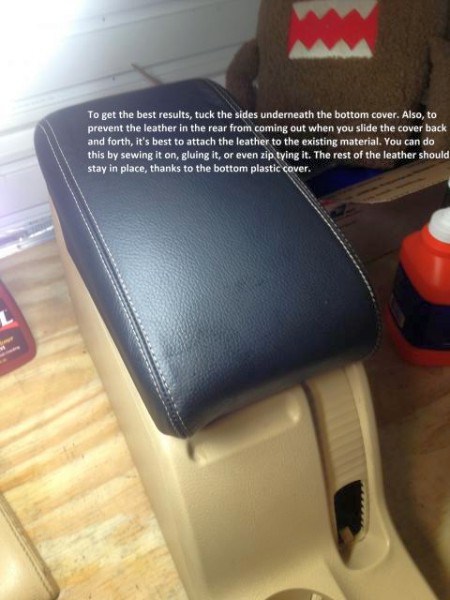 |
|
|
|
Please subscribe to our newsletter.
Get an instant 20% discount and enter our montly $100 CASH sweepstakes!