1987-93 FORD MUSTANG |
||||||||||||||||||||||||
|
1. Disconnect the negative battery terminal. Work will be performed around the lighter socket which has constant power to it. Remove the armrest assembly. Locate and remove the mount access plugs on the console to expose the four bolts holding the armrest in place. (Gently pry them loose, do not break the clips holding them in.) Remove the four bolts holding the armrest in place (8mm socket required). Lift the armrest straight up to remove.
|
 |
|
2. Remove the console shifter bezel. Grip inside of bezel and gently lift up to disengage the clips. Remove original shift boot from retainer ring and interior trim bezel - remove both staples and glue and clean the ring thoroughly.
Remove the shift knob. The manual shift knob simply twists off. To remove the automatic one, look under the shifter handle (with a small mirror) there is a split ring, you have to get a small screw driver or allen wrench and press one of the tabs while pulling up on the handle with the button depressed. |
 |
|
3. Position the new boot lining up holes in the leather boot with trim ring holes. Use tape to hold the boot temporarily.
For the automatic, the boot will simply wedge between the shifter plate and the bezel, so steps 3-5 are unnecessary. Just put the boot on, reinstall the bezel and reinstall the shifter handle. |
|
|
4. Pierce leather with a piece of a stiff wire or a pin. Mount with either staples if you have a gun or by taking small measures of copper wire, slide them through the boot and the bezel and twist the ends together. |
|
|
5. For additional hold, apply some epoxy-based glue or 270 automotive RTV silicone between boot and ring. Apply more between ring and bezel. Make sure you don't get it on the leather while sliding the boot into position. |
|
|
6. Clamp the shift boot, ring and bezel together for 24hours so that the epoxy glue/silicone has time to try. |
|
|
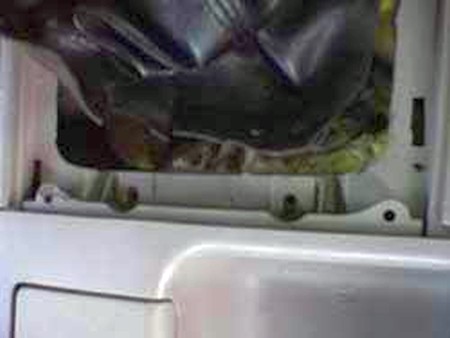
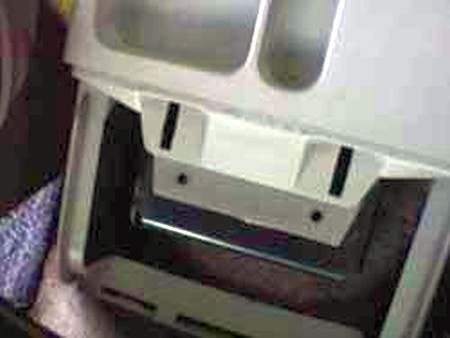
7. Remove the console top panel. Locate and remove the four screws (two front, two back) securing the console top panel to the main console body (Philips screw driver required). Engage the E-brake. Lift up on the console top panel; disconnect the lighter socket and the power mirror switch if so equipped. Your console top panel can now be removed. |
 |
|
9. Locate and remove rubber e-brake dust shield and plastic retainer. (Pull up on plastic retainer. These parts will most likely break, do not worry, they will not be reused.)
Using a sharp razor blade cut what remains of all the plastic pegs (previously securing the rubber e-brake dust shield) flush with the console top panel. Note: If alternate installation using factory mounting methods is desired, some have had luck heating the plastic pegs with a soldering iron (this will ruin your tip) to reshape them during removal and installation. Proceed at your own risk. |
 |
|
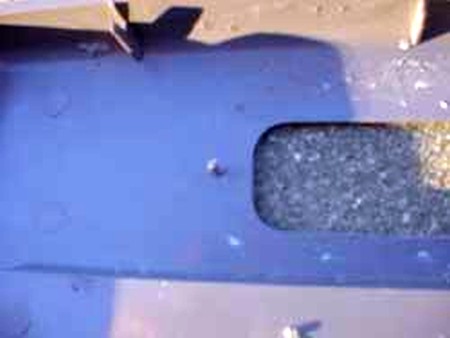
10. Prep upper console panel for e-brake boot installation. Lightly sand underside of console top panel (around e-brake opening) with 120-400 grit sand paper (this step is required to promote the Velrco’s adhesion). Clean area with denatured alcohol. Cut and install ½” wide stripes of Velcro all around e-brake opening. (Hook side: Velcro brand – industrial strength – heavy duty adhesive).
11. Cut and install ½” wide stripes of Velcro to the e-brake boot (Loop side: Velcro brand – industrial strength – heavy duty adhesive). |
 |
|
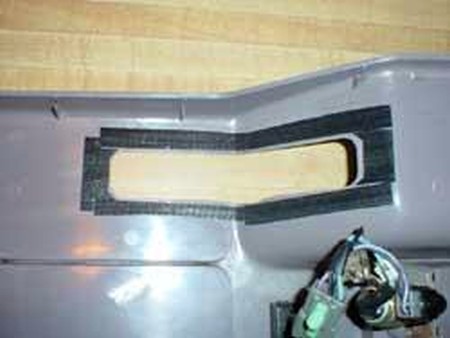
12. Install e-brake boot in upper console panel. Insert e-brake boot up through opening in upper console panel. Starting at one end center the seam and gentle roll boot around making sure the Velcro fastens securely; continue up both sides leaving the end opposite the starting point for last. You are now ready to install the upper console panel complete with boot back into your car.
13. Reinstall upper console panel and armrest. (reverse order of removing them). |
 |
|
ENJOY YOUR NEW LEATHER BOOTS! |
|
|
Useful tip You have installed a product made out of genuine leather. As you know, to maintain a leather product in good condition, you should take care of it. We suggest occasionally (every 4-6 week for example) applying some leather conditioner/UV protector to keep your leather from drying up in the sun and cracking. |
|
Please subscribe to our newsletter.
Get an instant 20% discount and enter our montly $100 CASH sweepstakes!