2005-09 FORD MUSTANG |
||||||||||||||||||||||||||||||||
|
|
|
|
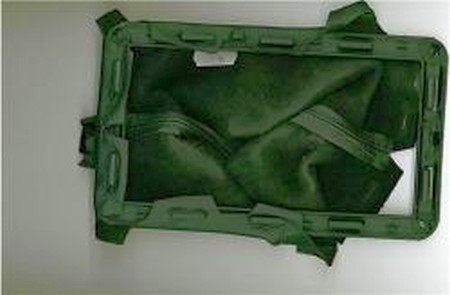
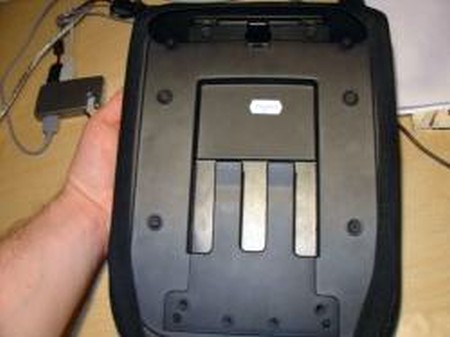
1. The shift boot is secured with sturdy plastic latching clips built into the bottom of the boot frame ring. Press either of the long sides with your finger tips and the boot will unlatch and lift up. The top of the boot sits snugly in a groove at the bottom of the shift knob. With firm pressure these will separate.
Carefully remove old boot from the plastic boot frame. Noting how old boot was attached .Remove any remaining glue from the frame with fine sandpaper. |
 |
|
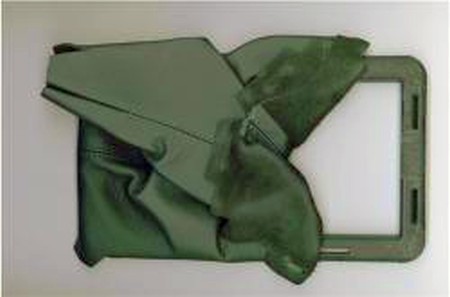
2. Position the new boot lining up holes in the leather boot with trim ring holes. Use tape to hold the boot temporarily. |
 |
|
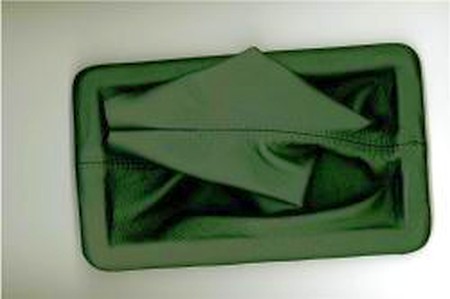
3. (Do not glue at this time.) Place new leather boot over frame. Line up all slots in the leather boot with the plastic clips on bottom of boot frame. Boot should be well fitted around the frame - adjust as needed. |
|
|
4. Gluing. Now that you know the position that you will mount the boot to boot frame. Remove the boot and set it a side-ready to put back on in the same installation position. Put small amount of glue around the top of the plastic boot frame. and attach boot.
Alternatively you can start your installation on one side and work your way around the frame gluing as you go.
I would sugest a slow drying glue. One that is not too tacky will give you plenty of working time. Automotive GOOP is a brand we have used successfully and it's easily available. |
 |
|
5. The stock shift knob has a lip around the bottom that top of the boot sits in. A rubber ring can be removed from your old boot this purpose and used to wedge the top of the boot above the lip with the rubber ring. Alternatively, you can use a zip-tie to secure the top - which will keep your stock boot intact.
Either way turn the boot inside-out, slide it thin-end first on the shift knob, use the zip-tie to secure the top of the boot to the shift lever. Reinstall bottom of boot and the shift knob. |
|
|
IMPORTANT: WE HAVE RECENTLY REDESIGNED OUR EBRAKE BOOT TEMPLATE and the instalaltion procedure is a bit different than it used to be |
|
|
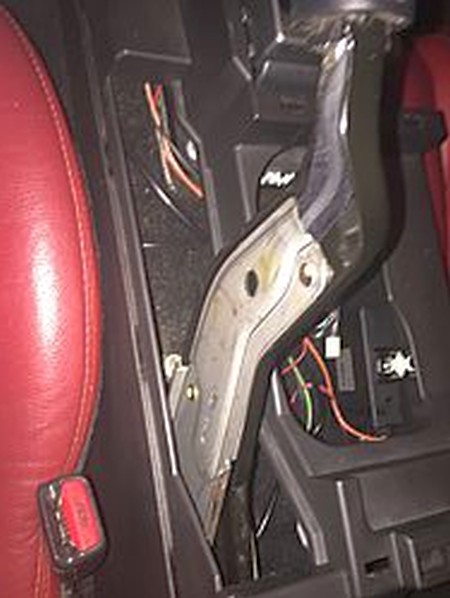
1. To install the ebrake boot, you must have the shift boot and shift knob removed. You will also remove the center console completely.
Recline seat backs - put arm-rest in the up position. The top of the console is secured by 2 screws in the rear (remove these) -and 4 spring clips.
2. Carefully raise the rear of the console top (pulling up frees the spring clips) and swivel it out over the e-brake ever. It's a snug fit so remember the motions you used to remove it. Place console top upside down on a bath towel to avoid scratching. |
|
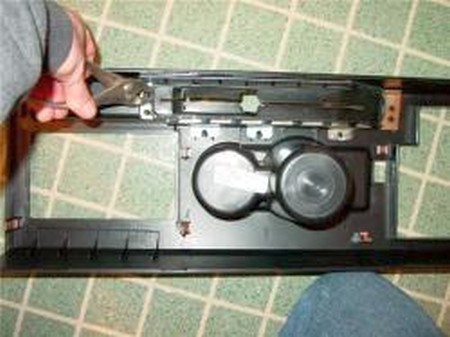
3. Now decide whether or not you want to leave the rubber runner or you want to remove it. Photos on our website show the boot with the runner removed but you can leave it place making the installation process easier and faster :-)
If you want to remove the runner, flip the console top upside down and cut it off with pliers.
If you want to leave the runner, just put the console top aside for a while.
|
 |
4. Remove side trim from the ebrake lever exposing its metal core (this step is the same, whether or not you want to leave the rubber runner)
|
 |
|
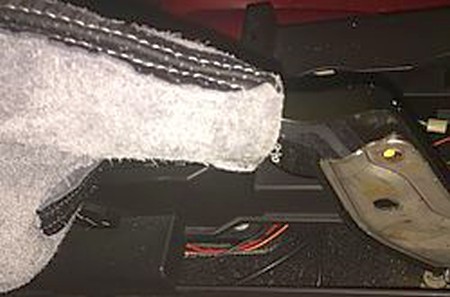
5. Fold the boot over and slide the top of it over the handle so that the edge of the boot reaches around 1 inch below the handle |
 |
|
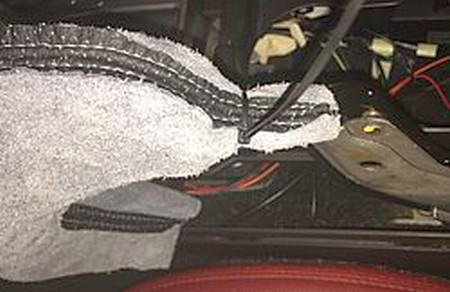
6. Secure the boot with a ziptie right below the handle. |
 |
|
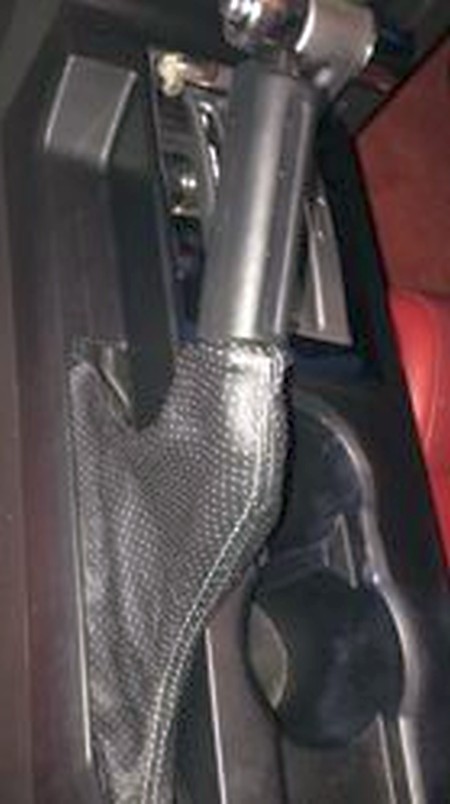
7. Unfold the boot and slide it all the way down the lever. If you deciced to remove the runner, you may need to use velcro that is sewn into the bottom of the boot. To do it, you need to glue the free velcro strips provided to the inside of the plastic tunnel trim along its bottom edge. And then attach the bottom of the boot to those velcro strips.
|
 |
|
|
|
|
1. Installing the armrest cover requires removing the armrest lid from the car (there are screws visible by the hinges after you open the lid).
2. You then need to separate the top and bottom part of the armrest by removing the screws hidden under the little rubber caps. Once the two halves are separate, wrap the armrest cover around the top section of the armrest lid.
3. Then re-assemble the lid, making sure the leather stays nice and tight in the process. It does help to use drops of glue in sensitive spots, to make sure the leather cover remains tight, flush and straight during the re-assembly. If you don't care about the leather cover being removable later, you might even consider glueing it (with Contact Cement or similar glue) on the entire perimeter of the sides of the armrest lid.
4. Once this has been completed, reinstall the armrest back into the car. |
 |
|
ENJOY YOUR UPGRADED LEATHER INTERIOR!
|
|
|
Useful tip You have installed a product made out of genuine leather. As you know, to maintain a leather product in good condition, you should take care of it. We suggest occasionally (every 4-6 week for example) applying some leather conditioner/UV protector to keep your leather from drying up in the sun and cracking. |
|
Please subscribe to our newsletter.
Get an instant 20% discount and enter our montly $100 CASH sweepstakes!