|
||||||||||||||||||
|
Items required - Leather covers x2 - Leather and Vinyl Glue - Stapler - Craft Knife - Posi - Drive screwdriver - Small flat head screwdriver - Rubber Bands (various sizes) - White Spirit - Old Rag
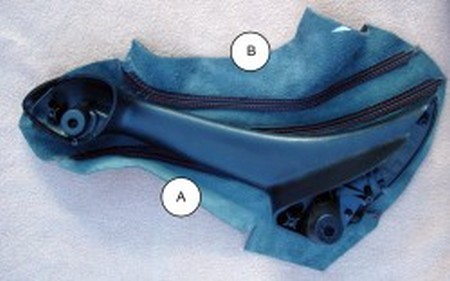
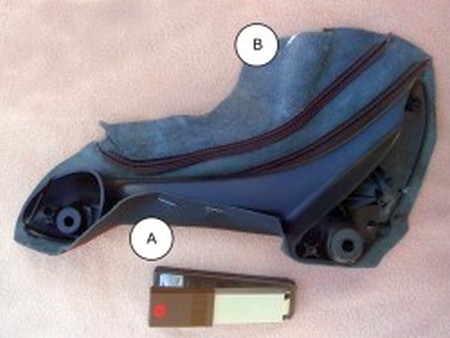
1. Remove door card, and unscrew the urethene handle. Clean handle of any grease using white spirit on old rag in preparation for gluing. Position the boot and check the overlap. For Left handle (see image) Flap "A" will be located first - Flap "B" will be the last section in the gluing process. |
 |
|
2. Staple or hold Flap "A" in position - the over lap will conceal the staples if left in position to aid the process. Or once you have glued the boot you can remove the staples prior to preparing the overlap. |
 |
|
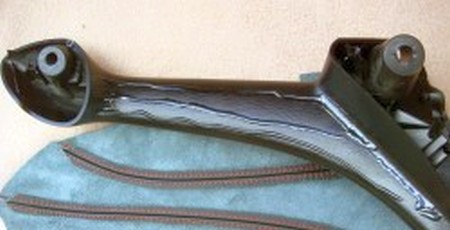
3. Apply Glue to handle along the length of the handle - with 1cm spacing inbetween each row. Care to be taken when using a perforated leather boot excess glue may seep through the holes if this occurs clean using white spirit and rag.
PREFERRED WAY TO INSTALL (BUT CONSIDERABLY LONGER) is to glue each section of the cover one at a time. It yields a better result since once secion A holds, the next section can be stretched to achieve a very nice and tight look. To do this, glue the first section as described above, wait for it to dry, proceed with the next section. The downside is you have to hold each section in your hands until it dries. |
 |
|
4. Finish the gluing process with the overlap facing down when you view the handle from above (creating visually a seamless leather handle). |
 |
|
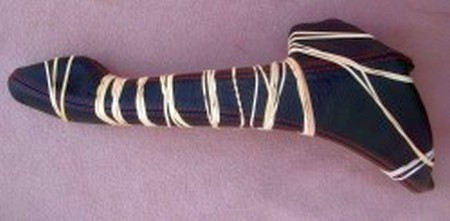
5. Using various sized rubber bands to hold the boot in place whilst the drying process completes.... 10-20 minutes.
PREFERRED WAY TO INSTALL WILL NOT REQUIRE THIS STEP since by now you will have all sections glued one-by-one and you will have held each one in your hands until it had dried. |
 |
|
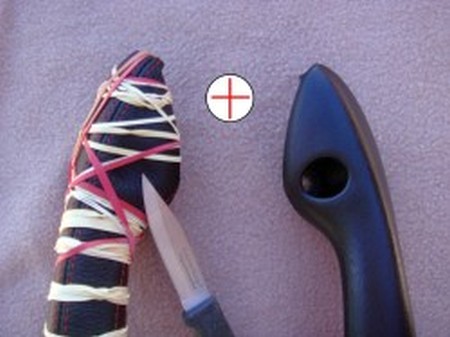
6. Using a sharp craft knife create a "+" shaped incision at the location of the upper fixing point - use the other handle as a guide if required (see image).
|
 |
|
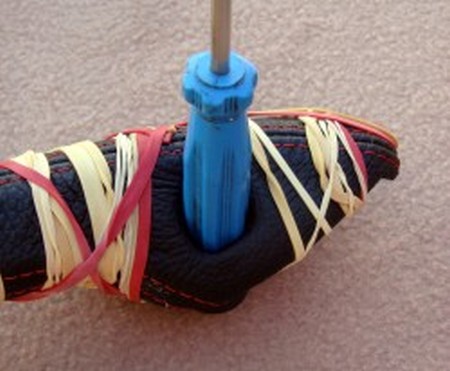
7. Using the butt of the screwdriver, or a similar tool, push the leather down into the hole recess. Glue flaps and secure whilst drying.
Repeat for the lower mounting point.
|
 |
|
8. Reinstall the door pull on the door card in the reverse order of removal and ENJOY!
|
|
Useful tip
|
|
Please subscribe to our newsletter.
Get an instant 20% discount and enter our montly $100 CASH sweepstakes!