MIATA 06+ ROLL HOOP AND DASH INSERT INSTALLATION INSTRUCTIONS
INSTALLING THE ROLL HOOPS
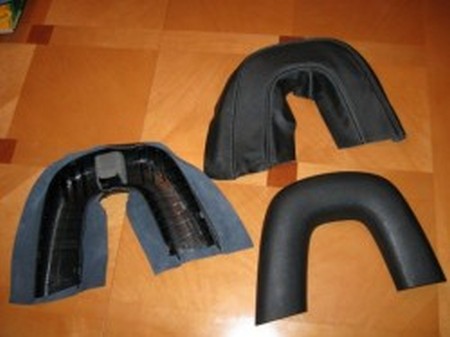
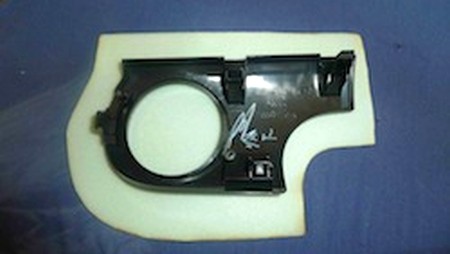
1. The front sections of the roll hoops simply pop off the back side
of the bar which is bolted to the actual roll bar.
2. Test-fitting the covers on the roll hoops.
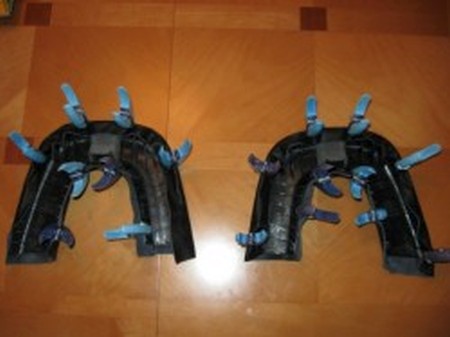
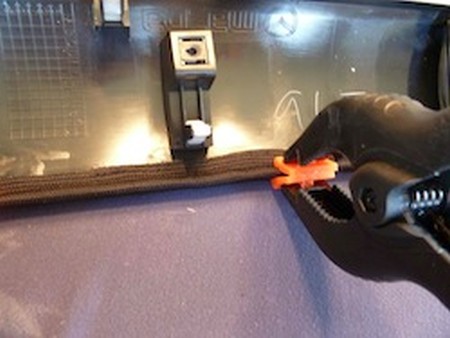
3. To install the covers I sprayed both the roll hoop and inside of
the leather with a light coat of 3M adhesive. I let it sit for approximately 30
seconds to tack. Then I positioned the center of the plastic roll hoop on the
leather and simply stretched it in place and used plastic clamps to secure it.
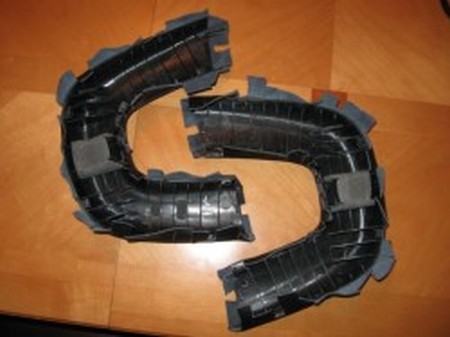
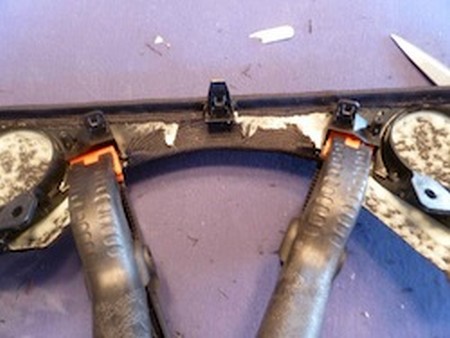
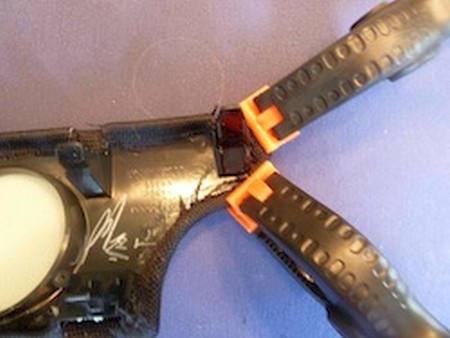
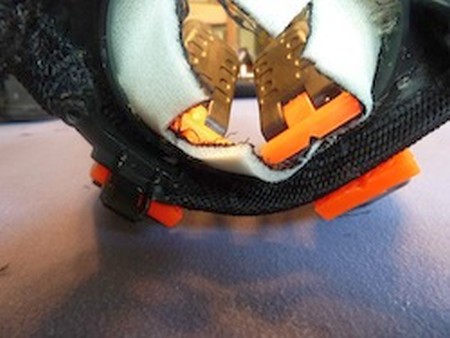
4. I let the parts sit for approximately one hour. I then removed the
clamps and began making a few snips along the outside and inside edges of the
roll hoops to make way for the plastic clips on the roll hoops. Once the snips
were made I sprayed the inside of the roll hoops and folded the excess leather
inside and allowed to cure for one hour.
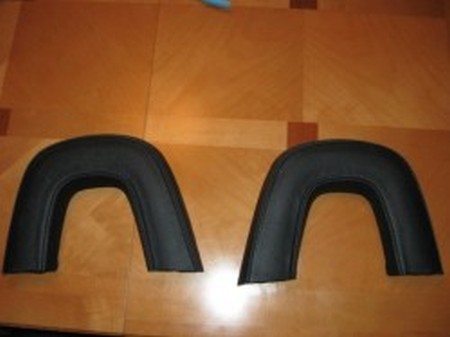
5. I then reinstalled by simply pressing the front half into the back
half.
INSTALLING THE DASH INSERTS
1. Tools and Supplies
Flathead Screwdriver or Car interior tools.
Phillips Head Screwdriver
Clamps
Scissors
Craft sticks -Popsicle sticks (because they will get covered in glue)
Razorblade
Hair Dryer or Heat Gun
Contact Cement
Spray Adhesive (e.g. 3M Super 77)
Intermediate setting epoxy
1. REMOVING STOCK INSERTS
Smaller Dash Insert
1. Use take covered flathead screwdriver or interior tool to pry dash insert at edge next to steering column. Apply pressure and piece should pop out with vent attached. Remove the two screws to remove the vent for cover install.
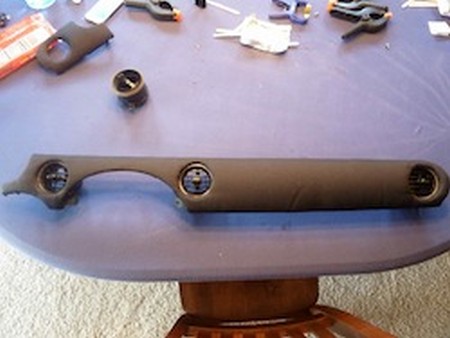
Large Dash Insert
1. Remove interior pieces that are on each side of the stereo, by applying pressure to the back edge closest to windshield, they should pop towards you.
2. Remove two screws from side of stereo.
3. There maybe a security screw on side of stereo, which is reached from foot well to the left of the stereo, a flashlight can help locate it. Once it is remove, pull stereo towards back of car and it will pop out.
4. Now remove two screws that hold large dash insert in place.
5. There is one more screw, which is reached through the glove box, and come into the back of the dash insert. Remove glove box and the screw is located just above opening.
6. With all 3 screws removed that hold the dash insert, used flathead screwdriver or interior tool to pry edge next to steering column, gentle pull towards back of the car, giving support to the thinner pieces of the insert as to not break at part that goes above the stereo. Part will pop towards you.
2. Clean surface of pieces with alcohol to remove anything that would stop adhesive from binding the cover to the dash inserts.
Lay cover down, backside up and position dash inserts in the middle of cover. Now apply spray adhesive to front of dash insert and place it to the backside of cover to give as much border on each edge as possible. Roll dash insert from side to side and front to back. This will help adhesive stick to insert on the entire from face and keep the cover smooth.
3. If your material has foam backing, you will need to remove foam from all the exposed material to allow for proper mounting when finished. (This includes inside the AC vent holes, as the cover will mount more securely without foam. Once foam is removed, you can test fold material over the edges and remove any excess that would be too bulky for re-installation. Material will just need to wrap around edge to back to be secure. A razorblade can be used to remove foam, BE CAREFUL not to cut into material; only a small amount of pressure is needed to cut into foam.
4. Once foam is removed you will begin attaching cover to the back of the dash inserts. Apply contact cement to the edge and allow to get tacky. Once it is, pull material around the edge with even pressure as to not over compress the foam on the front of the dash insert. Continue along each straight edge until all edges are glued down. It is best to work in small segments to not allow glue to over dry. Clamps can be used to maintain pressure while glue dries. Craft sticks can be used to push material into smaller edges where tabs come close to the edge. For edges that do not wrap around from front to back, make a cut in the material, and use craft stick to push material into openings with contact cement applied inside. Glue all straight edges before beginning curves and corners.
5. For curved edges you can either used a heat source to stretch around the curve or make slits in the cover to allow piece to contour to the curve. All should work should be hidden on back with clean material showing on front. Slit method used below on large curve above stereo. Use contact cement to glue material smoothly around curve. For the area that mount behind the stereo, cut the material so that it just fits behind the tabs shown below, and glue down with contact cement. This area will not wrap all the way around, but will not show once stereo is re-installed.
6. For corners, trim material so that is can be fold compactly on the rear of the piece, making a clean edge on the front of the insert. A clamp can be used to hold material in place, while glue dries. If contact cement does not hold material in corner, an epoxy can be used for increased hold. A clamp will be needed for epoxy while it hardens. Repeat on all corners, until the piece has all external edges glued down as shown below.
7. To wrap material into vent holes, use heat source to stretch material as much as possible and work material from the front into the opening. You can make a cross like cut into the material to allow for stretching. It will take some time, but slowly work fabric around the edges of the vent opening. If you are having trouble getting fabric into the area, you can make small cuts in the material to ease the tension and stretch it more easily. BE CAREFUL not to over cut, as cut make show from front if it is too large. Once again used contact cement that has been allowed to become tacky and glue stretched material around vent opening.
8. Once all edges and vents are finished, allow time (~1 hour) to sit and make sure no edges come unglued. This will also reduce the glue smell in the car after install.
Repeat each step for second piece and enjoy your handy work.
Re install pieces back into the car and re-install stereo.
Useful tip
You have installed a product made out of genuine leather. As you know, to maintain a leather product in good condition, you should take care of it. We suggest occasionally (every 4-6 week for example) applying some leather conditioner/UV protector to keep your leather from drying up in the sun and cracking.
Redline Automotive Accessories Corp. will not be held liable for any labor, incidental or consequential damages of any kind. Proceed at your own risk.