2006-15 MAZDA MIATA NC |
|||||||||||||||||||||||||||||||||||||||||
|
1. Remove the shift knob. It is screwed on with no set screw. |
|
|
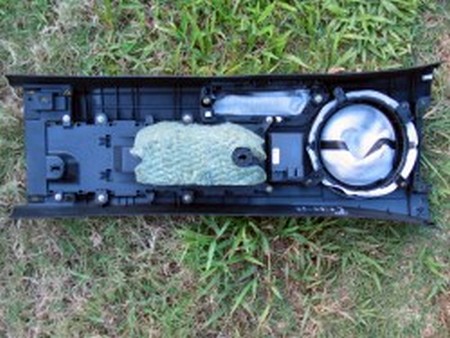
2. Remove center console: it is attached with five screws and two clips. The screws are located as follows; a. in the rear, 2 under the plastic piece; b. in the center, 1 in the bottom of the cup well c. in the front, 3 under the coin holder |
|
|
3. Once the five screws are removed, lift up the console and the two clips at the front. As the console is being lifted, twist off the hand brake handle by moving it from side to side and pulling up. When the console is raised about 6” (15cm), reach under and unclip the electrical connector for the window switches. If you car is equipped with heated seats, unclip those connectors. Once the handbrake handle is off and all electrical connectors are released, lift the console off and place it upside down on a soft cloth or towel. |
 |
|
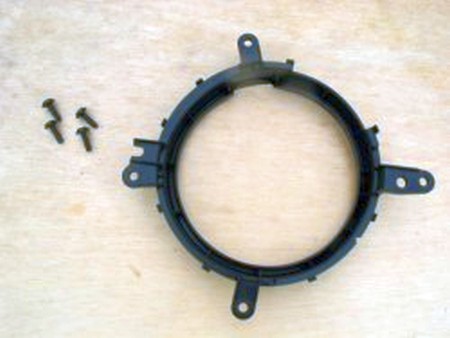
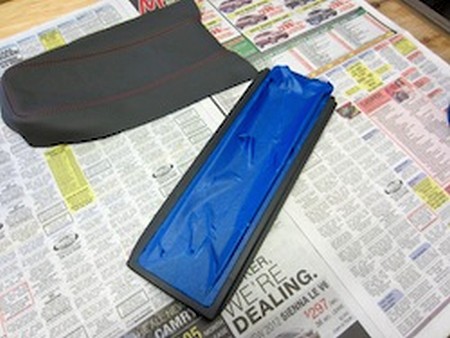
4. Installing the shift boot: The console is upside down. The shift boot is held in place with a plastic clamping ring attached with 4 screws. Remove the screws, clamping ring and stock boot. Remove the stock boot and replace it with the RedlineGoods shift boot. The RedlineGoods boot goes over the inside clamping ring with the cut openings fitted over the plastic tabs. Reattach the clamping ring, boot and to the underside of the console. |
 |
|
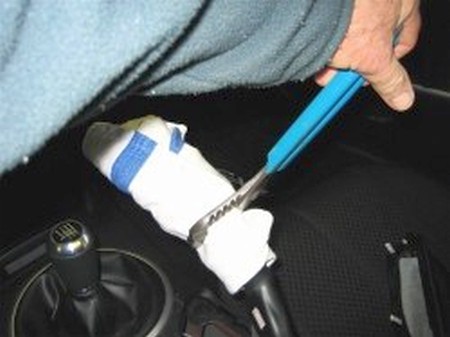
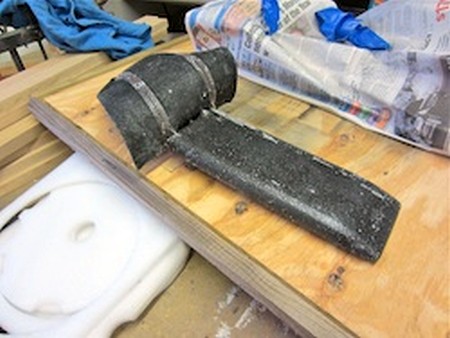
5. Installing the handbrake boot: The console is upside down. The handbrake is held in place with a two-piece plastic clamping ring attached with 2 screws and clips. Remove the screws, the clamping ring and the stock boot. Observe how the stock boot is fitted over the plastic tabs. The handbrake handle is still attached to the boot. Simply pull the handle out of the boot. |
 |
 |
|
|
6. If you are NOT installing the ebrake handle cover as well, go through steps 10-20 now. Now insert the handle into the REDLINE boot. The REDLINE boot goes over the inside clamping ring with the cut openings fitted over the plastic tabs. Reattach the clamping ring, boot and to the underside of the console. |
 |
|
7. If you are NOT installing the ebrake handle, proceed to step 12 now. |
|
|
8. INSTALLING THE EBRAKE HANDLE
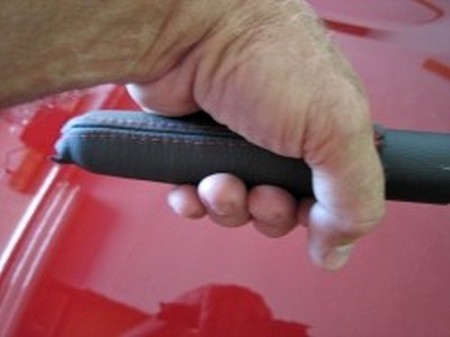
Basically what we're going to do is slide the leather cover over the existing rubber handle, it slips on pretty easily but I found that the job goes much easier if the rubber handle is removed from the lever first. We recommend a spot of glue at the back end of the cover to hold it on but the rubber handle expanded enough when installed back over the handle that the leather cover isn't going anywhere, it's a very tight fit. You'll notice that the button end of the leather cover is cut into tabs that tuck into the hole around the release button, you'll need the exacto knife to enlarge the button hole in the rubber handle to allow the leather to fit in around the button.
Remove the factory handle by wrapping a rag around it and using pliers to give it a twist to beak it loose. Once it's loose just pull it off. |
 |
|
9. Once you have the rubber handle off, use the exacto knife to CAREFULLY enlarge the hole around the release button. The factory hole is only large enough for the factory button to fit through, we're going to be wrapping some quality leather into the hole and around the button, so the hole must be enlarged to allow this. Cut the opening to the inside diameter of the rest of the center hole and then round the edge of the hole so that the leather has a nice round edge to wrap around. |
 |
|
10. Now we're ready to put things together. Pull the leather cover on with the handle off of the lever, it's much easier to pull on this way. Pull the cover all the way on so that you have just enough leather left to tuck into the enlarged button hole. This will take some twisting and pulling but the cover must be all the way on. This is actually the "hardest" part of the installation and do be sure that the seam is lined up where you want it to be! |
 |
|
11. With the leather cover on, the newly beautified handle can be reinstalled on the lever. The handle goes on first, and the the boot. As the button begins to poke through the button hole use the small flat blade screw driver to tuck the leather in around the release button, this is why you enlarged the hole. As you tuck pull the handle back into position until it looks like this. Test the button to be sure that it will move correctly with the leather around it, if it does not pull the assembly back apart, remove the leather and open up the hole a bit more. |
 |
|
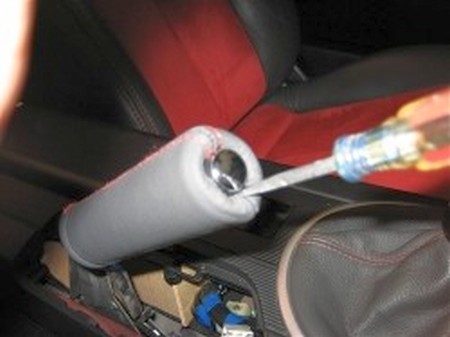
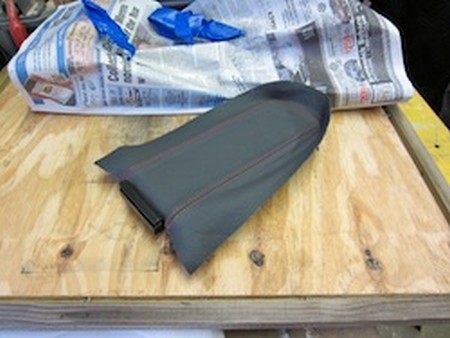
12. Now insert the handle into the REDLINE boot. The REDLINE boot goes over the inside clamping ring with the cut openings fitted over the plastic tabs. Reattach the clamping ring, boot and to the underside of the console. |
|
|
13. Reattach center console. Be sure to reinstall all the connections. Reinstall the shift knob. Adjust the shift boot to 'crinkle' as you desire. |
|
|
Start by cleaning the ILM pad with a pre-paint degreaser and then masking off the areas that I do not want to get spray adhesive on. Here the bottom is covered and the Redline Goods leather cover is waiting for it's glue coating on the underside./p>
I also masked the plastic hinge before spray gluing. I use Permatex Heavy Duty Headliner & Carpet Adhesive for my interior projects, it's great stuff, but do not get it on anything that you don't want it on. |
 |
|
15. Here the parts are all covered with the spray adhesive and the Redline leather cover has been tucks carefully into position between the hinge and pad. Line everything up carefully in this step so when the leather is laid over the pad it will be straight with no crooked seams. |
 |
|
16. With the leather laid into position this is what it'll look like. The leather is not yet pulled tight so work out any wrinkles and double check it's position on the pad. |
 |
|
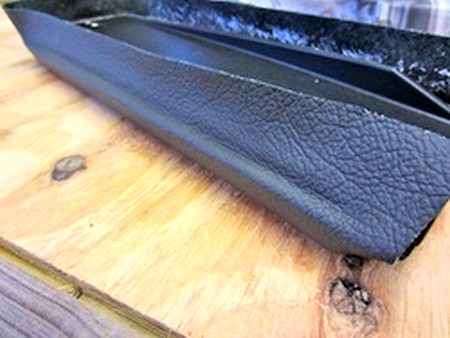
17. Pull the edges down and stretch the leather tightly onto the pad. This got rid of any remaining wrinkles and finalized the fit. This is how the edges should look, the leather is fitted onto the shoulders of the ILM pad. This is the section that fits into the opening of the console so keep these tight. |
 |
|
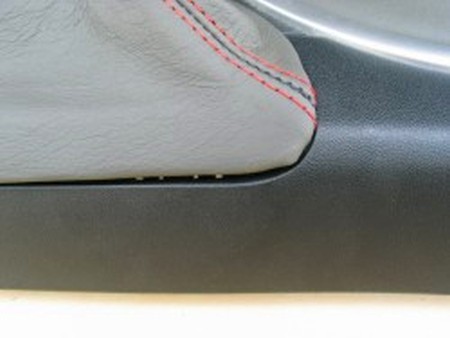
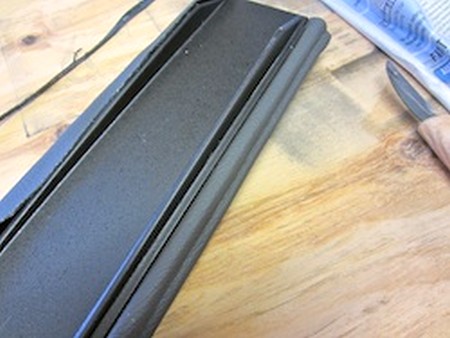
18. Here's a finished edge, the leather is tucked in tightly and I've already trimmed the excess leather along the plastic rib with a knife. Trimming along the rib will give the right amount of leather to tuck in between the plastic and the padding. I used the back of my knife to push the leather down between the pad and plastic, this worked very well and made a beautiful edge. I should not have used the back of the knife for this, it is not safe. Use a rounded dull edge tool to push the leather in. One side is all tucked in and the other trimmed and ready to be tucked in. |
 |
|
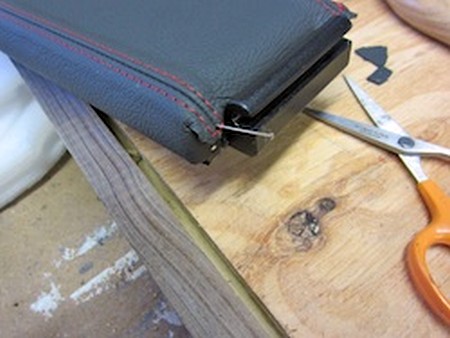
19. Now it's time to trim the front edges and get those tucked in as well, just do it as you would a nicely wrapped birthday gift. However, since the thickness of the leather will affect the fit into the console, do not double the thickness of the leather, just trim everything for a nice butt seam and glue securely. With the sides and from finished it's time to turn to the back edge. This is not so easy, we cannot have more than a single thickness of leather here, the back of the pad must clear the metal parts of the hinge as installed in the console. Luckily, this will all be invisible when installed so we're going for being neat and tidy here. Cut the leather so that it will pull around and cover all of the exposed edges, be sure to have adhesive on both the underside of the leather and the pad for good adhesion. To ensure that the leather stayed where it was supposed to, I used a couple of straight pins to secure it. The pins will not show if positioned carefully and will hold everything in place.
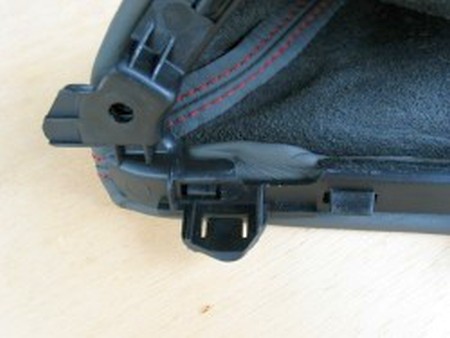
The back of the lid needs to be lifted up so start by shimming the metal part of the hinge that attaches to the console up by about 1/16th of an inch. A small washer or two should do the trick. You will also need to trim the side edges of the opening to allow the lid to fit back inside it's hole. Use a coarse file to make the opening larger, test fitting often until the fit is good. Once everything fits nicely use a fine file to clean up the rough edges. |
 |
Useful tip
You have installed a product made out of genuine leather. As you know, to maintain a leather product in good condition, you should take care of it. We suggest occasionally (every 4-6 week for example) applying some leather conditioner/UV protector to keep your leather from drying up in the sun and cracking. |
|
Please subscribe to our newsletter.
Get an instant 20% discount and enter our montly $100 CASH sweepstakes!