|
||||||||||||||||||||||||||
|
Tools needed for job: 1 Phillips #2 screwdriver 1 Pair Diagonal cutters 1 Razor knife
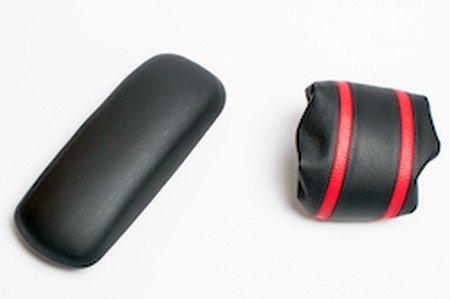
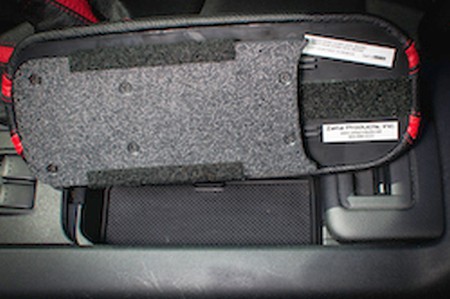
1. The RedlineGoods armrest cover is provided in one piece, with an elastic band. This will simply slip over the armrest once it has been disassembled. |
|
|
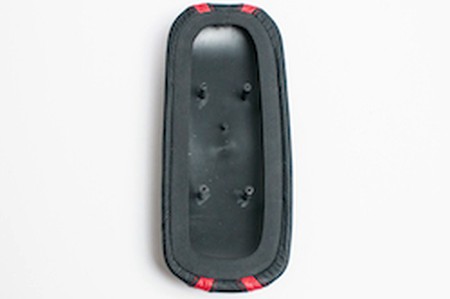
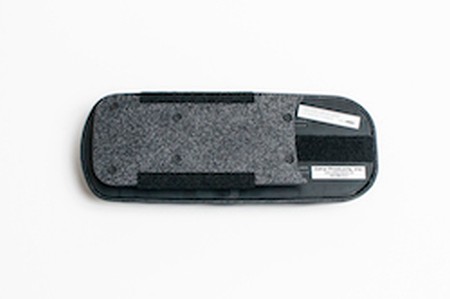
2. Flip over the Zeta Armrest, and make a note of the 6 screws and the orientation of the mounting plate with relation to the armrest itself. These pieces must all be assembled in the same orientation that they are in now, or the pieces will not fit properly. For future reference, please note that the mounting plate does not cover the entire bottom of the armrest... the uncovered area is the "back" of the armrest, whereas the covered end is the "front" of the armrest. |
 |
|
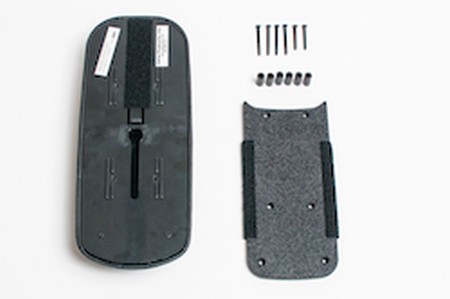
3. Remove the 6 screws from the bottom of the Zeta Armrest plate with a Phillips screwdriver. Note that there are also 6 plastic posts between the mounting plate and the bottom of the armrest itself -- these posts are not attached to anything and will come loose after the screws are removed, be careful not to misplace any of these. Also, note that there are 4 screws of one length, and 2 screws of a shorter length -- the shorter screws go on the "front" end, and the other 4 go into the center and "back". The reason for this will be apparent shortly. |
 |
|
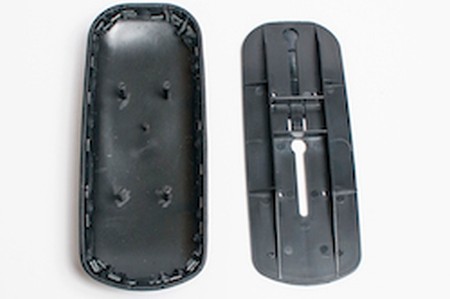
4. Now that all of the screws have been removed, lift the bottom plate of the Zeta Armrest off and set it aside, carefully noting the orientation. Note the four posts on the inside of the armrest -- these are where the longer screws go through the mounting plate and attach the bottom plate to the top plate of the armrest. |
 |
|
5. Slip the new RedlineGoods armrest cover over the padded top plate of the Zeta Armrest. |
 |
|
6. Continue slipping and adjusting the RedlineGoods cover until it fits snugly -- make any adjustments to position or alignment as necessary during this time. |
|
|
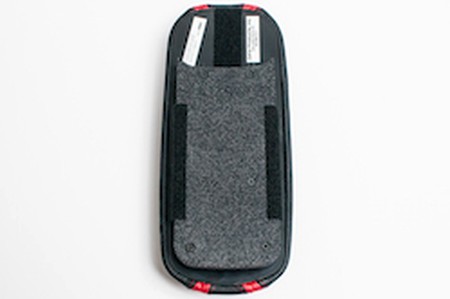
7. Now simply reverse the disassembly process. Lay the bottom plate of the armrest back onto the underside of the top plate, aligning the four closely-set holes with the four posts inside. Then, carefully place each of the 6 plastic sleeves you removed earlier onto each hole. After that, carefully lay the mounting plate back on top of the plastic sleeves noting once again that everything should be lined up in its original orientation. Insert the 4 longer screws into the four center/"back" holes, and the 2 shorter screws in the "front" holes and screw them all in until everything is snug. |
|
|
8. Flip the Zeta Armrest back over and ensure the fit is to your satisfaction. If not, you will need to disassemble it once again to adjust the fit. |
|
|
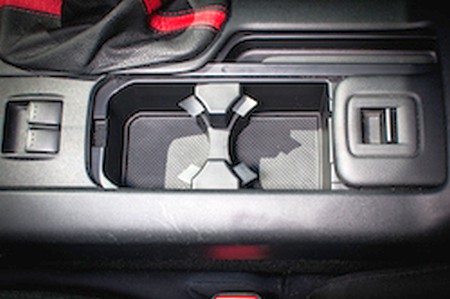
9. In the car, open up the center console cover to expose the center cup holders. |
|
|
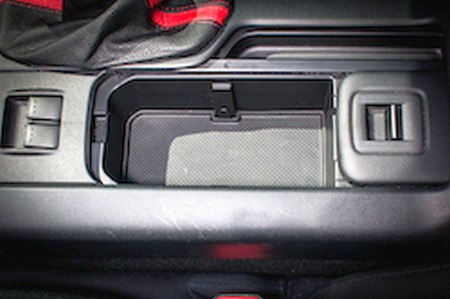
10. Lift up on the center cup holder divider, it simply slides out. |
|
|
11. Line up the mounting plate of the Zeta Armrest with the exposed area of the center console, and simply slide it into place per the Zeta Armrest instructions. As noted on the Armrest itself, it may help to seat the front first, and then push the rear down. If you need to remove it, simply lift up on the rear. |
|
|
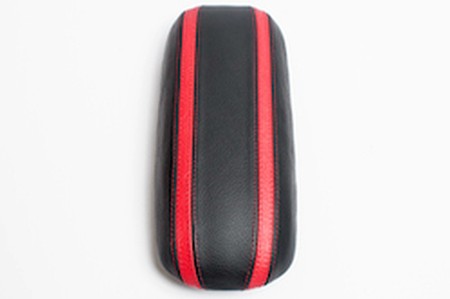
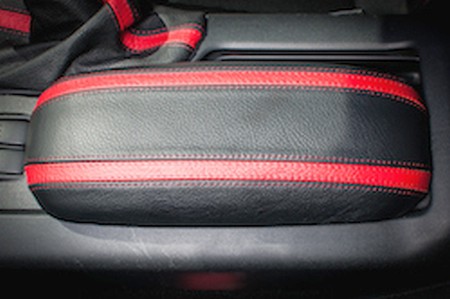
12. Enjoy your new Zeta Armrest with genuine RedlineGoods leather cover! |
|
|
CONGRATULATIONS - YOU HAVE SUCCESSFULLY INSTALLED YOUR NEW LEATHER BOOTS!
Useful tip You have installed a product made out of genuine leather. As you know, to maintain a leather product in good condition, you should take care of it. We suggest occasionally (every 4-6 week for example) applying some leather conditioner/UV protector to keep your leather from drying up in the sun and cracking. |
|
Subscribe to our newsletter to get an instant 20% discount!