2006-15 MAZDA MIATA NC |
|||||||||||||||
|
1. Remove the cover at the rear of the center console by carefully pulling on the back to release the tabs. |
|
|
2. Remove the 2 black screws securing the rear of the console. |
 |
|
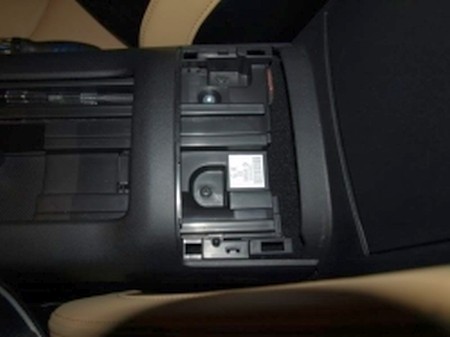
3. Remove the cup holder/divider and the rubber pad at the bottom of the center console cubby.
4. Remove the rubber pad at the front of the console. Carefully pull
the center console up starting at the back, there are 2 clips at the front of
the console that secure it and a small pull should release them. |
 |
|
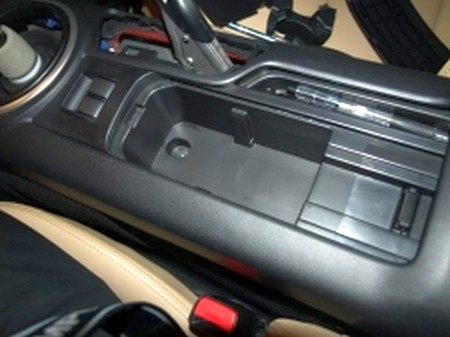
9. To remove the sliding console cover, remove the 2 silver screws holding the slide stop to the console. Once the slide stop is removed, the cover will slide out the back of the console. To remove the sliding console cover, remove the 2 silver screws holding the slide stop to the console. Once the slide stop is removed, the cover will slide out the back of the console.
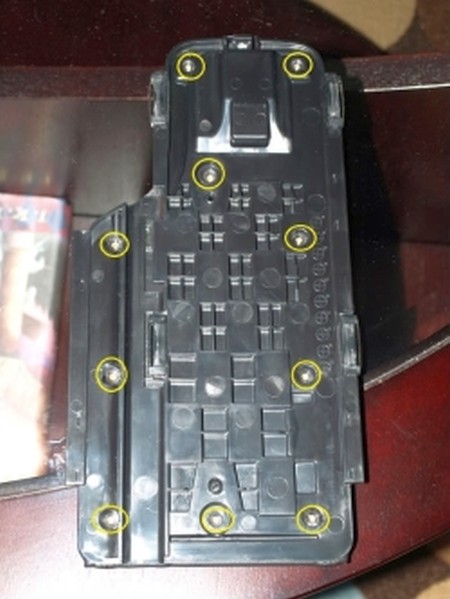
4. Once the cover is off, separate the 2 pieces of the cover by removing the 10 small screw securing them together: |
 |
|
11. With the cover apart, the vinyl is held onto the top part with staples and glue. Pry the staples out of the plastic, a small flat head screwdriver will work, just take your time. There are 4 silver screws holding the clip to the top, remove those to remove the clip to finish removing the vinyl.
When I installed the top cover, I just used the glue that was still on the top and trimmed where needed for screw holes. Once I had the 2 pieces screwed together they held the leather in place without need for the staples. |
|
 |
|
|
12. Reattach center console. Be sure to reinstall all the connections. Reinstall the shift knob.
ENJOY! :) |
|
Useful tip
You have installed a product made out of genuine leather. As you know, to maintain a leather product in good condition, you should take care of it. We suggest occasionally (every 4-6 week for example) applying some leather conditioner/UV protector to keep your leather from drying up in the sun and cracking. |
|
Subscribe to our newsletter to get an instant 20% discount!