2001-06 MINI COOPER |
||||||||||||||||||
|
The following tools are necessary: * Needle-nose pliers * Small Flathead screwdriver * Long flathead screwdriver * Staple Gun * 1/4" Staples
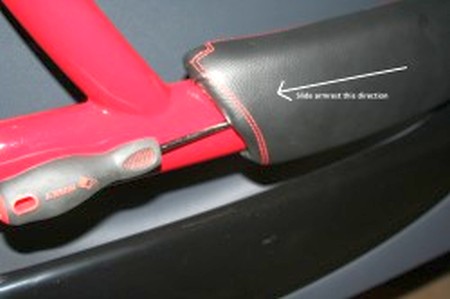
1. To begin, remove both door panel armrests from your MINI. To do this, grap your long flathead screwdriver. Both armrests are held in place by a retention clip that hidden about 4 inches along the plastic door panel. To depress the clip, insert the flat head screw driver between the armrest and the door panel. A cloth is advised to prevent from scratching your door panel.
Next, push the flathead screw driver along the rail. You should feel some resistance as you push down the clip that locks the armrest in place.
Once you have pushed the flathead screwdriver further back, slide the armrest forward as seen in the above picture. Remove the armrest once you slide it forward.
Repeat on the other armrest.
|
 |
|
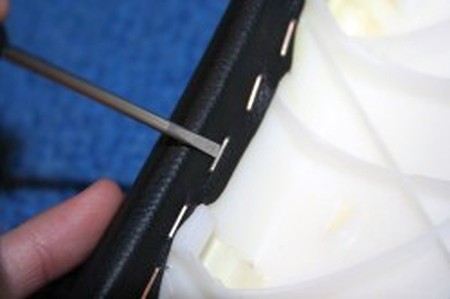
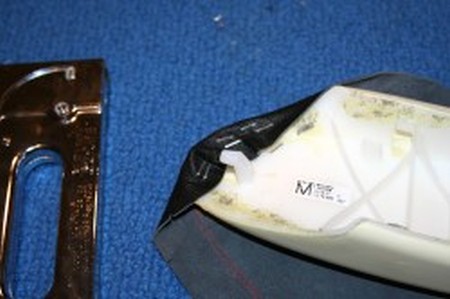
2. The next step is to remove the old leather/leatherette that currently covers each armrest. To do so, grap your small flathead screwdriver and needle nose pliers. The best method to remove the staples, is to wedge your flathead screwdriver underneath the staple and pry it up. |
 |
|
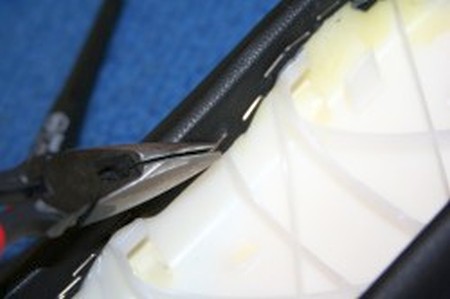
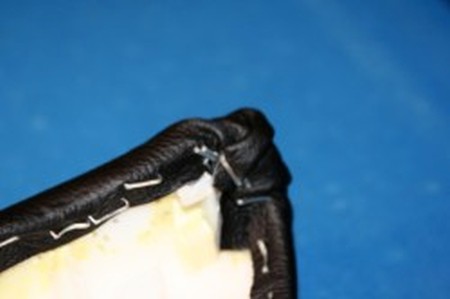
3. Then, if this does not remove the staple, you can follow with the needle nose pliers to remove the rest of the staple. |
 |
|
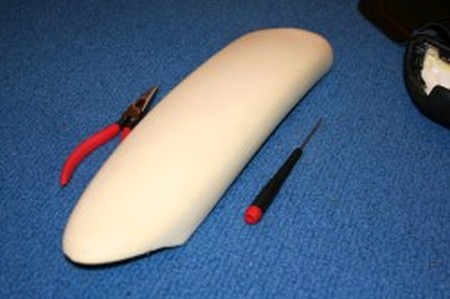
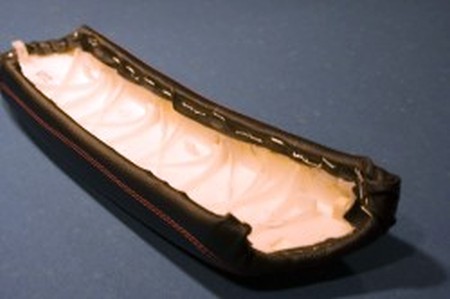
4. Repeat on both armrests.
Once you have all the staples removed, remove the old leather from the armrest. |
 |
|
5. Grab your staple gun, load it up with 1/4" staples and, of course, grap your leather. Line up the top of the leather with the approriate side of the armrest. When stapling the leather down, it is easier if you start at the tip of the armrest. |
 |
|
6. Apply staples every few centimeters, and continue to work your way down the sides of the armrest. Be sure to flip over the armrest every once in a while to asure that the threads on the visible side of the leather are straight. |
 |
|
7. Don't be afraid to apply pressure to the staple gun! Because of this thickess of the plastic, you definitely need to apply some pressure, otherwise the staples will not stay in!
Work your way around the armrest. With a little practice, you will be a pro! |
 |
|
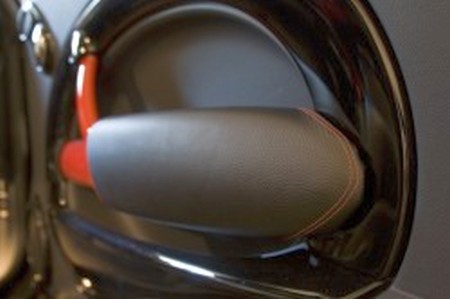
8. To re-install on your door panel, align the armrest on the panel and slide it back in place. It will lock in place once you push it back in line with the retention clip. |
 |
|
Useful tip You have installed a product made out of genuine leather. As you know, to maintain a leather product in good condition, you should take care of it. We suggest occasionally (every 4-6 week for example) applying some leather conditioner/UV protector to keep your leather from drying up in the sun and cracking. |
|
Please subscribe to our newsletter.
Get an instant 20% discount and enter our montly $100 CASH sweepstakes!