2003-08 SUBARU FORESTER |
|||||||||||||||||||||||||||||||||||||||||||||||||||||||||
|
0) Make sure that you have the following items available. 1) Phillips and flat blade screwdrivers 2) Needle-nose pliers 3) Contact cement ( Auto Zone for $2.65 a tube)
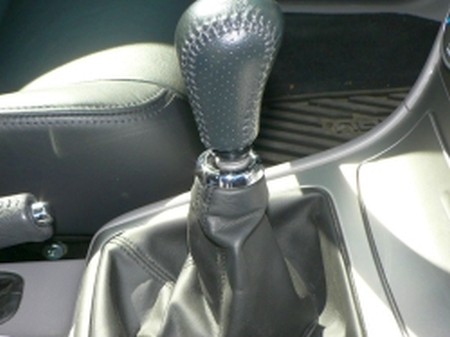
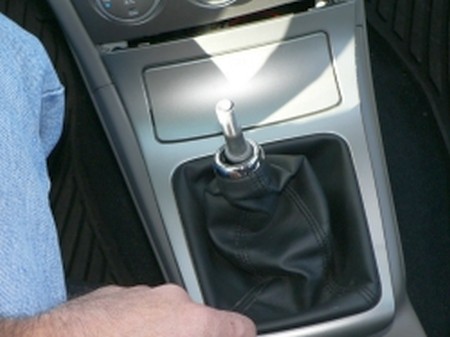
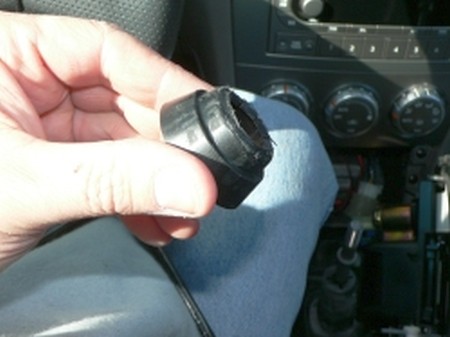
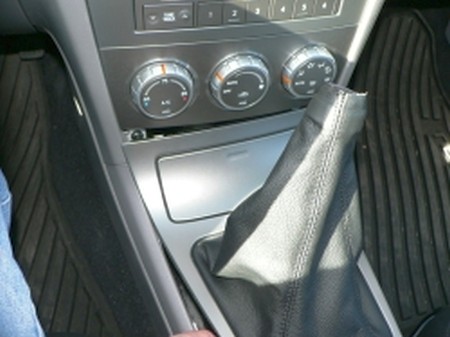
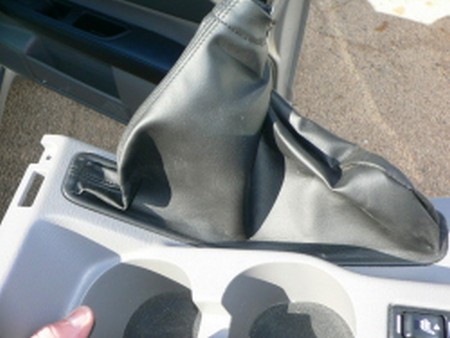
1) Remove the shift knob by unscrewing it counterclockwise, and then push down on the silver retaining ring on the top of the boot to seperate the boot from the knob. Set the knob off to the side. |
 |
|
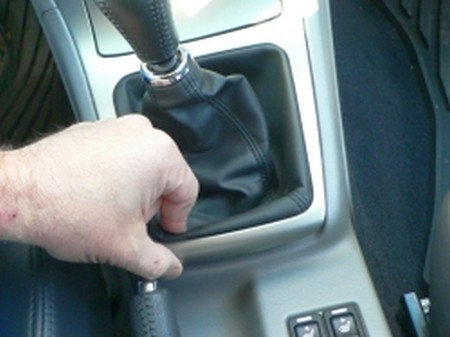
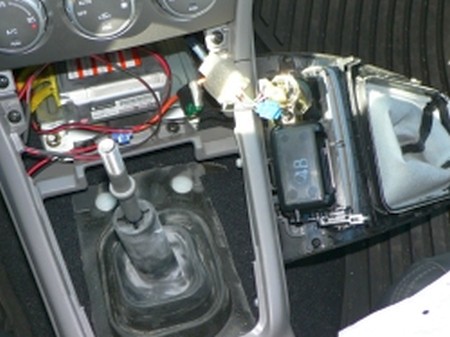
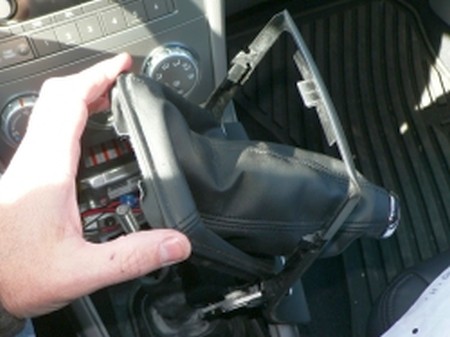
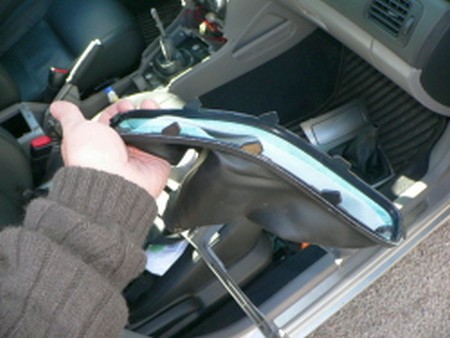
2) Grasp the back side of the console where the back edge of the boot meets the console. Pull up and the console will come loose at the back. As you pull up on the back, slide the console back and down in the front. You will see a tab on each side at the top and front of the console. Once you have cleared these tabs you can carefully wiggle the console free and then sliding the consol and boot out and off of the shift lever it will come free.
|
 |
 |
|
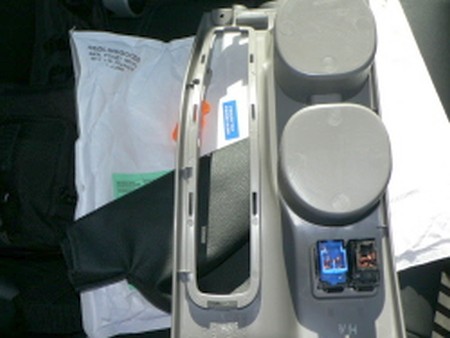
3) Although the console has been removed it will still be connected by several wires. There will be wires connecting to the ashtray light and also to the cigarette/power receptacle. Remove both of these at the connector point on the console, and then set the console off to the side and out of harms way.
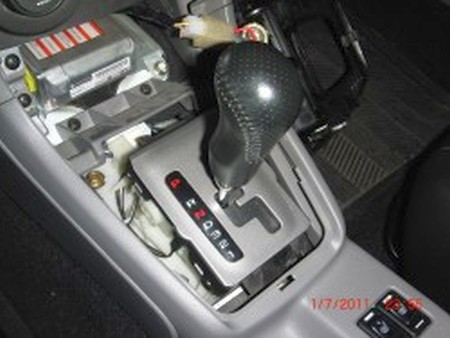
On an automatic car you will now see the exposed shifter plate. Just align the boot over it, you may want to use bits of double-sided tape to make sure it stays where you want it. Proceed to step 8. |
|
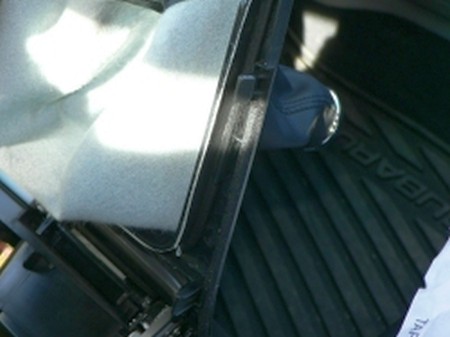
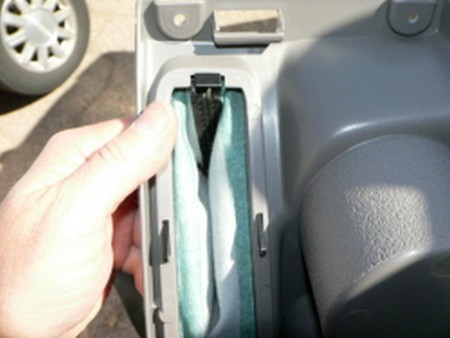
4) Turn the console and boot upside down to gain access to the boot retaining clips. They are made into the console and clip the plastic boot ring in place on the front, back, and both sides. Just pry back and pop the shifter boot and its attached boot ring out of the underside of the console |
 |
 |
|
 |
|
 |
|
 |
|
 |
|
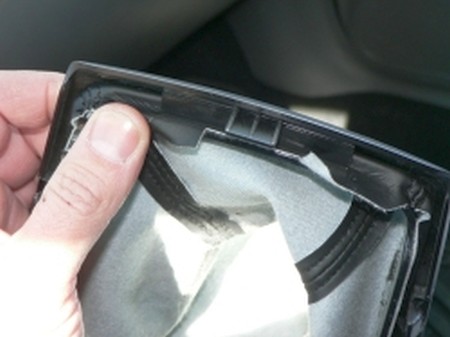
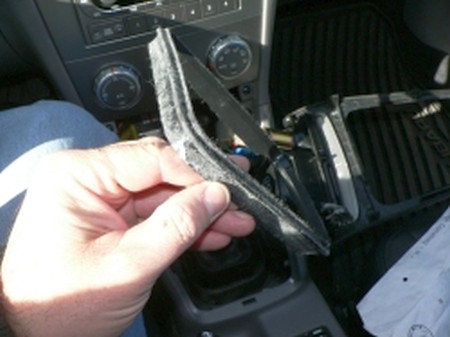
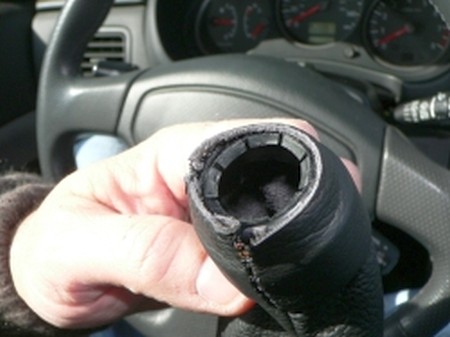
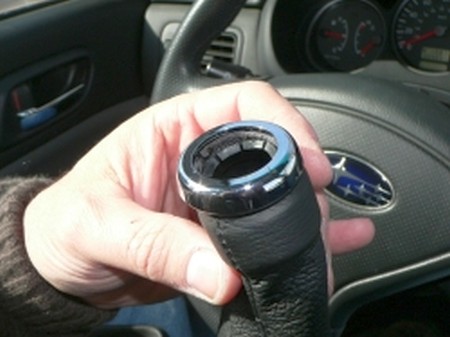
5) Now to disassemble the stock boot. First remove the vinyl boot from the ring by pulling it loose from the plastic boot ring. It is glued in place, so I would advise using a set of needle nose pliers to get things going. Once you can get a good grip, you can pull the boot loose pretty easily. Keep an eye on which side of the boot ring is up and down for the re-install. Also flip the boot inside out and remove the plastic inner-retainer and the chrome outer ring from the old boot. They are also glued in place as well, but can be pulled loose using care. |
 |
 |
|
 |
|
|
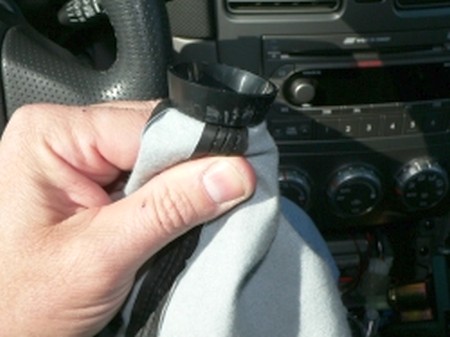
6) Re-install the plastic inner retainer for shift knob. No glue required |
 |
|
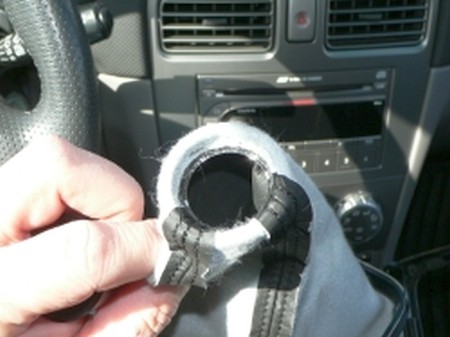
7) Fit the boot around the plastic base ring. Again no glue required but optional I suppose. |
 |
 |
|
|
DO NOT PERFORM STEPS 8-12 AT THIS TIME IF YOU ARE INSTALLING THE EBRAKE BOOT AS WELL.
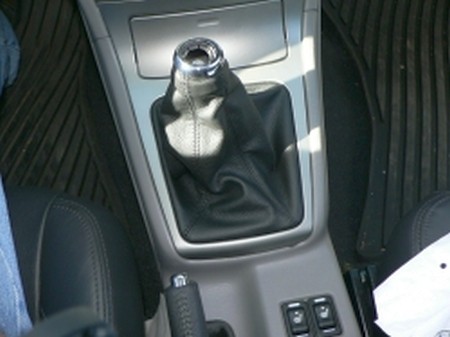
8) Re-fit the boot and ring assembly from the bottom back into the cosole making sure the clips securely retain the boot and retaining ring.
9) Re-connect the power connectors on the ash-tray light and receptacle
10) Re-fit the console sliding upper tabs into dash panel. Press console into place, making sure any excess boot material is tucked inside. |
 |
11) Re-fit the chrome ring using contact cement |
 |
12) Re-install knob of choice and slide plastic boot retainer up on knob barb. inspect for fit and electircal function of re-connected console lamps |
 |
13) Remove shifter console per earlier shift boot install instructions (unless you have installed the shift boot as well, in which case you probably have it removed already.) Undo the snap button on the ebrake boot. |
 |
14) Open the console top and remove the two black philips screws at the back of the console base. Also remove the two black phillips screws at the front of the lower console. |
 |
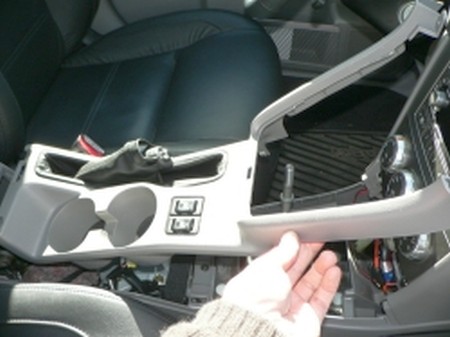
15) After removing all four philips screws, you will need to pull up on the emergency brake handle, and unsnap the snap on the factory boot under the handle. For easy removal access, pull the console base up in the front on each side a little, and then in the back as well. Once you have the back freed-up you can tilt the front up to clear the climate controls and then carefully slide the console forward and up over and off of the emergency brake handle. |
 |
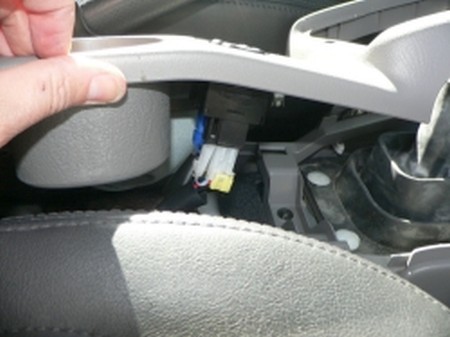
16) Before getting too carried away, the seat heater connectors will need to be disconnected before being able to remove the console. They are color coded to the receptacle so there is no worry concerning getting them reconnected properly. These require a simple squeeze in to remove. |
 |
17) Pull lower console and stock e-brake boot out of car and move to bench location to finish removal of boot. |
 |
 |
|
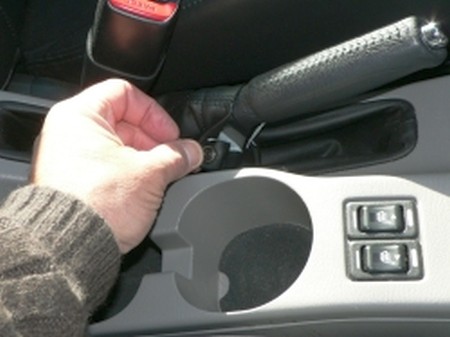
18) Pop retainer clip on underside of the E-brake handle slot. This is the plastic retainer that holds the e-brake boot in place. Once unclipped, pull the clip and boot out of the lower console housing. |
 |
19) Pull factory boot off of black plastic retainer/clip. |
 |
 |
|
20) Once factory boot has been removed from the ring (again the boot is best pulled loose using a set of needle-nose pliers to get it started), then you need to get the contact cement and new e-brake boot ready.
21) The new boot is a tight fit, and the curve of the plastic retainer piece makes the install a three-handed job.
22) Dry fitting it is a good idea, then once you are satisfied with how the boot will sit on the retainer ring, use the contact cement on the plastic retainer using it along a portion of the ring at a time to ensure the cement doesn't set-up before installing the boot. |
 |
23) Beginning at the front end, I glued the front edge, and then part of one side in place. I palced the rear edge of the boot over the retainer, but did not glue yet. The e-brake boot will be installed flush with the plastic retainers edge with no excess hanging over. The cement set-up fast, but you should allow it to become tacky, then press the boot in place and hold till set. This doesn't take too long.
24) Continue to glue the other side from the front to the middle, and hold until set.
25) Pull the rear of the boot up and off carefully and place cement on the back edge and back to center sides of the retainer. Reposition the back of the boot and then work down the edges from the center of each of the sides to the rear. Let dry. 26) Reinstall the new boot and retainer clip back into the console and clip securely. Its tight becasue the leather boot is thicker than the vinyl stock boot. |
 |
|
27) Reinstall the new e-brake boot over the e-brake handle (remember to unhook the Velcro at the boot edge to provide enough room for the handle to go through), reconnect the two seat heater connectors, and finally lower the console back into place.
28) Screw the four(4) black philips head screws back into place to retain the lower console and the reinstall the shift boot console as noted in the shift boot installation instructions above.
|
|
|
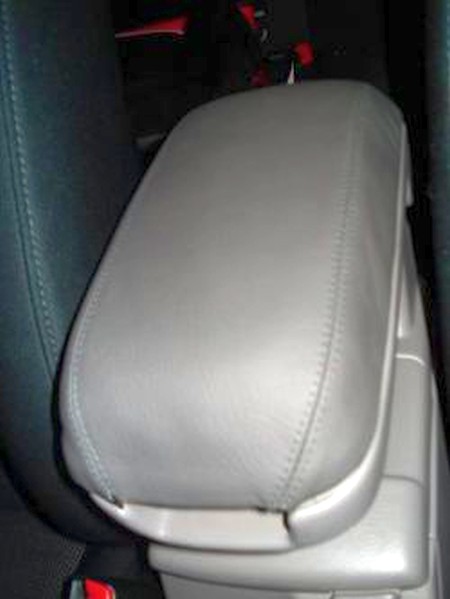
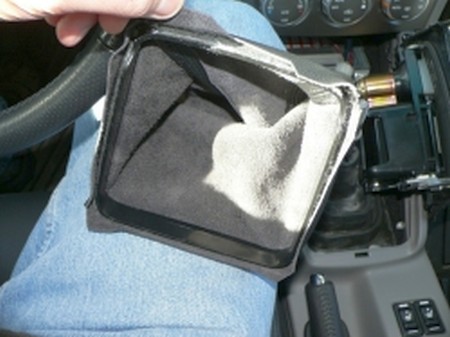
29) Flip the arm rest upside down. You'll see 2 screws on the bottom of each cup holder. Remove both screws. This will release the plastic piece that the arm rest slides on.
30) Flip the tab that moves the arm rest forward (the piece that allows it to move forward and backward). The arm rest should slide right off this piece.
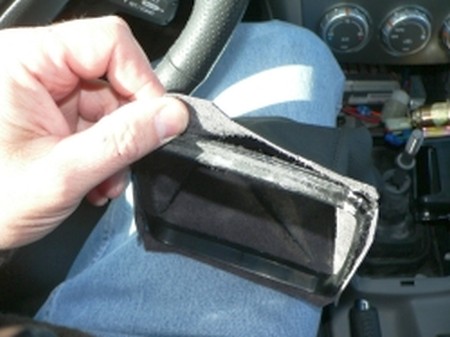
31) At this point, remove the stock arm rest cover. It's probably easier to install the leather cover without it, but you can leave it in place if you want.
32) If you chose the arm rest padding (which I recommend, it's very comfortable), glue it to the arm rest. It made it much easier to glue the leather cover if the padding doesn't move around
33) To install the cover, I started at the front and glued (rubber cement) the cover to the stock arm rest. Having some clamps made it much easier to hold the cover on while the glue set. I slowly worked my way around, gluing a few inches at a time.
34) I did the front and sides first, then the back, and used the back 2 corners to pull out the excess leather.
35) Finally, reinstall the arm rest cover the same way it came off. |
|
| Congratulations, you're DONE! | |
|
Useful tip You have installed a product made out of genuine leather. As you know, to maintain a leather product in good condition, you should take care of it. We suggest occasionally (every 4-6 week for example) applying some leather conditioner/UV protector to keep your leather from drying up in the sun and cracking. |
|
Please subscribe to our newsletter.
Get an instant 20% discount and enter our montly $100 CASH sweepstakes!