1997-02 PONTIAC FIREBIRD |
||||||||||||||||||||
|
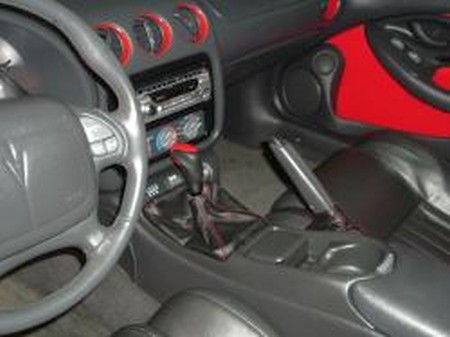
1. Begin with removing you shift knob by rotating it counter clockwise.
2. Grab the ring within the base of the factory shift boot, push the ring towards the front of the car, and lift up to disengage it. Remove the factory boot and ring from the car.
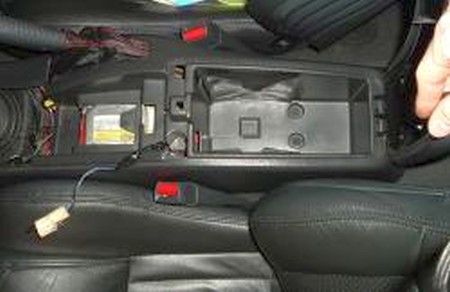
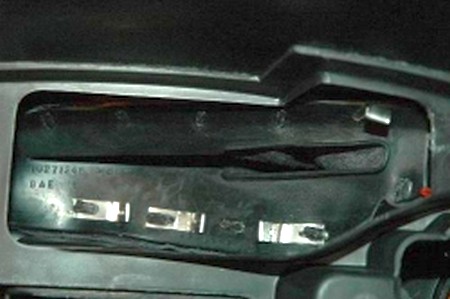
3. If you are installing the ebrake boot as well, remove the top piece of the center console: Open your center console door and grab the top center console piece right behind the cup holder (arrows). Push forward and lift up to disengage the piece from the console. Disconnect the traction control wires and ash tray light. Also remove the center console pocket light that is located at the rear of this piece. It does not need to be disconnected, just remove the black clip from the top and slide the light out the bottom. |
 |
|
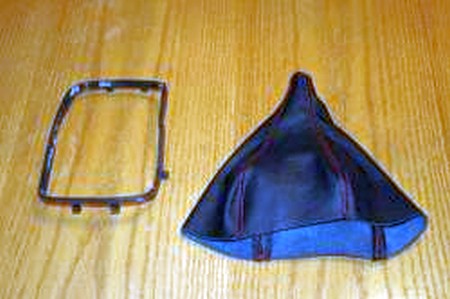
4. Remove the factory boot from the ring and replace with the RedlineGoods shift boot. |
 |
|
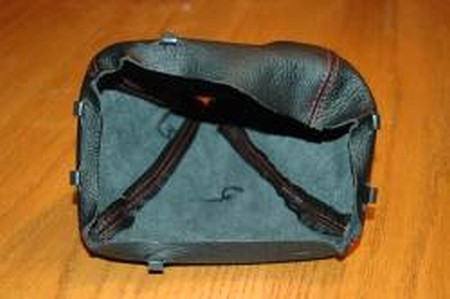
5. Align the RedlineGoods shift boot with the ring and cut the slits for the side and rear teeth of the ring. Make sure to leave enough room for your lever travel. Test it in the car before you make ANY cuts. If you are installing just the shift boot, reinstall everything in reverse order and you are done. |
 |
|
6. If installing the ebrake boot as well, you need to remove the console. In order to achieve that you need to remove the two 10mm bolts from the front sides, two 10mm bolts from the bottom of the main compartment, one 10mm bolt from under the ash tray, and two small screws from under the coin holder. Remove your shift knob and boot. Release the light bulb from the ashtray location. Pull your e-brake handle all of the way back (you may need to pry up the pawl under the stock boot with a screwdriver to get it back far enough). At this point, lift up the rear of the console. Reach under and remove the connectors for the lighter and power outlet (pinch top and bottom and pull). Pull the switch panel (traction control, etc.) off and push it back through the hole. At this point you should be able to pull the console up high enough to clear the e-brake handle and remove it. |
 |
|
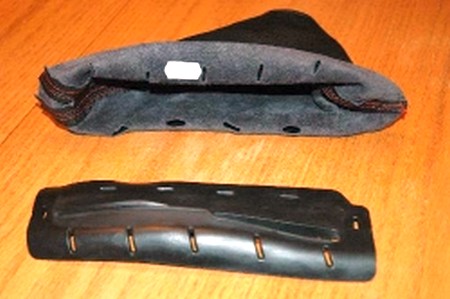
7. Turn the console over and find the e-brake boot. You’ll see how it’s retained upon examination. The first thing to do is remove the metal retaining strip on one side. It can be cut with a dremel or other tool. Another option is to start at one end and bend it back and forth until it breaks. Then, with a pair of pliers you can pull the next section from under the retaining tab and start the bending process all over. Once that’s removed, gently pull the rubber boot off the retaining tabs.
8. Next, position the new RedlineGoods boot in position and with a pen, mark the positions you need to cut slots in the leather for the retaining tabs. Play around with the boot to make sure it looks the way you want it to before you cut the slots. I used a pair of wire cutters to make the slots. I made them about 1/16th of an inch wide to facilitate slipping the boot over the retainers. |
 |
|
9. I decided to reinstall the rubber boot over the leather boot to hold the leather boot in place. Another option would be to use a hot glue gun. I used a screwdriver to help get the rubber back over the tabs. When that was done, I used some of the metal strap pieces as retaining clips at key locations where the retaining tabs weren’t in the best condition. |
 |
|
10. With the boot installed, replace the console in the vehicle by following the steps from removal in reverse order. Carefully work the e-brake handle through the new boot as you lower the console into position. Before you attempt to reinstall and fasteners, check to see that your seat belts are out of the way and you haven’t trapped any wires under the edge of the console. |
 |
|
11. Reinstall the shift boot and shift knob. |
|
|
ENJOY YOUR NEW LEATHER BOOTS! |
|
|
Useful tip You have installed a product made out of genuine leather. As you know, to maintain a leather product in good condition, you should take care of it. We suggest occasionally (every 4-6 week for example) applying some leather conditioner/UV protector to keep your leather from drying up in the sun and cracking. |
|
Please subscribe to our newsletter.
Get an instant 20% discount and enter our montly $100 CASH sweepstakes!