2011-19 FORD FIESTA |
||||||||||||||||||||||||||||||||||||||||||||||||||||||||||||||||||||||||||||||||||||||||||||||||||||||||||||||||||||
|
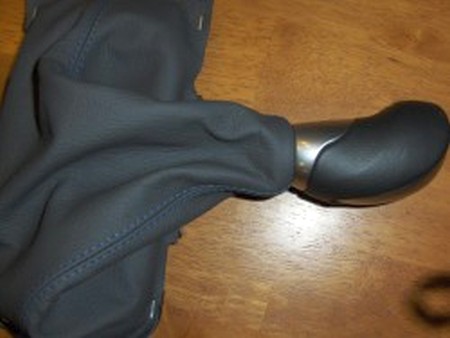
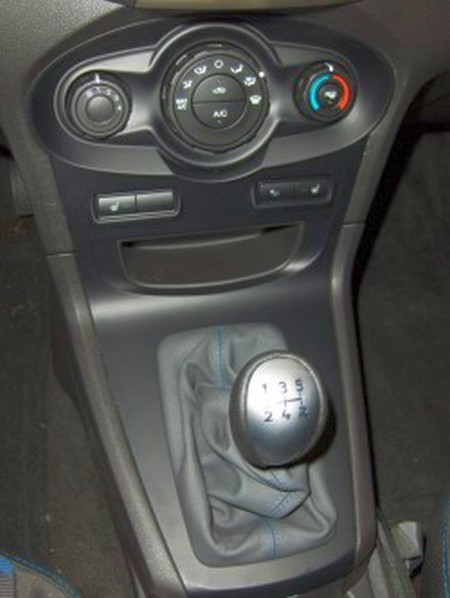
The first write-up is for the 5-spd (non-ST) model. Please use links for installation guides for: Fiesta ST shift boot, armrest cover.
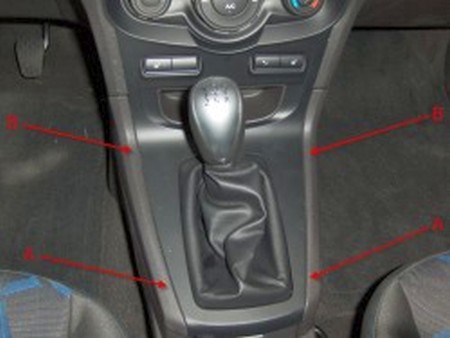
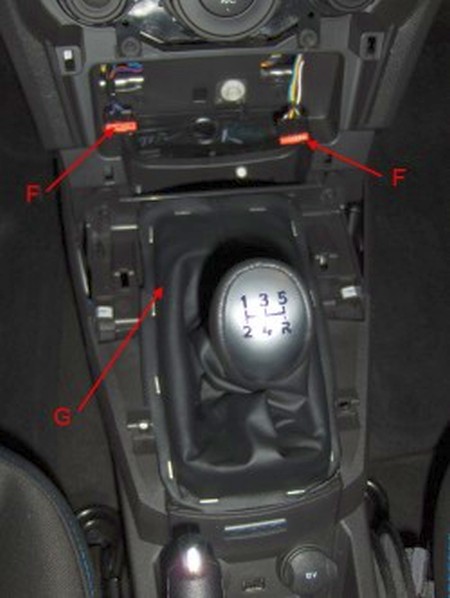
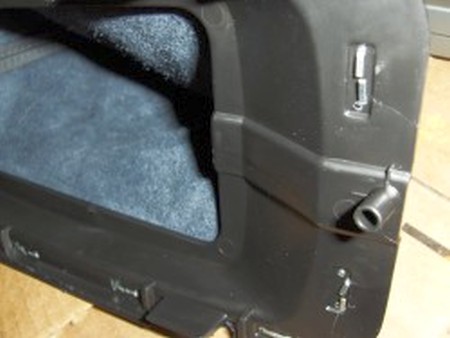
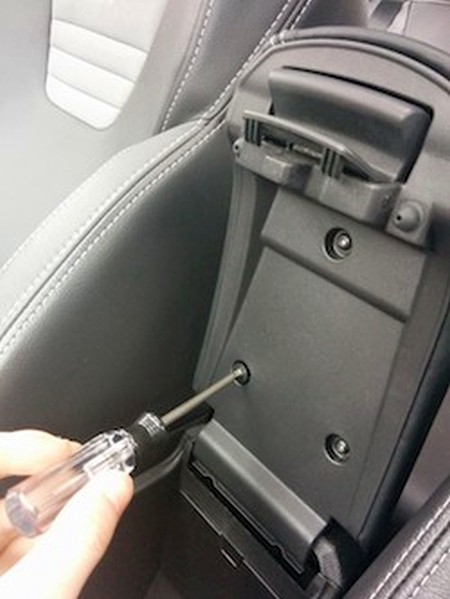
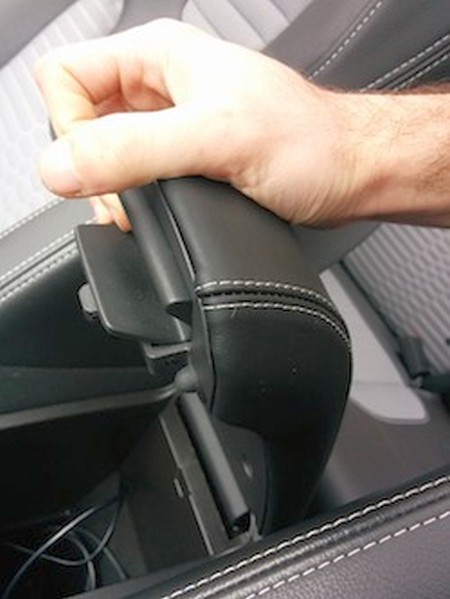
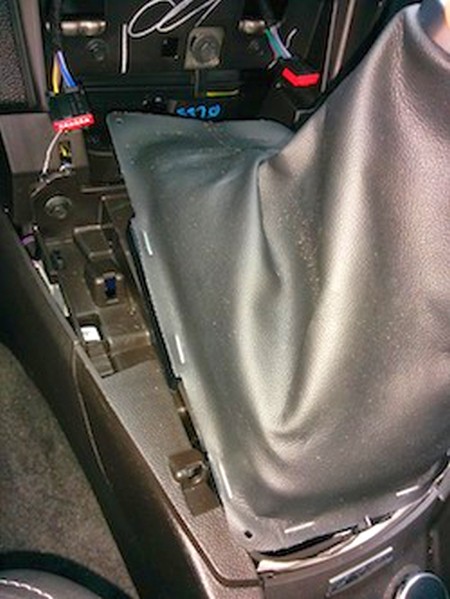
1. Start by prying up the locations marked A on the image. You should be able to use your fingers and are pulling up on the lighter textured part of the cover. Once those clips are released, continue to the location marked B. The upper section to be removed next is the darker slick plastic. |
 |
|
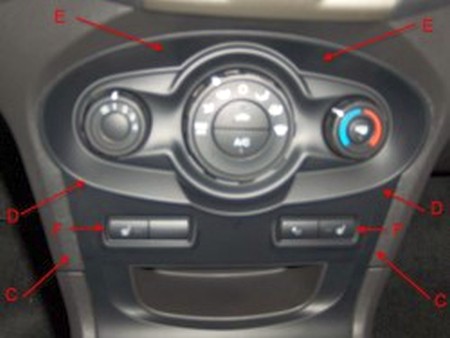
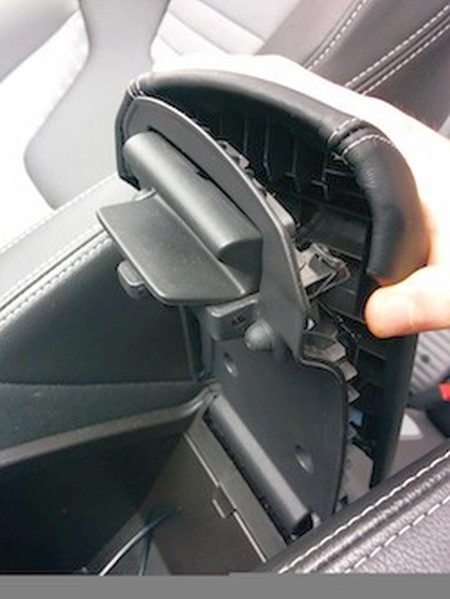
2. Continue prying up the cover at locations C, D, then E. There will be electrical connectors at location F if you have heated seats or ambient lighting. |
 |
|
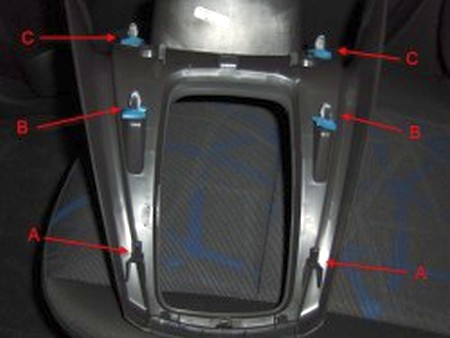
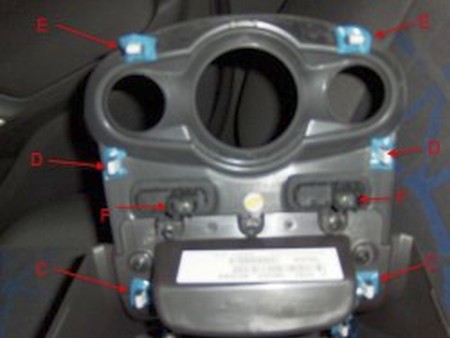
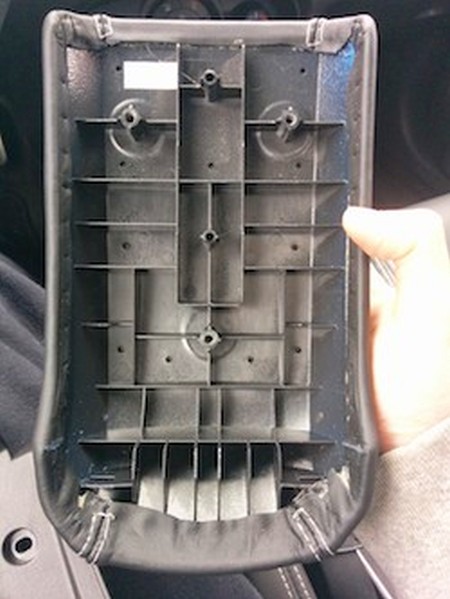
3. For reference, here is the back of the cover, with the clips and electric connectors. |
 |
|
4. The connectors will have to be removed before the cover can come all the way off. |
 |
|
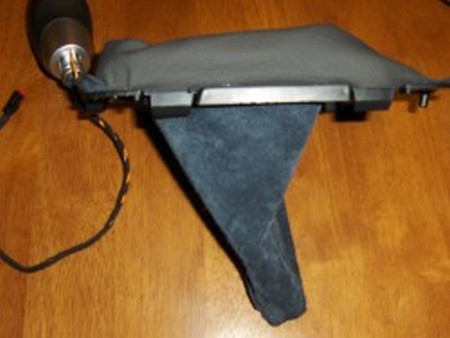
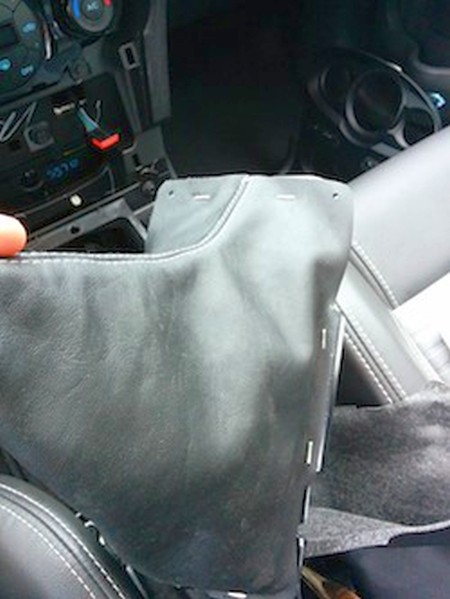
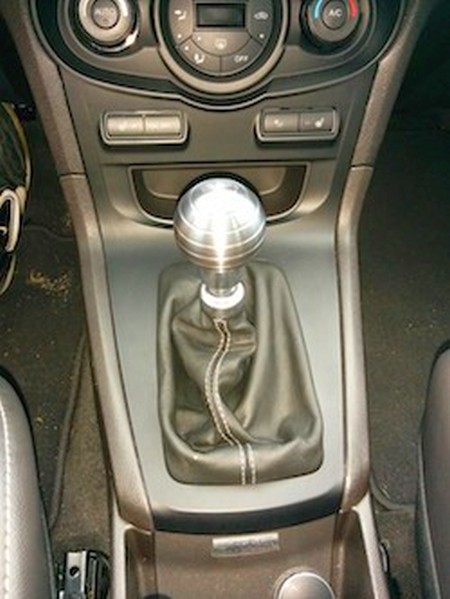
5. Lift the boot (G) off the console. |
 |
|
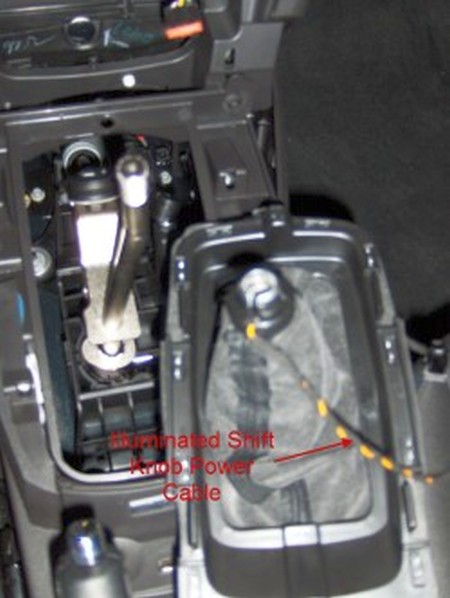
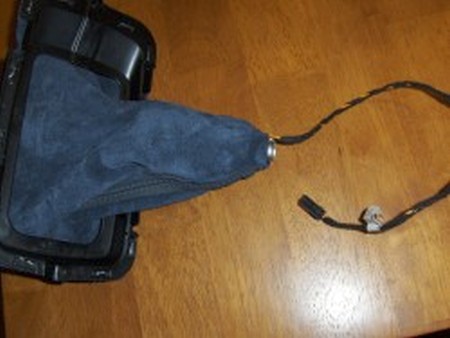
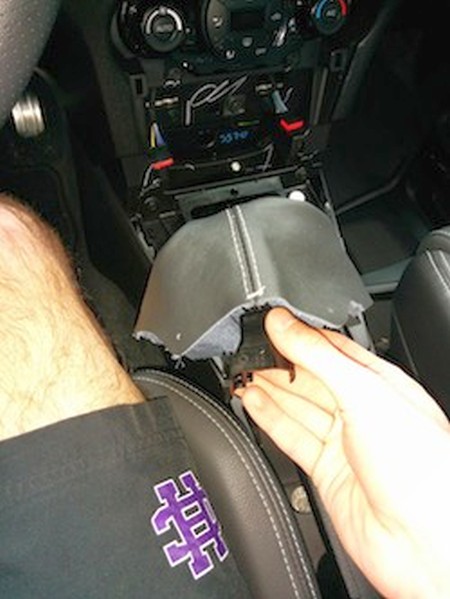
6. If you have an illuminated shifter you’ll have to disconnect the power connector and unclip it from the shifter stick. |
 |
|
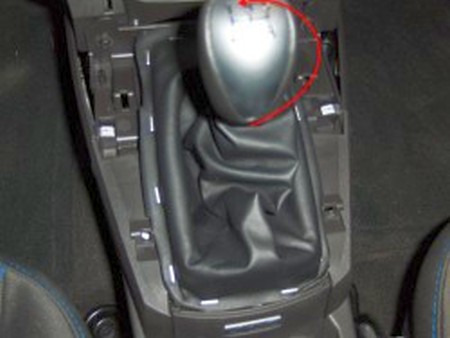
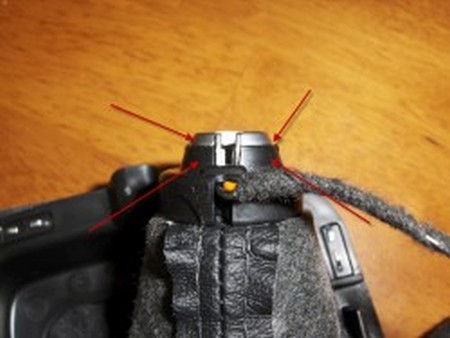
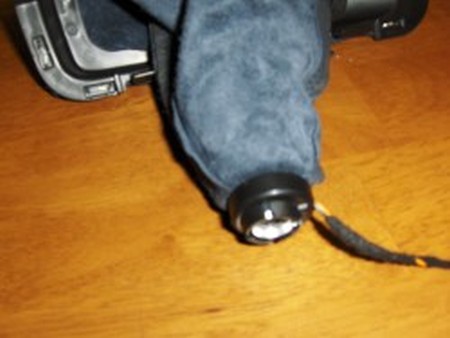
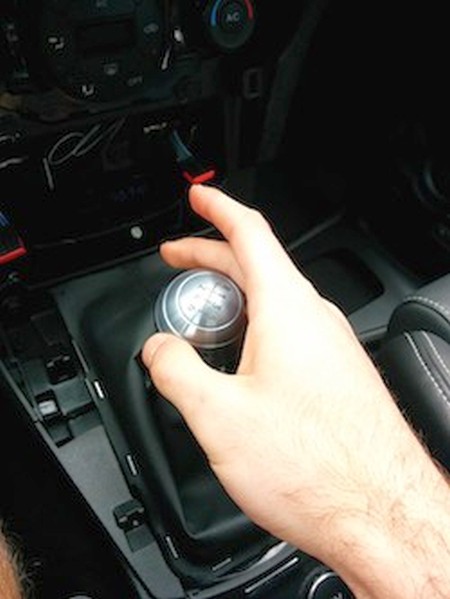
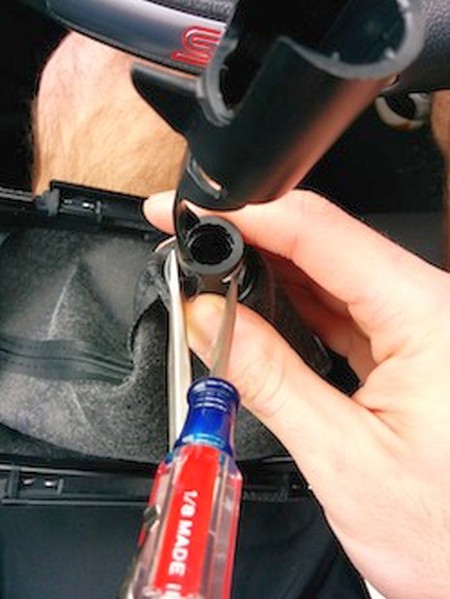
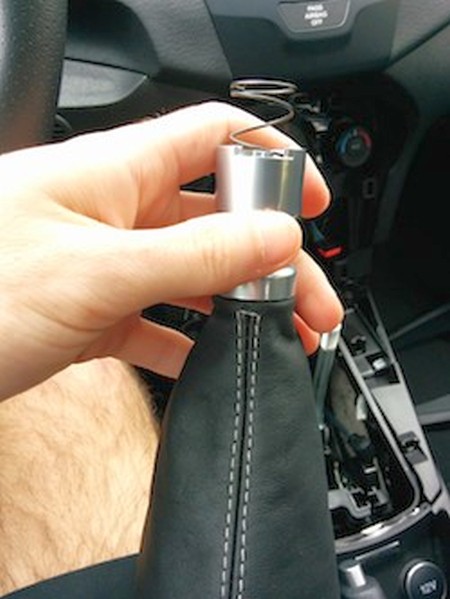
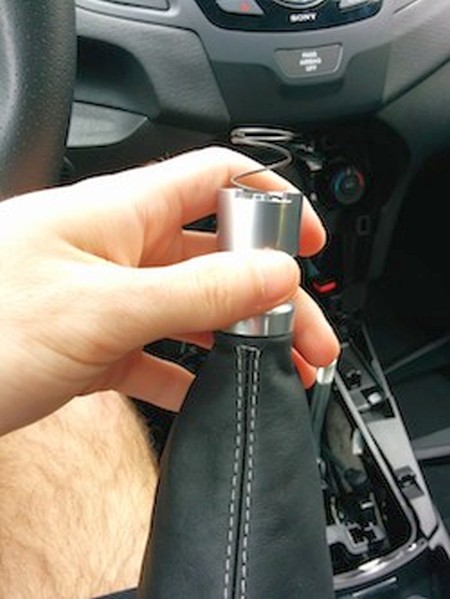
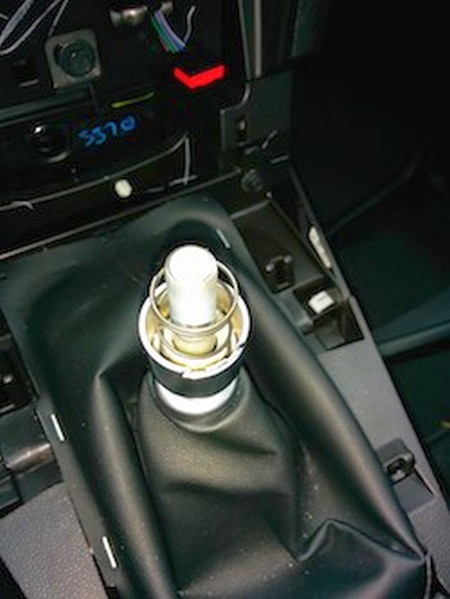
7. Unscrew the shift knob. The boot will have to be spinning with the knob, as well as the power cable for the illuminated knob if you have it. |
 |
|
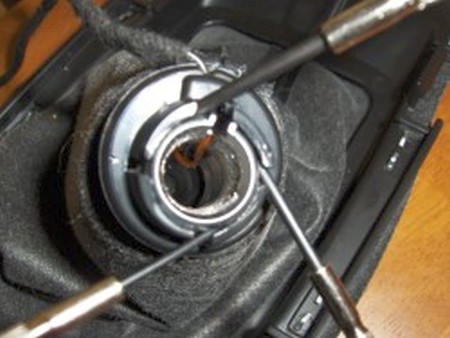
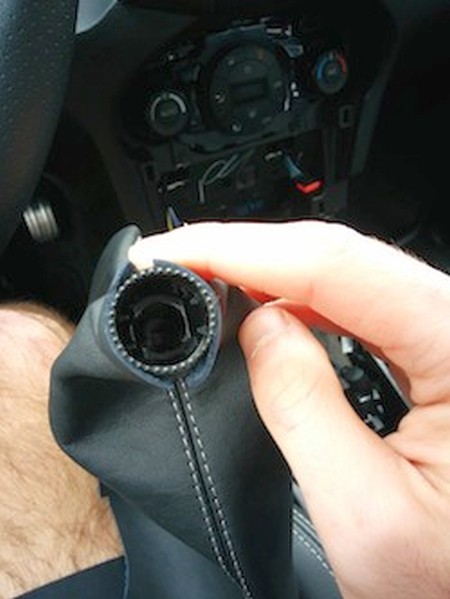
8. Once the boot and shift knob are off the stick, the lock ring has to be removed to release the boot from the knob. The arrows in the second picture below point to the 4 pieces of the lock ring that need to be released. |
 |
|
9. There is a notch for the power wire in this lock ring. Without the illuminated shift knob, that notch won’t be there. |
 |
|
10. To remove the lock ring I used several small jewelers screwdrivers to pry 3 of the plastic tabs from the channel on the shift knob. I then pried the ring up from between the lock ring and the knob. |
 |
|
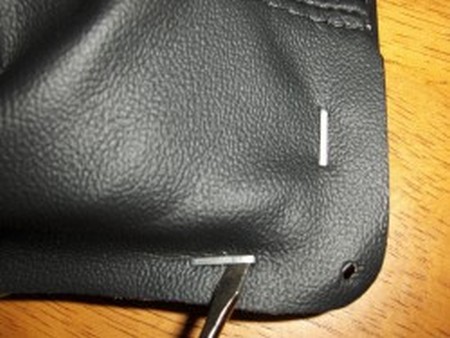
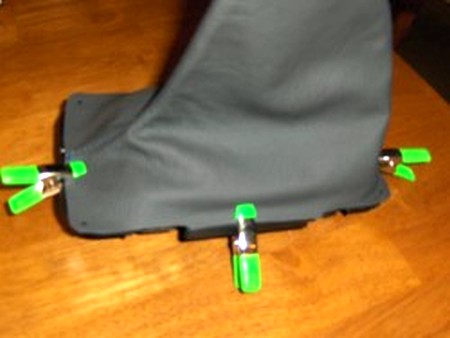
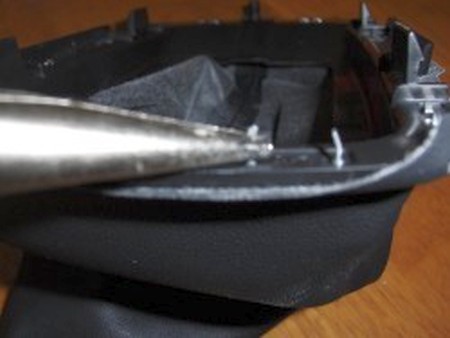
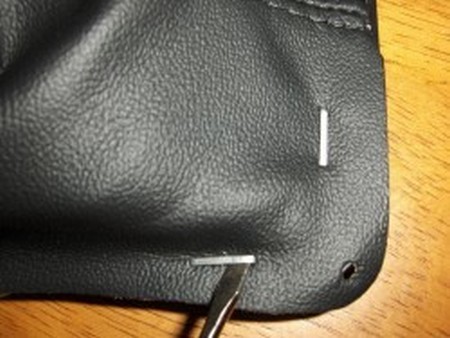
11. Remove the staples from the bottom side by straightening them out and pulling up from the top. |
 |
|
12. Like this: |
 |
|
13.And this: |
 |
|
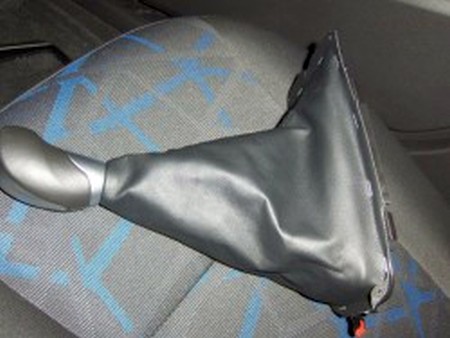
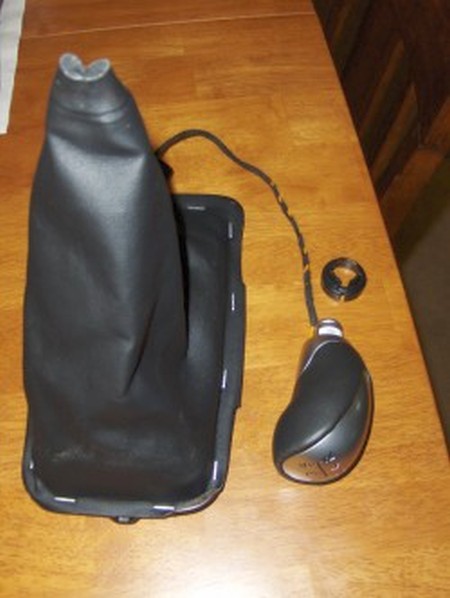
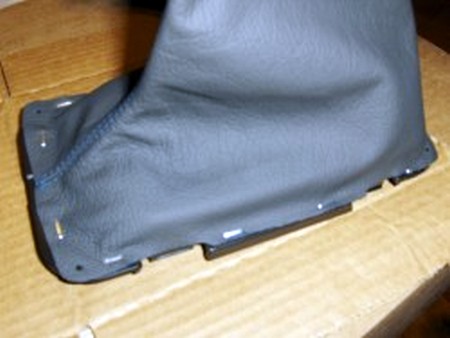
14. The boot removed from its frame. |
 |
|
15. Layout the new boot with the frame as shown. |
 |
|
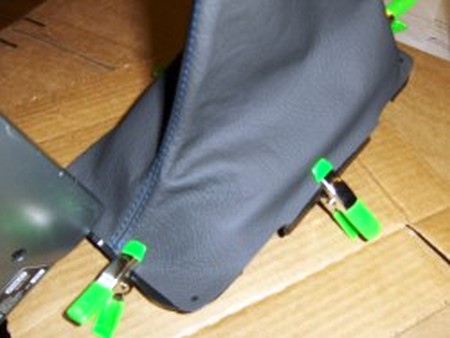
16. I used small spring clips to hold the boot in place while stapling the boot on the frame. |
 |
|
17. I used a regular staple with 3/8" staples to reinstall the new boot. |
 |
|
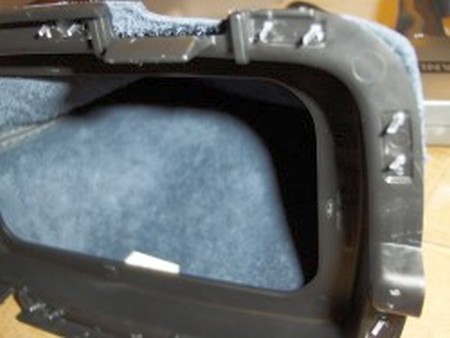
18. There are thinner spots on the plastic frame to staple through. |
 |
|
19. Underside shot: |
 |
|
20. Folded over the staples to hold the boot in place. |
 |
|
21. Boot inverted to install the shift knob. |
 |
|
22. Knob pushed through the boot. |
 |
|
23. Retention ring installed on knob. There are 4 individual clicks that should be heard when the ring is pressed onto the knob. |
 |
|
24. Reinstalled knob on boot. |
 |
|
25. Push knob down on stick./TD> | 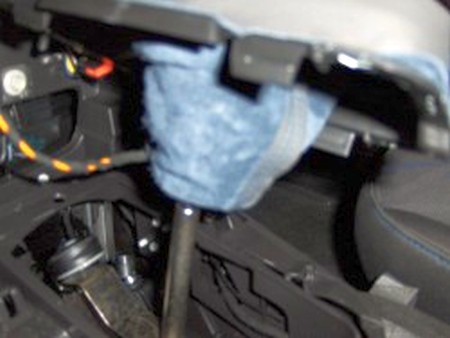 |
|
26. Screw knob back onto stick. This is easier to do with the boot bunched up towards the knob. |
 |
|
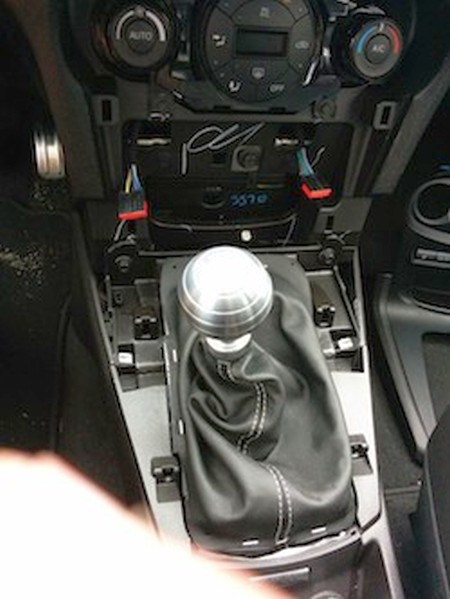
27. Push the frame down into place. There's notches to align it. |
 |
|
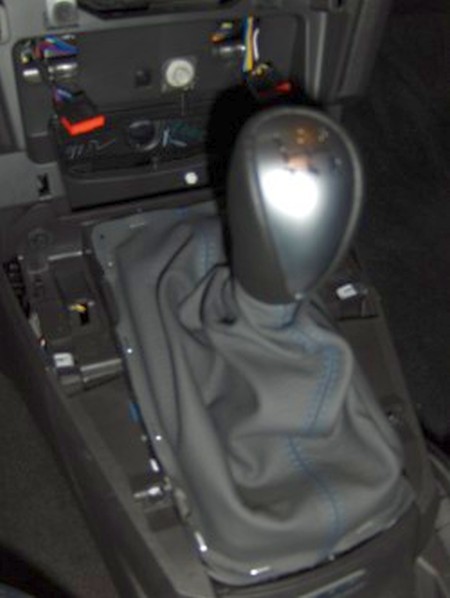
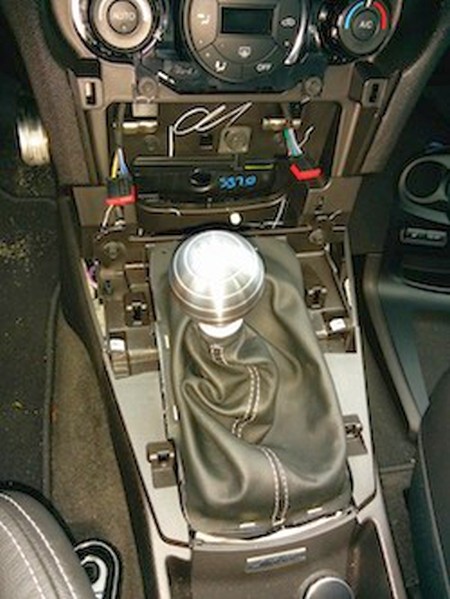
28. Set the console cover back on top of the console and reconnect any wires if needed. |
 |
|
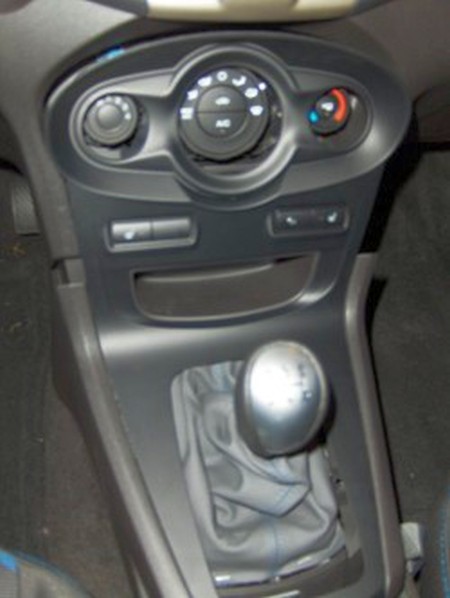
29. Push the cover back into the clips, starting with the upper portion at the heater controls, then moving to the lower portion over the boot. |
 |
|
ARMREST COVER INSTALLATION |
 |
|
2. Remove the top of the armrest. |
 |
|
3. Glue or staple the new cover on the armrest. DO NOT remove the stock wrapping, put ours over it. |
 |
|
4. Place the wrapped armrest back on top of the armrest assembly, making sure it fits snug. |
 |
|
5. Reattach the top of the armrest using the three Torx screws. |
 |
|
FIESTA ST SHIFT BOOT INSTALLATION |
|
|
2. Continue prying up the cover at locations C, D, then E. There will be electrical connectors at location F if you have heated seats or ambient lighting. |
|
|
3. For reference, here is the back of the cover, with the clips and electric connectors. |
|
|
4. The connectors will have to be removed before the cover can come all the way off. |
 |
|
5. Unscrew the shift knob. |
 |
|
6. Lift the shift boot of the console with the reverse lockout still attached. Before doing so, take note of the position of the black piece and how it functions as a lockout. The part that extends down and to the left must be on the drivers side of the car when reinstalled on the new boot. |
 |
|
7. Flip the boot inside out so that the reverse lockout can be removed from the boot. |
 |
|
8. Use two flathead screwdrivers to hold open each of the two black clips on the reverse lockout. Then, pull the silver piece free of the black piece to separate the two pieces. |
 |
|
9. Hold the shift boot as if you were to install it, with the longer side of the base facing the front of the car. In order for the reverse lockout to work properly, you need to make sure that the black plastic part that extends down and to the left must be facing the drivers side of the car (as noted in Step 6). You will notice if you did this wrong once everything is reinstalled. |
 |
|
10. Slide the black piece up under the new shift boot, so that the top of the black piece sits flush with the top of the shift boot, as pictured. You can use a very small dot of super glue between the boot and the black piece in order to hold the boot and the black piece flush and properly aligned. Only use one very small dot so that the boot and black piece can be separated just in case of an error. |
 |
|
11. Once the black piece is properly lined up in relation to the new shift boot (and any glue used is dry), insert the silver piece into the black plastic piece. The very top of the silver piece (the piece that will go up into the shift knob when reverse is engaged) has two small notches. These notches must face the rear of the car, as pictured, in order to clip properly into the black piece. You will notice if you did this wrong once everything is reinstalled. Make sure that the top of the boot is fitting inside the silver piece, but still around the outside of the black piece. |
 |
|
12. Push the two pieces together so that you hear and feel the silver piece clip back into the black piece. It may take some force to clip the pieces together but it will work. You can also carefully flip the boot inside out and push the clips inwards with a screwdriver until they clip. |
 |
|
13.Remove the staples from the base frame attached to the old shift boot by straightening them out and pulling them from the top using needle nose pliers like this: |
 |
|
14. And this: |
 |
|
15. You can install the new boot onto the frame by lining the frame with super glue or by stapling the boot to the frame using the factory staple locations. I used small spring clips to hold the boot in place while stapling the boot on the frame. |
 |
|
16. Pictured is the boot restapled: |
 |
|
17. Guide the black piece onto the shift stick and slide the reverse lockout assembly back onto the stick so that the top of the stick protrudes through the silver piece. |
 |
|
18. Screw the shift knob all the way back on to the stick. Make sure the reverse lockout still functions properly. Here you will be able to tell if you properly followed steps 9 and 11. If the reverse lockout is not working properly, revisit steps 9-11. |
 |
|
19. Push the frame down into place. There are notches to align it. |
 |
|
20. Set the console cover back on top of the console and reconnect the wires. |
 |
|
21. Push the cover back into the clips, starting with the upper portion at the heater controls, then moving to the lower portion over the boot. |
 |
|
ENJOY YOUR NEW LEATHER BOOTS! |
|
|
Useful tip You have installed a product made out of genuine leather. As you know, to maintain a leather product in good condition, you should take care of it. We suggest occasionally (every 4-6 week for example) applying some leather conditioner/UV protector to keep your leather from drying up in the sun and cracking. |
|
Subscribe to our newsletter to get an instant 20% discount!