2005-12 BMW 3-SERIES |
||||||||||||||||||||||||||||||||||||||||||||||||
|
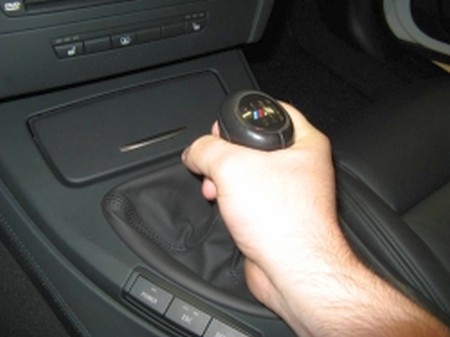
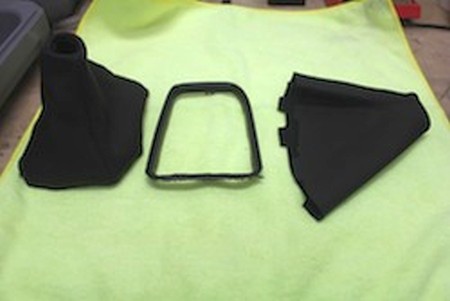
For DCT SHIFT BOOT installation please scroll down. The first part of this guide pertains to the manual car. Materials needed: - Razor knife (hobby or X-Acto knife works great) - Flat Blade Screwdriver - Pliers - Zip-ties - Glue for bonding leather to plastic (we used SuperGlue)
1. Non-M3: remove the shift knob if it is separate from the shift boot. This is accomplished by pulling the knob upward, some have better luck putting the shifter into 3rd gear and pulling back/up.
|
 |
|
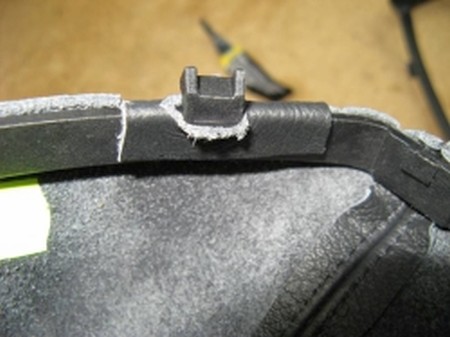
2. After the knob is removed, the boot can be removed by pulling upward at the frame snap points starting with the front, there are four snap locations. If the knob is lighted, the electrical connector can be unplugged. |
 |
|
3. If the knob is attached to the boot (M3), the knob can be removed with the boot now. |
 |
|
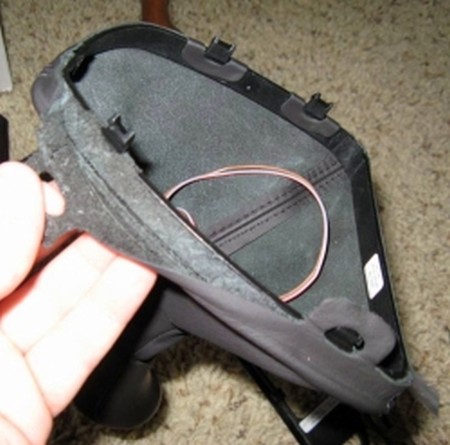
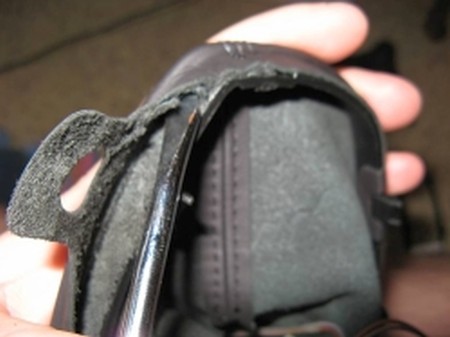
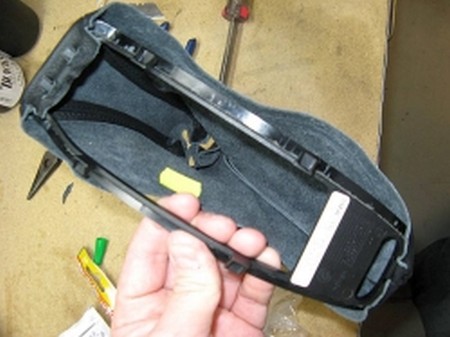
4. The boot can now be carefully removed from the plastic frame, I found it easiest to use a razor blade (not safe BTW) to get the separation started and then used a flat-blade screwdriver to separate the rest- be sure to stay close to the plastic to avoid damaging the leather if that is a concern. At some point you should be able to carefully peel the leather off the frame. |
 |
|
5. I did this S L O W L Y to avoid cutting, puncturing, or tearing the OE leather boot since I might want to reinstall it at some future time. You may want to try and get as much of the remaining leather off the frame to promote adhesion of the new glue and to reduce the thickness of the assembly so that it is like OE. |
 |
|
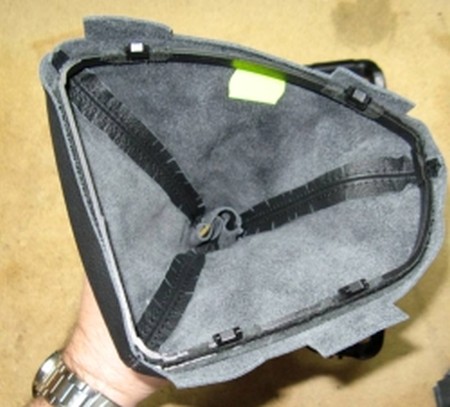
6. Now all that remains is the plastic frame and the new leather boot. Start out by inserting the frame into the new boot. |
 |
|
7. Next, cut slits in the 4 tabs that line up with the snap points- the cuts should be in line with the edge of the boot. My glue of choice was super glue, I tacked down all three of the stitched seams into the recesses on the plastic frame to start, and then worked my way around the frame, applying super glue and pressing leather and plastic together a small section at a time- no rush. I only applied glue where the factory had glue. |
 |
|
8. The boot is now attached to the base and ready to go in the car. You may need to trim additional leather from around the snap areas carefully using a razor blade (wire cutters worked for me) if the boot does not snap firmly into place. Also, the top of the boot can be left loose on the shifter or you can use a zip-tie to anchor it to the shifter…..easily done by turning the shift boot inside out, and then installing: |
 |
|
9. Unsnap the boot by pressing the base towards the inside and pulling up. I found it easiest to open the center console door and start at the top by pressing down and pulling out. Once unsnapped the zip tie holding the boot to the brake handle will need to be removed using wire cutters, the boot can then be carefully removed by sliding over the brake handle and off: |
 |
|
10. Following step 4 above for the boot removal, the parking brake boot is removed from the plastic base. All that remains is the plastic frame and new leather boot. I started out by cutting slits in the tabs at the top and super gluing them and the front seam to the plastic base. I then carefully super glued a section at a time until all was done- I did find it necessary to cut small angle shaped pieces of leather out at the corners to allow the leather to wrap around the base: |
 |
|
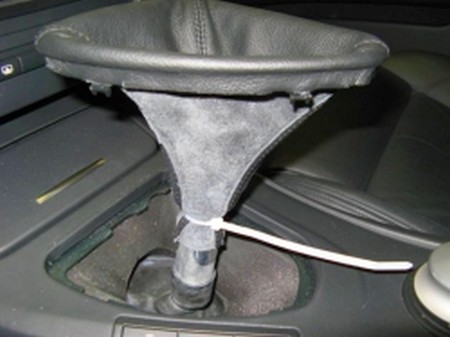
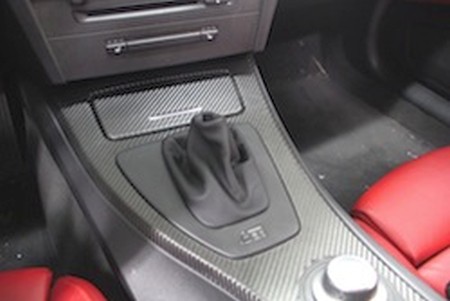
11. The boot should be slid over the handle and positioned so that the top seams line up with the threaded seams on the handle. The boot is zip tied to the handle, you will notice a channel that the zip tie should be placed in before tightening. The boot is then snapped back into place, it is tight so be patient.
12. Snap the frame back into the center console... You are done! ENJOY! :) |
 |
|
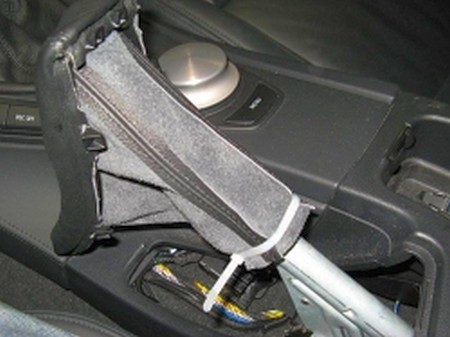
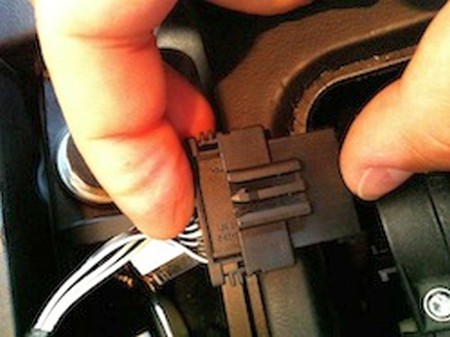
DCT SHIFT BOOT installation below. If you installed the ebrake boot and manual boot only, you are done at this point. Materials needed: - Razor knife (hobby or X-Acto knife works great) - Flat Blade Screwdriver - Pliers - Zip-tie - Glue for bonding leather to plastic (we used SuperGlue) 1. The car has to be completely off during this procedure, and secured against rolling away. Pull upwards on the mounting points on the bottom of the boot, there is an integrated frame that will yield if you wiggle it (it's flexible to a point). To remove the shift knob, pull it upwards. Make sure to brace yourself so that you don't pull it too hard, it's best done while seated in either seat using just your forearms with the elbows braced on your thighs and center armrest. |
 |
|
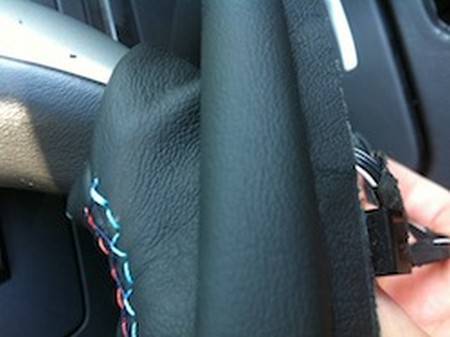
2. Squeeze the sides of the upper part of the connector to make the shift knob part release from the part of the wiring harness that goes back into the center console. |
 |
|
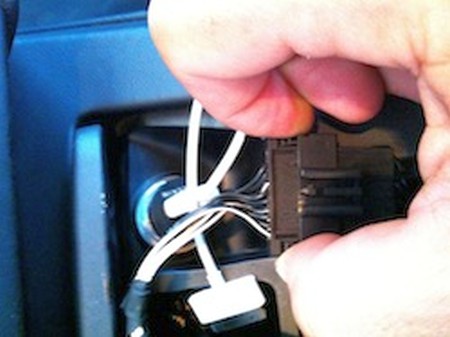
3. Use an x-acto knife to cut the stock boot right under the shift knob. It's easy to do around the front and sides of the knob, as there is a plastic tube that makes it easy to just cut without worrying (worst case you will scratch an invisible piece of plastic). The rear is more tricky as the harness is exposed. Therefore cut the front and sides first, pull the harness out of the boot as pictured, insert the knife between the remaining leather and harness and cut all the way through. Don't worry if you can't, or are afraid to, cut off everything, during our installation a bit of leather remained covering the rear (harness) side of the bottom section of the shift knob. That is fine. |
 |
|
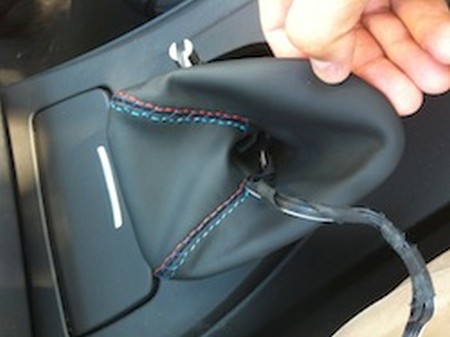
4. Glue the new boot on the shifter frame after removing it from the stock boot. It's the same procedure as for the manual (explained earlier in this write-up). Make sure the alignment is correct and that the glue settles well before proceeding. Once the frame is solid with the new boot, flip the boot inside out and insert the harness from above as pictured. |
 |
|
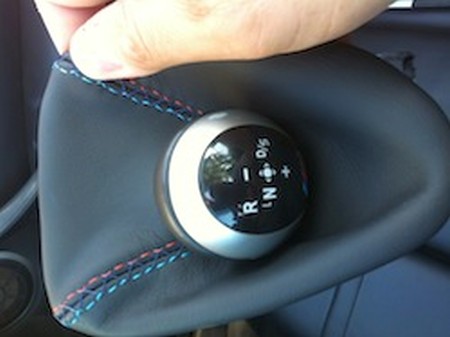
5. Push the shift knob into the boot as far as it will go. Ideally you will want the bottom of the knob to be even, or almost even, with the top edge of the boot. |
 |
|
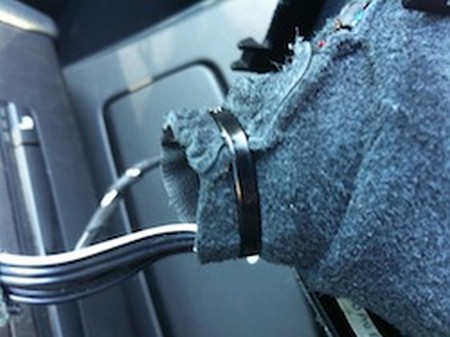
6. Use a zip-tie to hold them together. Make the zip-tie tight. |
 |
|
7. Flip the boot back out. This requires some dexterity. What helps is holding the zip-tied part of the assembly with one hand and pushing down with the other. If you aren't careful you will push the zip-tie off the knob and will have to get back to previous steps to redo it. Make sure you get it right before you run out of zip-ties. :) |
 |
|
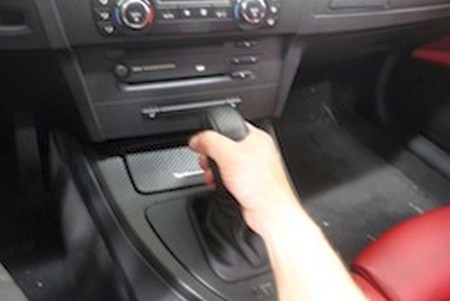
AUTO SHIFT BOOT installation below. 1. Begin by grabbing ahold of the shift knob like this and pull up. Sometimes the shift knob takes a lot of force to pull it off the stalk. If it is stubborn, try rocking it side to side while pulling up. |
 |
|
2. To remove the factory boot, stick your fingers into the boot and release the 5 tabs holding it in. |
 |
|
3. After you have removed the factory shift boot from the car you will need to remove the factory boot from the ring. You will have to either cut or rip the factory boot off but be careful not to break the plastic ring. |
 |
|
4. Now all you have to is attach the new Redline boot to the ring via the 5 hooks cut in the leather like this. |
 |
|
5. Once you have completed that, installation is simply the reverse of uninstalling the factory boot. Snap the ring with your new shift boot into place and slide the shift knob back on top! |
 |
|
Useful tip You have installed a product made out of genuine leather. As you know, to maintain a leather product in good condition, you should take care of it. We suggest occasionally (every 4-6 week for example) applying some leather conditioner/UV protector to keep your leather from drying up in the sun and cracking. |
|
Subscribe to our newsletter to get an instant 20% discount!