2007-12 NISSAN ALTIMA |
||||||||||||||||||||||||||||||||||||||||||||||||||
|
CVT TRANSMISSION SHIFT BOOT
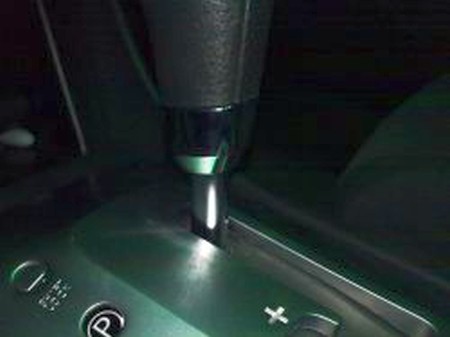
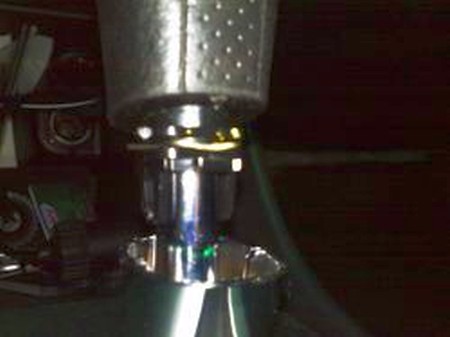
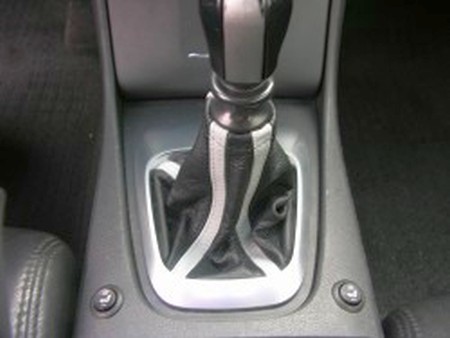
1. Pull down the silver piece on the shift knob. |
 |
|
2. Pull off the pin holding the shift knob on.
3. Pull shift knob up. |
 |
|
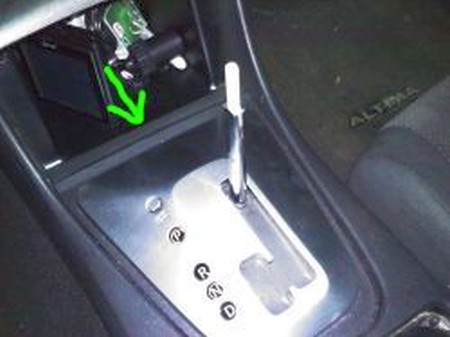
4. Take a flat head screwdriver between the cubby hole and the black piece under the silver shift plate and lift up the black piece. |
 |
|
5. Pull up the black piece. It will come right out but it may require some pulling. Then unplug the shift letters light so the shift plate can come out. |
 |
|
6. There are three screws holding the silver shift plate to the black piece. Take them out. Take the shift boot and put it around the silver shift plate. The shift boot is now over the silver shift plate and needs to get screwed back down to the black piece. |
 |
|
7. Snap the shift plate back into place. Stick the silver piece from the bottom of the shift knob onto the shaft of the shifter. Stick the pin halfway onto the shift knob then put the shift knob onto the shifter shaft. Push the pin all the way into the shift knob and then push up the silver piece onto the bottom of the shift knob. |
 |
|
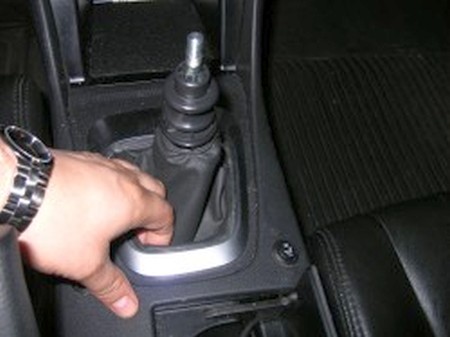
1. First unscrew the shift knob to take the shift boot out. This is achieved by pulling straight up. (Hint: The knob requires A LOT of force to remove it.) |
 |
|
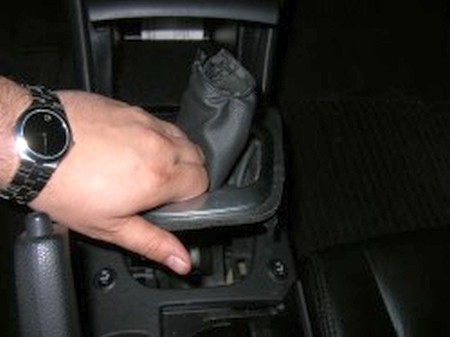
2. Next, remove the Shifter Faceplate from the center console trim. Pull the rear of the shift console towards you and slightly lift up until it pops off. Also unbutton the leather boot on top. It is now free to pull out. |
 |
|
3. Now that you have the plate and boot out flip it over and you will see 2 screws. Unscrew them to remove the silver shift plate holding in the old leather boot. While pulling apart squeeze the 2 tabs on the side inward.
4. Once the boot is out we have to remove the old leather from the frame. Use the Xacto knife to help separate. |
 |
|
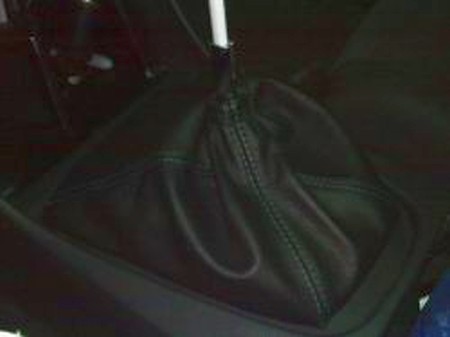
5. Discard the old boot. Now we must attach the new boot to the frame. Be sure the cutouts in the leather line up with tabs in the frame. Glue the leather to the frame.
6. Once the leather and frame are attached, it is time to reassemble the same way you took it apart. (Note) Do not over tighten the shift knob you can black the reverse lock out mechanism from operating properly and you will have a rough time if at all going into reverse. |
 |
|
1. To install the ebrake boot properly you need to get to the ebrake handle assembly. Start by removing the shifter plate (just like in the shift boot removal instructions), center cubby, under dashboard plastic (driver side only), and side plastics on the driver and passenger side of the center console.
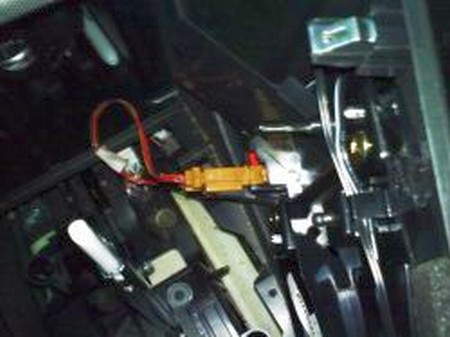
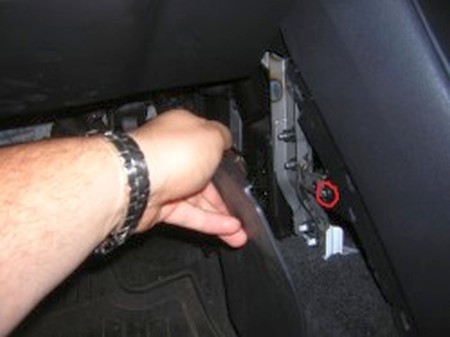
The under dashboard plastic on the driver side (which has the Ikey insert and trunk release button) is removed by taking the plastic end cap on the left side of the dashboard off using a butter knife and unscrewing one Phillips screw where the fuse panel is. The under dash plastic will pull right out at this point. You can leave the switches plugged in if you like. This will release the driver side plastic on the side of the center console that will reveal a screw you will eventually take out highlighted in red. |
 |
|
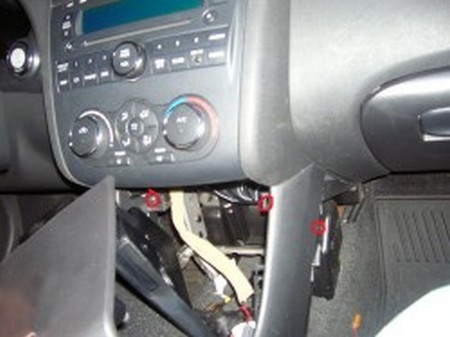
2. Next remove the center cubby which pulls out, just give it a yank but carefully and unplug the wire from behind it. You may need to open the cubby door to give it some room to come out past the shifter exposing two more screws highlighted in red. |
 |
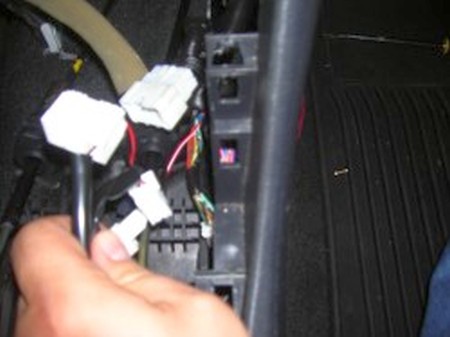
|
3. At this point unplug what you can by maneuvering inside the hole of the shifter plate and cubby area to get the main wire harness that goes to the console. You also want to unplug the heated seat switches as well. |
 |
|
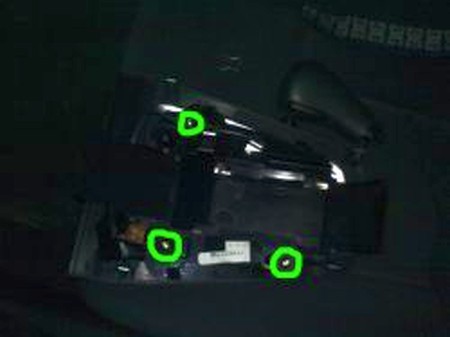
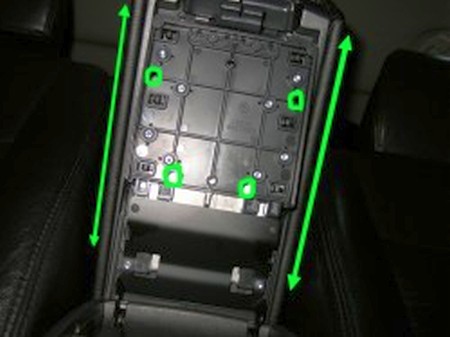
4. Now you will need to remove the four highlighted screws at this point from the center console. There will be two screws on the inside (where the cubby use to be that were highlighted) and two screws on the outside of the console (where the side plastics use to be). These screws are highlighted in red in the first few photos. |
 |
|
5. Then you just need to remove two screws from the bottom of the back side of the console on the driver and passenger side next to where seats bolt in. |
 |
|
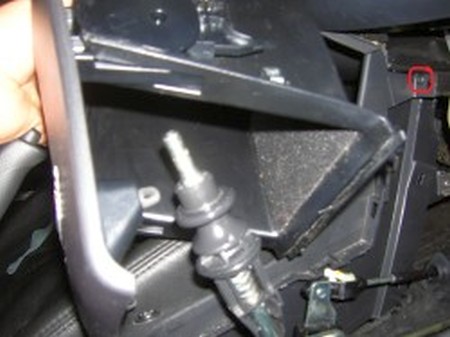
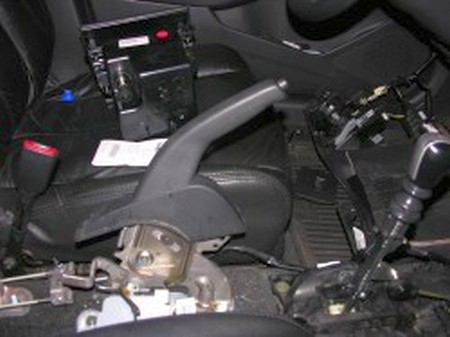
6. You need to pull the center console towards the rears seats about an inch or two to release the clips and guides from the front of the console connected to the dash. Then tilting the console towards the dashboard by lifting the back end up to pull up and then back towards the seats while paying attention to the ebrake handle. The console will be free and the ebrake handle assembly will be fully exposed. |
 |
|
7. You want to put the boot on top of the ebrake and pull it tight. You don’t need to do anything else to secure it. The fitment is perfect and will not move out of place when everything is reinstalled back into place. |
 |
|
8. Reinstall everything in the reverse order and again pay attention to the ebrake handle not to ruin the leather or damage the seats. You also want to pay attention to the little guides on the center console that slide into the dashboard. They can brake and be a pain in the butt if you don’t align them correctly. It may take a few attempts. |
 |
|
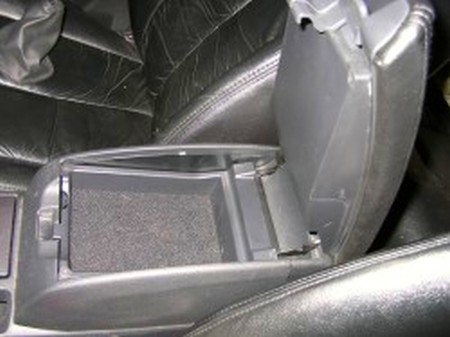
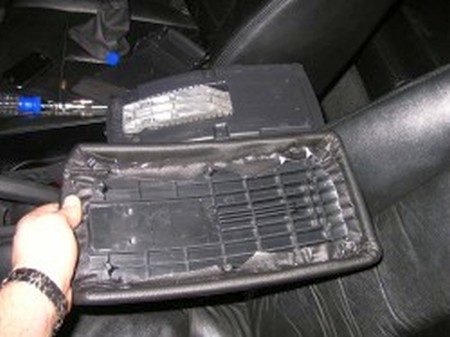
1. First open the armrest and look underneath where you will see a cover plate blocking the inside portion of the armrest cover. |
 |
|
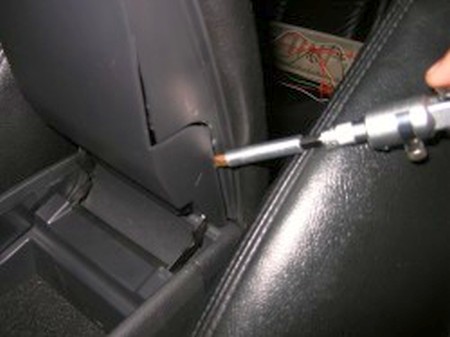
2. Using a butter knife or small flathead screwdriver pry open the cover to expose the underside of the armrest where you will see 2 phillip screws and 2 torx screws holding the armrest lid to the center console. Unscrew them to release the armrest. (Hint start prying close to the base as shown in the picture.) |
 |
|
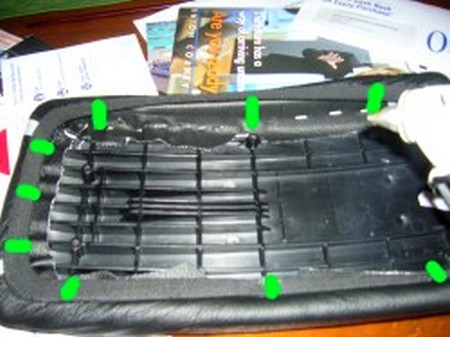
3. Now to separate the cover and armrest slider you will need to remove 6 small phillip screws. You can access the top two by sliding the slider down. The other four are hidden and accessible by sliding these port holes on the slider to line up with them on the cover. You can’t access all four in one shot. You will need to slide the slider down further for the last 2. |
 |
|
4. At this point the cover is now released from the slider. You may need to wedge the cover from the slider to get them apart. |
 |
|
5. Slip the new armrest cover on the lid. It’s your choice to leave the OEM material or to take that off. Choosing to leave it on is a much easier route. You will need hot glue the inside edge to make the cover taught and not loose looking when installed. Start with a decent dab about the size of 3 pennies when its been spread and work from the middle outward. Place 3 dabs per side. If you see a loose spot on the lid pull the leather as best as you can and glue as needed. (See diagram for glue placement on this install marked in green.) |
 |
|
6. Reinstall everything in the reverse order of removing it. |
|
|
Useful tip You have installed a product made out of genuine leather. As you know, to maintain a leather product in good condition, you should take care of it. We suggest occasionally (every 4-6 week for example) applying some leather conditioner/UV protector to keep your leather from drying up in the sun and cracking. |
|
Subscribe to our newsletter to get an instant 20% discount!