2008-12 HONDA ACCORD |
||||||||||||||||||||||
|
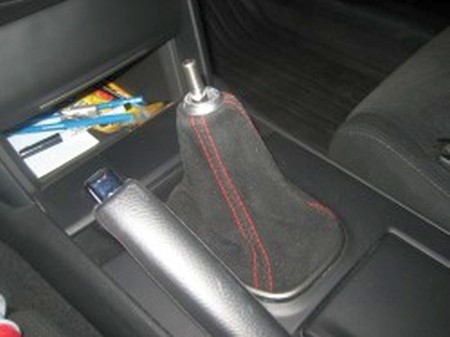
1. Remove current shift knob by un-clipping the base of the knob and turning it counterclockwise. |
|
|
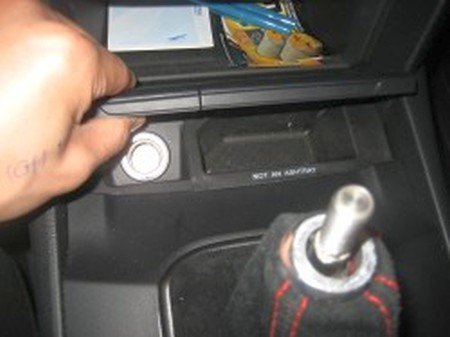
2. Lift the cigarette lighter cover as well as the cover next to it and pull up gently, the clips holding the console in place should begin to undo. Be sure to unhook the power line to the cigarette lighter under the console. |
 |
|
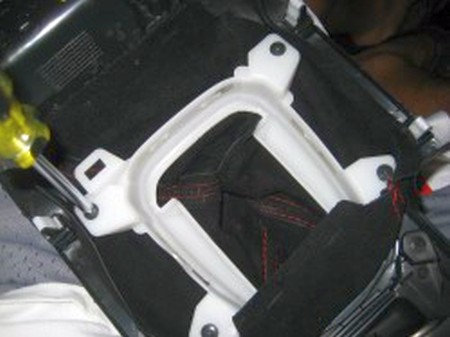
3. Once the console is removed, flip it over. You should notice 4 screws holding the current boot's base in place. Use a Phillips head to remove the four screws. |
 |
|
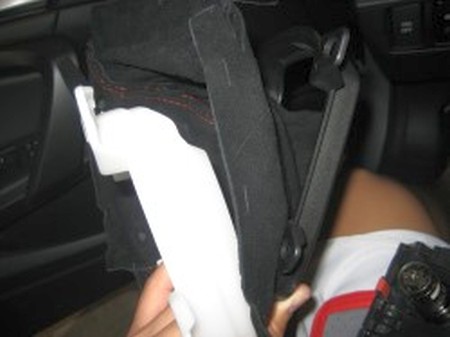
4. Once the screws are removed, the base is comprised of two pieces sandwiching the shift boot. Separate the bases and undo the stock boot.
|
 |
|
5. Place the new boot in its place. Align and sandwich the boot to its base. |
 |
|
6. Reattach the boots base to the console, screw in the four screws. |
 |
|
7. While the console is removed, pull hand brake boot over the handbrake. |
 |
|
8. Before reattaching the center console, make sure to attach the neck of the boot to your shift knob. Reattach center console, be sure to plug the cigarette lighter back in. |
 |
|
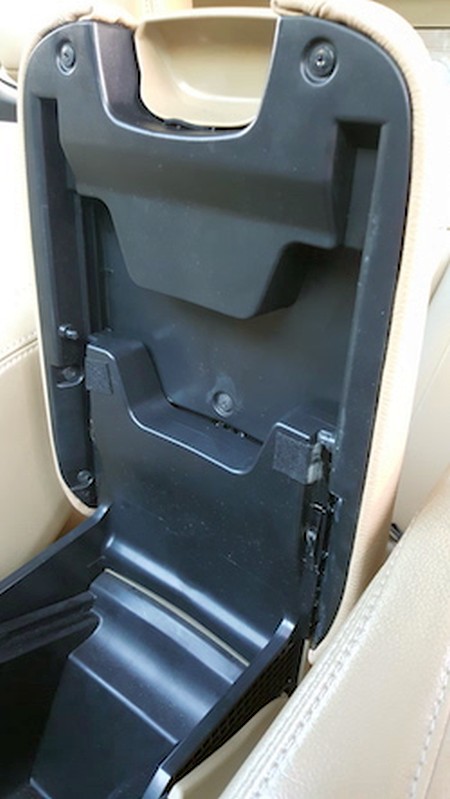
9. Extend the armrest to it's full length and open the armrest so that you can see the underside. Locate the seven screws (4 on the side, 1 middle, 2 up top) and remove them carefully. Once the screw have been removed, close the armrest cover and lift the cover off of the console (this should come off fairly easily, a little wiggling may be required.) |
 |
|
10. Pull out all the staples adhering the OEM cover to the plastic plate. Pull the OEM cover off of the plastic plate. You may need to clean some of the glue/tape which was used to adhere the previous cover. Pull the new leather cover over the plastic cover and adhere to the plastic using either staples or glue or combination of both. Put the cover back on the console and insert the 7 screw back into their spot - installation now complete! |
 |
|
CONGRATULATIONS - YOU HAVE SUCCESSFULLY INSTALLED YOUR NEW LEATHER BOOTS!
Useful tip You have installed a product made out of genuine leather. As you know, to maintain a leather product in good condition, you should take care of it. We suggest occasionally (every 4-6 week for example) applying some leather conditioner/UV protector to keep your leather from drying up in the sun and cracking. |
|
Subscribe to our newsletter to get an instant 20% discount!